
If you are trying ON1 Photo RAW, the ON1 plug-ins like ON1 Effects or ON1 HDR, or upgrading your ON1 software to a newer version, please consider using my affiliate link. There is no extra cost to you and it helps support my work and this website.
A glow filter can give a landscape photograph a softer, airier feel. Apply it across the whole frame, though, and you may brighten areas that should stay quiet or lose detail in water that is already bright. The useful question is where that glow belongs and what you want it to do.
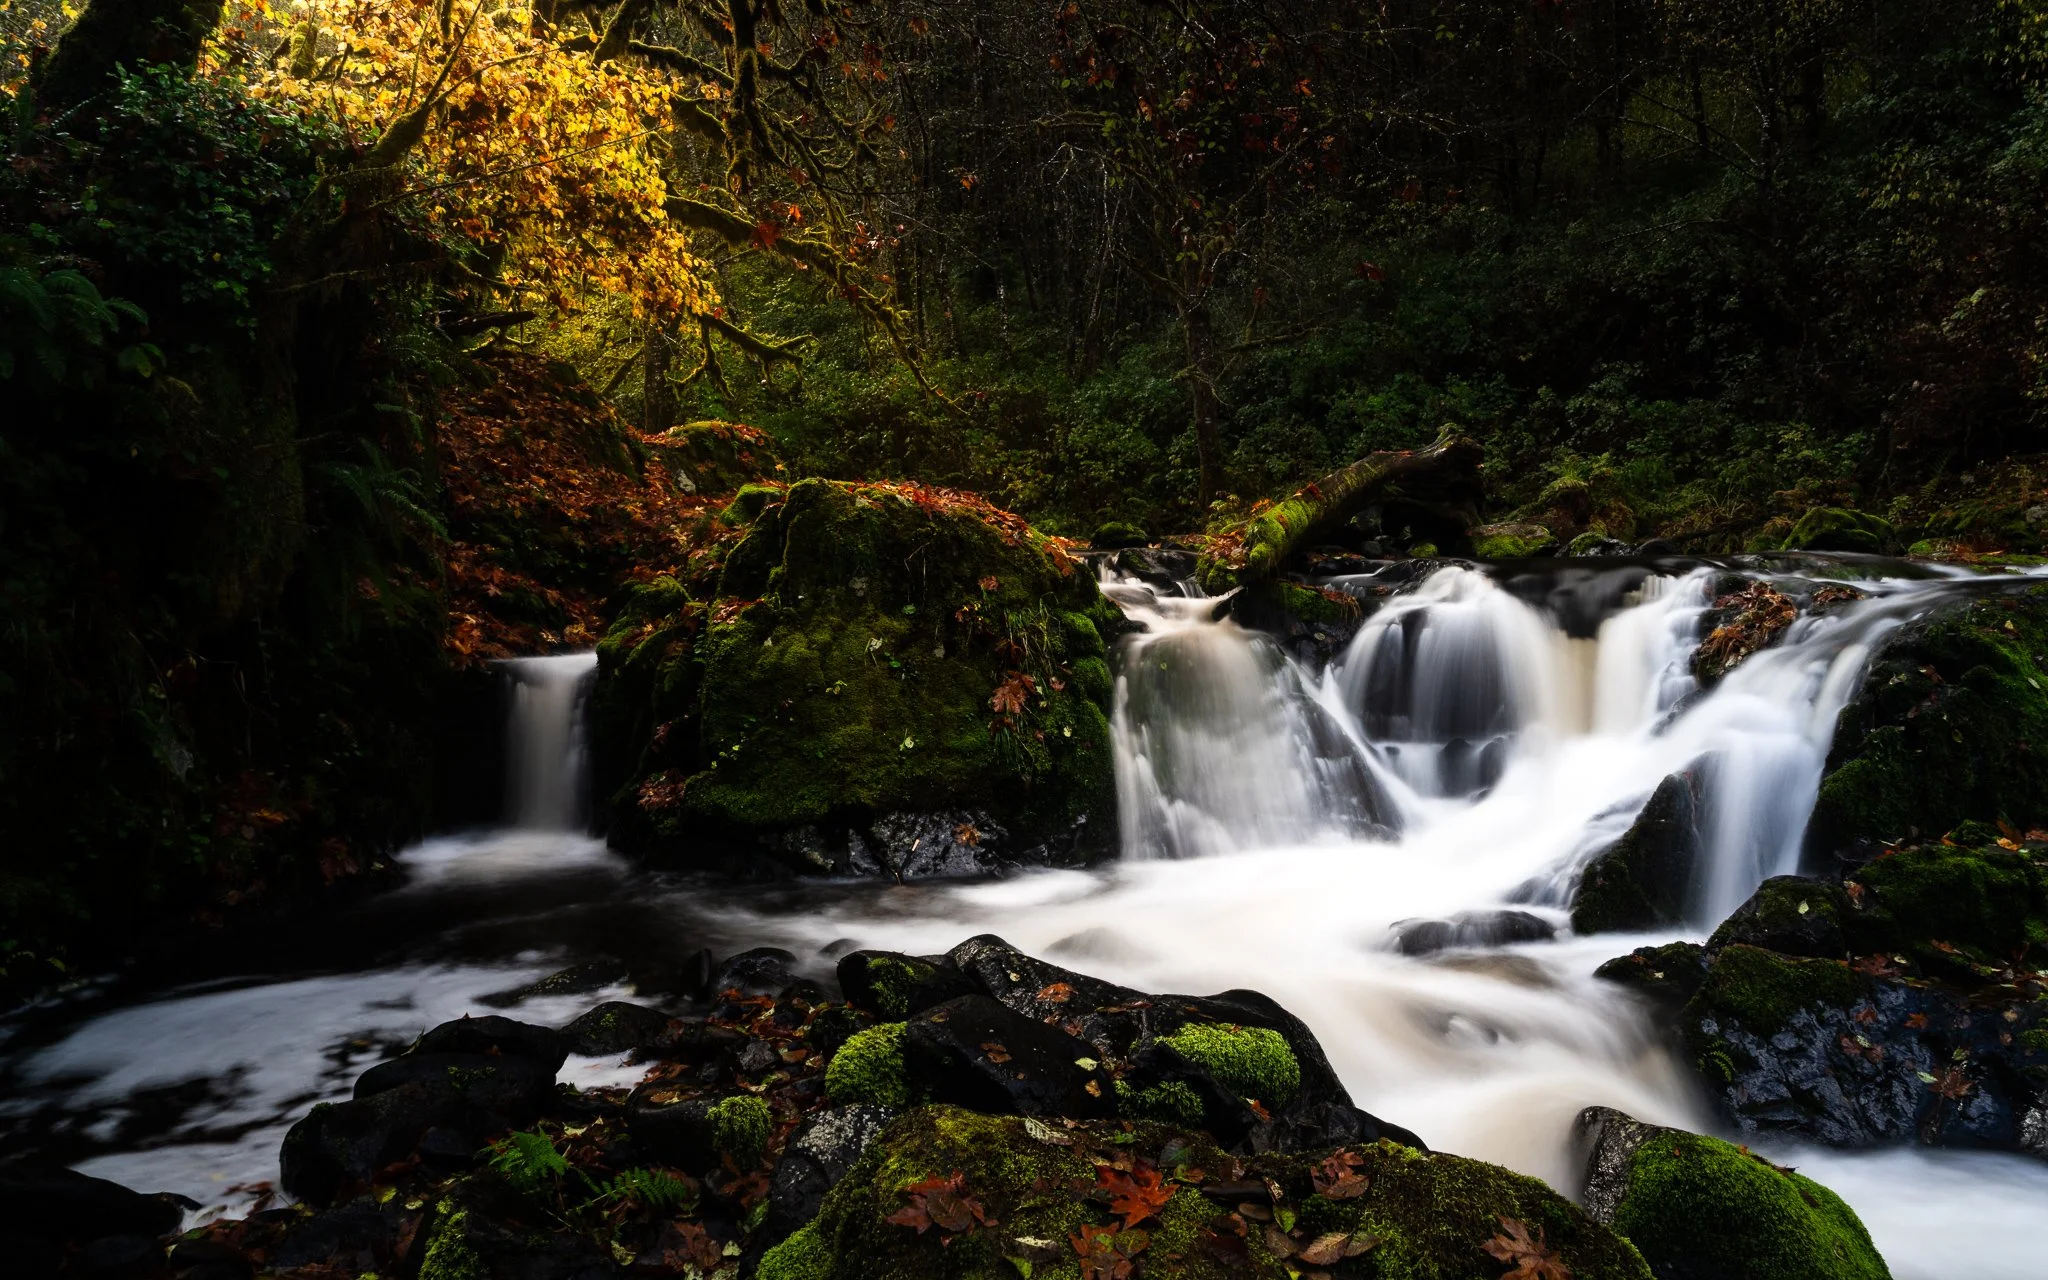
For this Sweet Creek photograph, I want warm light to enter from the upper left and gently lead the eye toward the water. ON1 Effects’ Sunshine filter gives me the finish I’m looking for. Combining its glow with a few masking tools lets me control which tones receive it, where it travels, and where it fades away.
Start With the Direction You Want the Light to Take
In How I Decide What a Landscape Photo Needs Before Editing, I worked through the plan for this photograph: make the water the subject and use the surrounding light and detail to support it. This adjustment follows through on the part of that plan concerned with directing the light.
I’ve already completed much of the processing in Lightroom. A radial gradient intersected with a luminance range mask adds a little exposure and warmth to the brighter areas along that direction. It works, but I want a slightly dreamier finish to the light catching the leaves.
That is why I move into ON1 Effects. The creative decision stays the same even though the tools change. I’m looking for a soft suggestion of light spilling into the scene from outside the crop, with the darker forest remaining subdued.
Let the Brighter Tones Carry the Glow
After adding the Sunshine filter, I increase its glow while watching the foliage where I want the effect to appear. At this stage, I’m comfortable making it somewhat stronger than the final result. The filter’s opacity gives me a way to reduce the overall strength later.
My first control is a luminosity mask. Brighter parts of the mask receive more Sunshine; darker parts receive less. This is a useful starting point for glow because it lets the brighter tones carry the effect while holding it back in the shadows.
The mask’s Levels controls let me refine that relationship. For this photograph, I allow some of the midtones and slightly darker tones to receive more of the effect as well. I’m judging the leaves and surrounding light, rather than trying to restrict the glow to only the very brightest pixels.
A luminosity mask gives the glow a tonal foundation, allowing brighter areas to receive more of the effect while keeping the darker forest quieter.
The water also receives plenty of Sunshine at this point. That makes sense tonally, but it does not fit my plan for the light. The next adjustments address where the glow belongs.


Shape the Light With a Feathered Line Mask
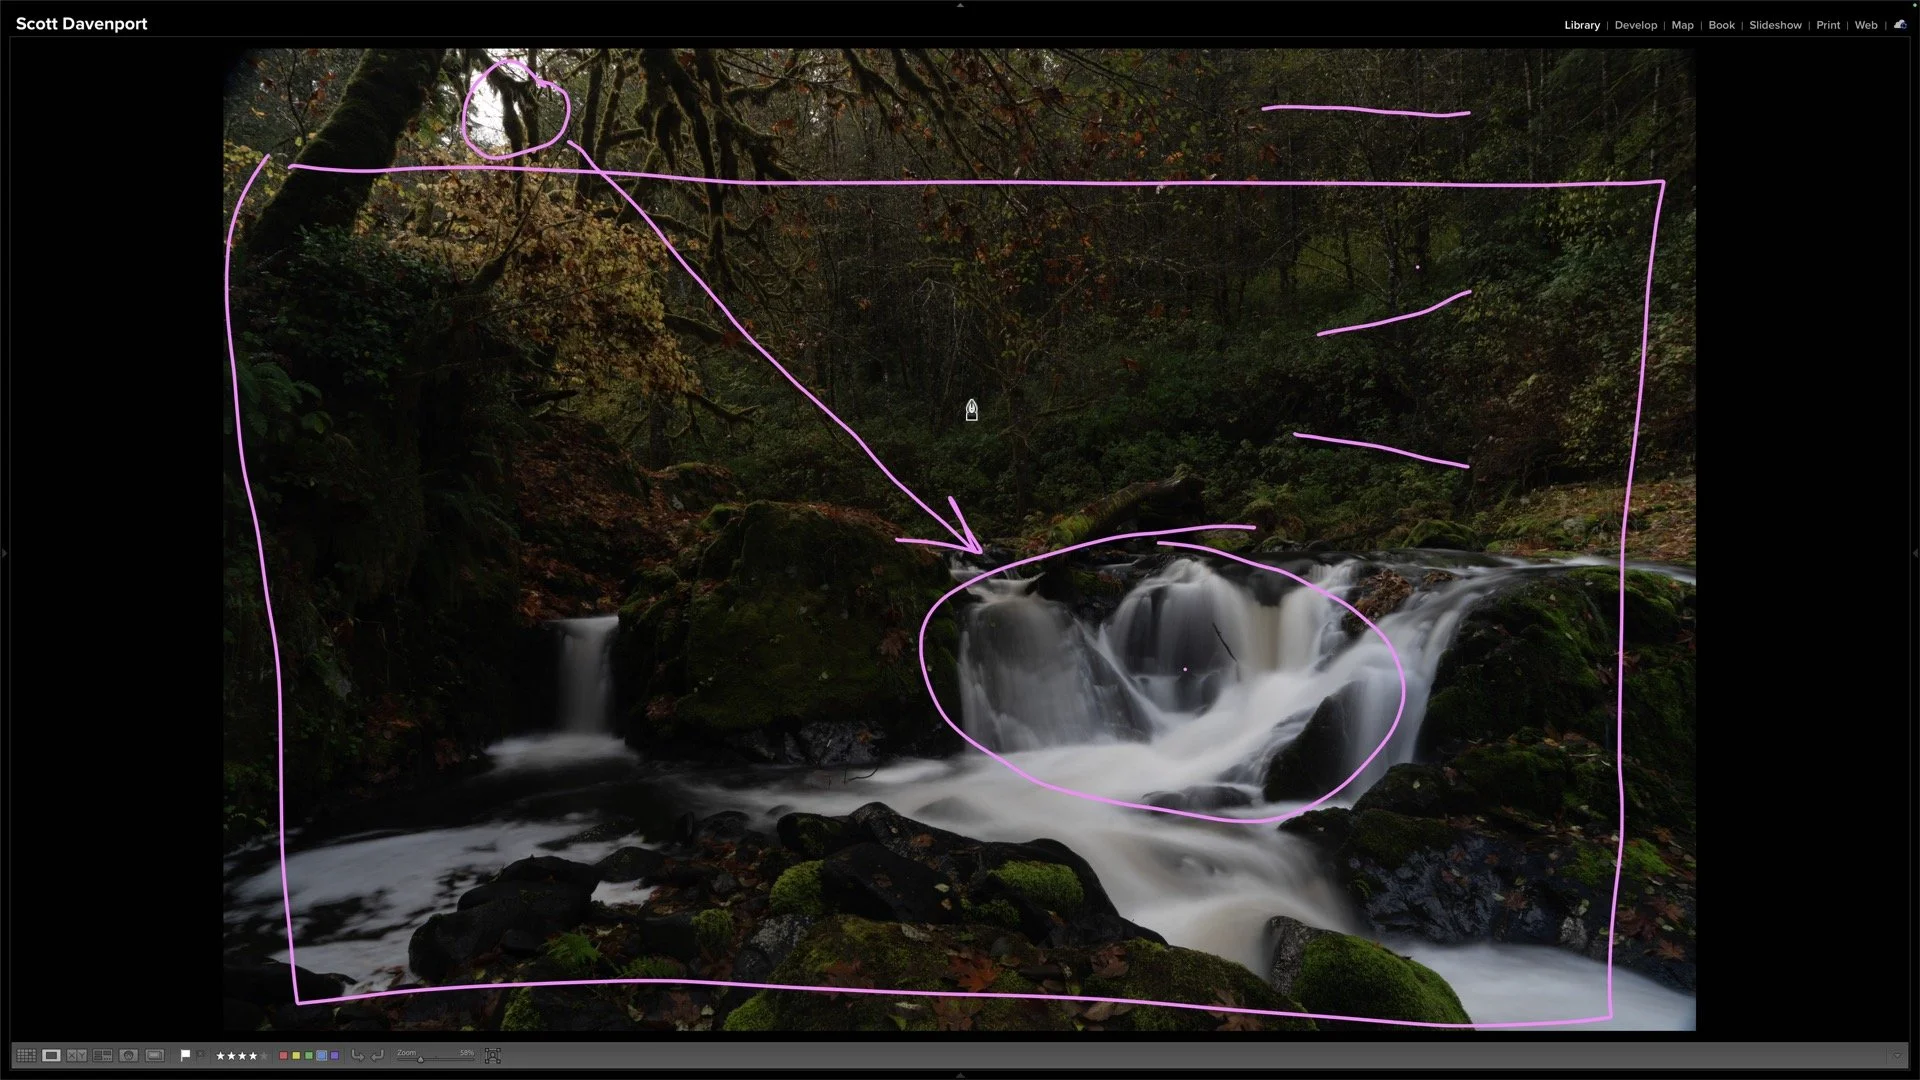
A gradient could help bound the light, but I use a line mask here because I want more freedom to draw its shape. This tool is useful when the area you want to affect does not fit a simple straight fade.
I zoom out so I can begin the shape outside the upper-left corner of the photograph, where the light source would be. From there, I place points to define a broad path through the foliage and across the frame. After closing the shape, I use the erase operation outside it to remove Sunshine from the surrounding areas.
Feathering matters. I set the line mask’s feather to 100% for a soft transition. A hard edge would suggest light passing through something with a crisp boundary, such as a window. For this forest scene, I want the glow to blend gently into its surroundings.
Starting the mask outside the crop helps establish the light’s direction. Generous feathering keeps its edges soft within the forest.
The line mask can be refined after you draw it. Select it again to move the existing points, use the control that appears between points to reshape an edge, or right-click to add a point. That flexibility lets me pull the glow away from darker forest areas and bring its shape closer to the light I want to emphasize.
Fade the Glow Before It Overpowers the Water
The luminosity mask controls the tones, and the line mask controls the shape. I still need the effect to weaken as it approaches the water. Otherwise, the whitewater can become too bright and lose detail.
For that final control, I add a gradient to the same filter mask. I rotate it to follow the direction of the light and adjust its transition so the Sunshine remains stronger near the upper left, then gradually fades toward the lower right.
I check the mask to understand the fade, then return to the photograph to judge the result. The water is my reference: I want the light to lead toward it while preserving the texture in the whitewash.
The gradient reduces the glow as it approaches the water, preserving detail while maintaining a gentle direction of light.
Each masking tool has a job. Together, they let me give the glow a little more presence without applying that same strength everywhere.
Judge the Effect by What It Adds to the Photograph
Once the masks are working together, I compare the photograph with and without Sunshine. I’m looking for a little extra warmth and soft light in the foliage, with the dark forest staying back and the water retaining its detail.
I also inspect the mask for stray affected areas. In this example, the heavily feathered line mask leaves a small unwanted area near a corner. That is something to clean up with the mask’s erase tools before considering the adjustment finished.
There is room to refine the line mask’s shape, but I keep judging those changes against the photograph. A carefully drawn mask only helps if the resulting light remains believable and supports the scene. The filter’s opacity is the final volume control when the overall effect needs to be quieter.
Final Thoughts
Soft directional light comes from controlling more than the strength of a glow. The luminosity mask determines which tones carry it, the line mask gives it a shape, and the gradient lets it fade before it overwhelms an already bright area.
For this photograph, those controls help me follow through on an existing vision: warm light leading through the foliage toward the water, with the surrounding forest adding depth. When you try this on your own photos, begin with where the light should lead. That decision gives every mask a purpose.
Soft Golden Light in Sweet Creek
Contact Scott to commission a print or license this image.




Shape The Light – Tell Your Story
Light shapes your story, and Lightroom gives you the tools to mold it. In Mastering Light & Shadow, we’ll dive into how to read the light in your photos, control it with intention, and shape it to match the story you want to tell. You’ll walk away with practical techniques, clear workflows, and the confidence to interpret your photos and bring your creative vision to life.