
If you are trying ON1 Photo RAW, the ON1 plug-ins like ON1 Effects or ON1 HDR, or upgrading your ON1 software to a newer version, please consider using my affiliate link. There is no extra cost to you and it helps support my work and this website.
You want to apply an adjustment or effect to a portion of a landscape. Quick Mask AI picks out most of it, but a patch of it isn’t impacted when you apply the look. You could spend time adjusting the edge of the whole mask. A few brush strokes or a slight tweak to the selection where it missed will get you there faster.
That’s what I like about masking in ON1 Photo RAW 2027. Add, Subtract, and Intersect are right in the local adjustment or effect I’m working on. I can look at the photo, decide what the mask needs, and choose a tool for that job.
Start With the Part of the Photo You Want to Change
It’s easy to open the masking tools and start wondering which one to use. I find that question much easier to answer once I can describe the edit. “Darken the road” gives me a clear starting point. So does “bring out the texture in the trees on the left.”
I start with whichever tool gets me most of the way there. A sky or subject selection makes sense when the area is easy to identify. A gradient works well when the adjustment should fade across a broad part of the frame. And if the effect itself already targets what I want, I can stop there. On a coastal photo, for example, I used Color Mixer to boost the oranges and yellows in the sandstone and sand. The filter was already doing the targeting by color so no mask is needed.
Add Where the Selection Missed
For the road, I started with Quick Mask AI in a local adjustment. I pulled exposure down far enough to see where the adjustment was landing. Most of the road darkened, and the bright patch in the foreground showed me exactly where the mask needed work.
Feathering softened the edge, and shifting the edge extended the selection a little. The gap was still there. I chose Add and painted over the missed gravel with a brush. Farther up the road, where I wanted a lighter touch, I lowered the brush opacity and built up the mask with a couple of passes. The same exposure adjustment can then come through more strongly in the foreground and more gently farther back.
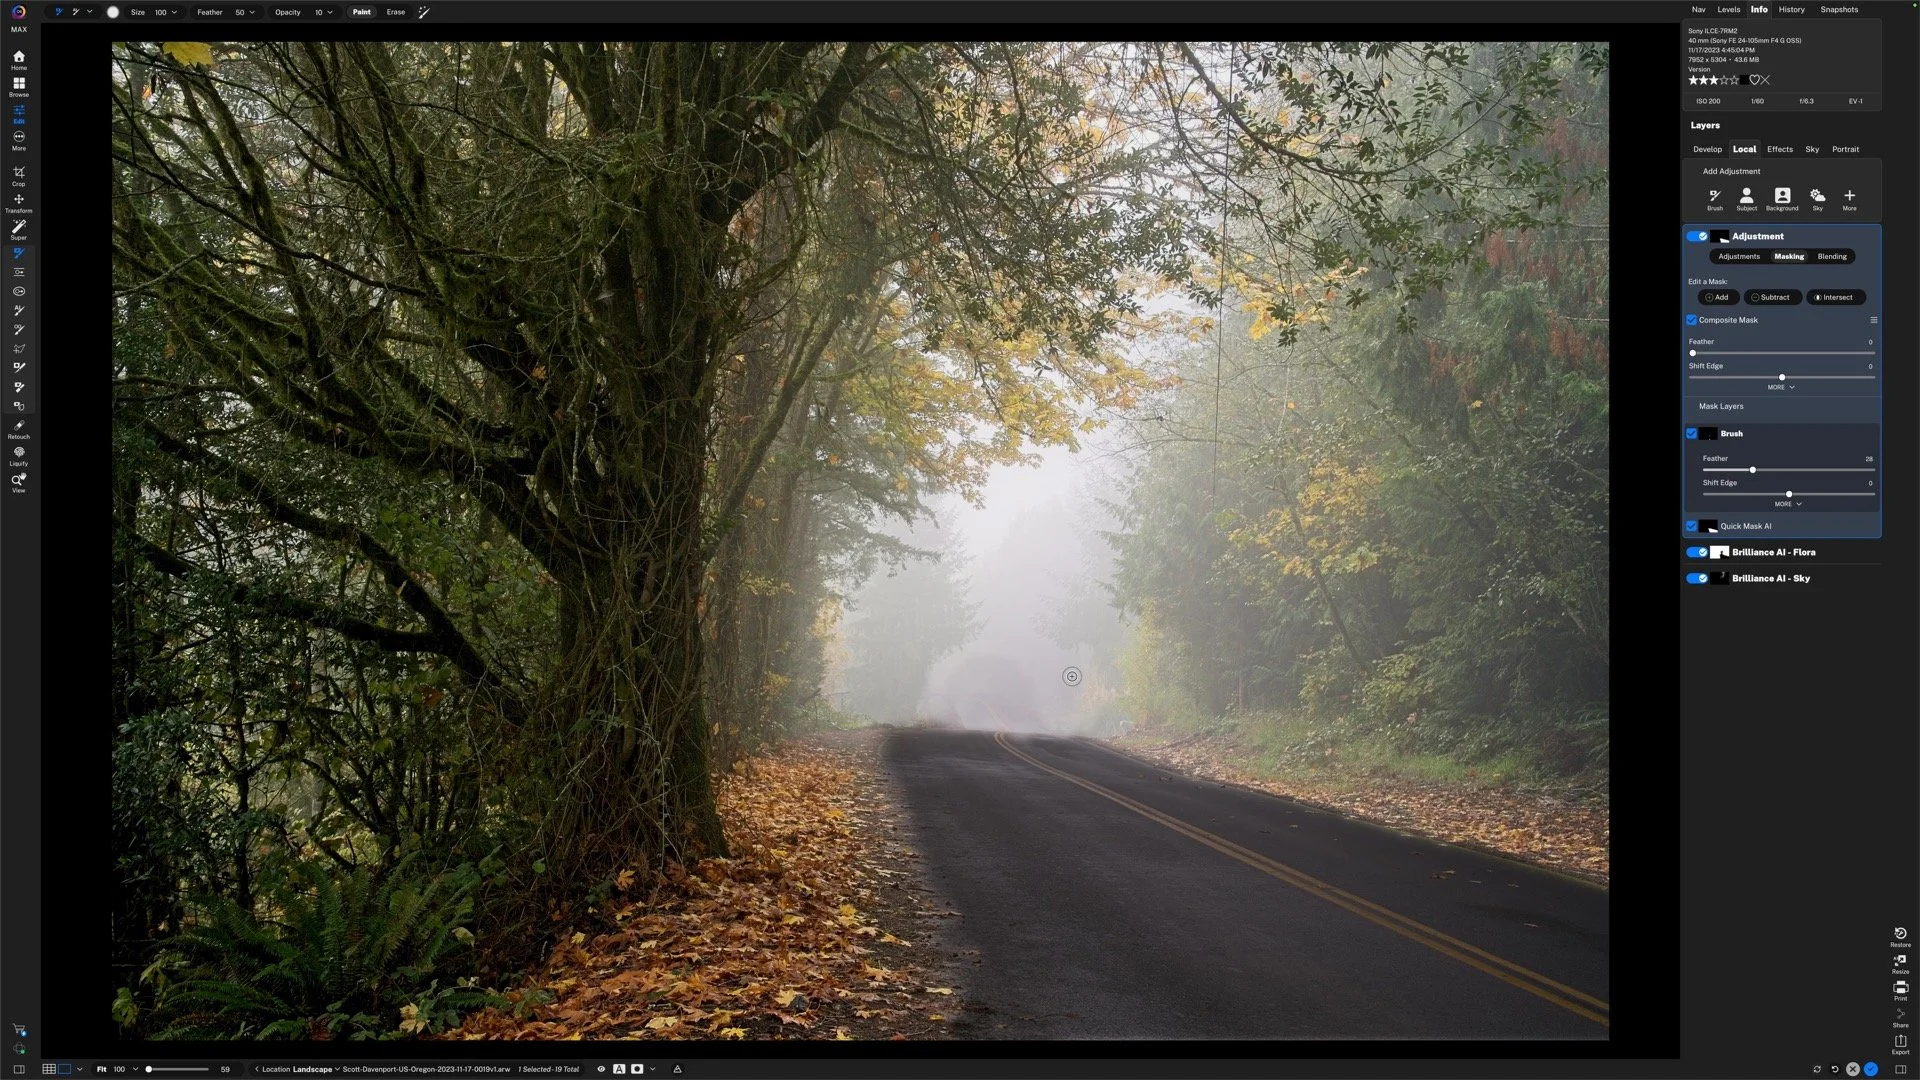
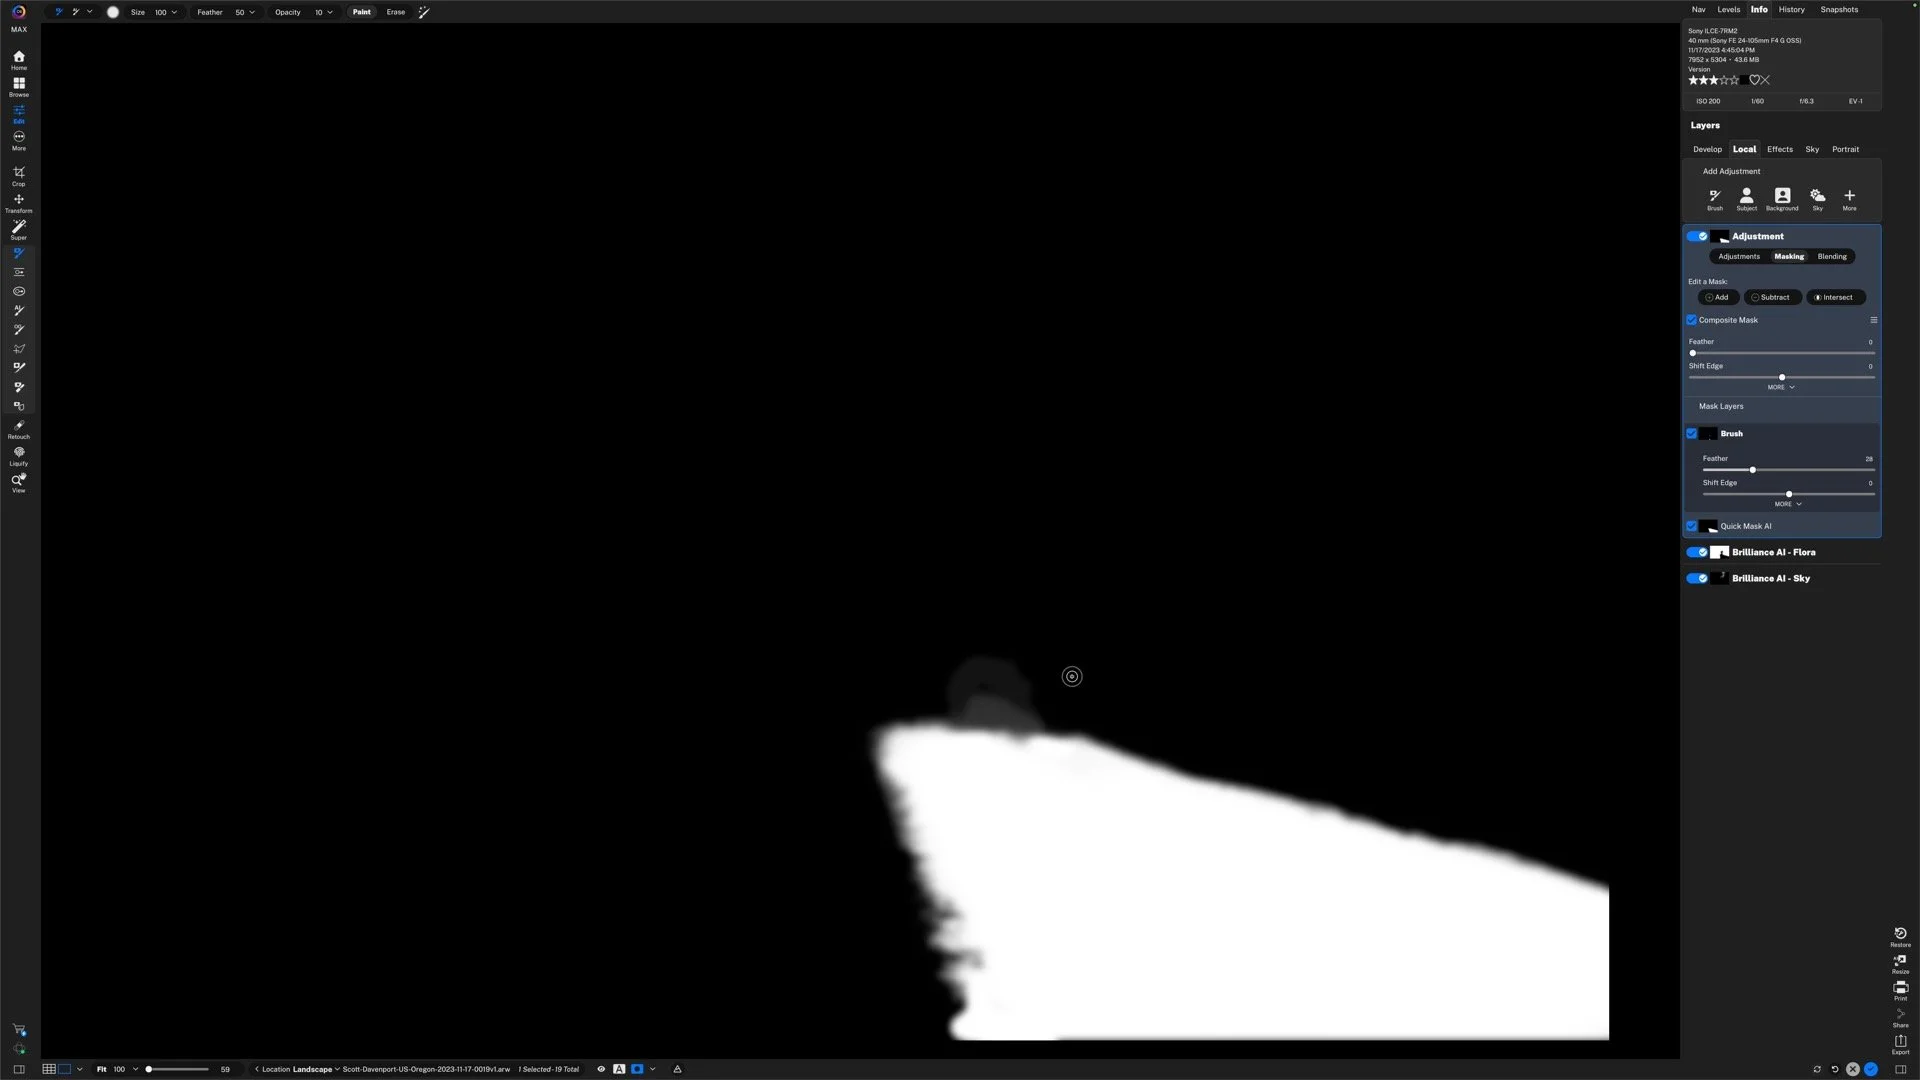
A brush fills the gap in the foreground, while lighter strokes build coverage gradually farther up the road.
Subtract to Localize an Effect
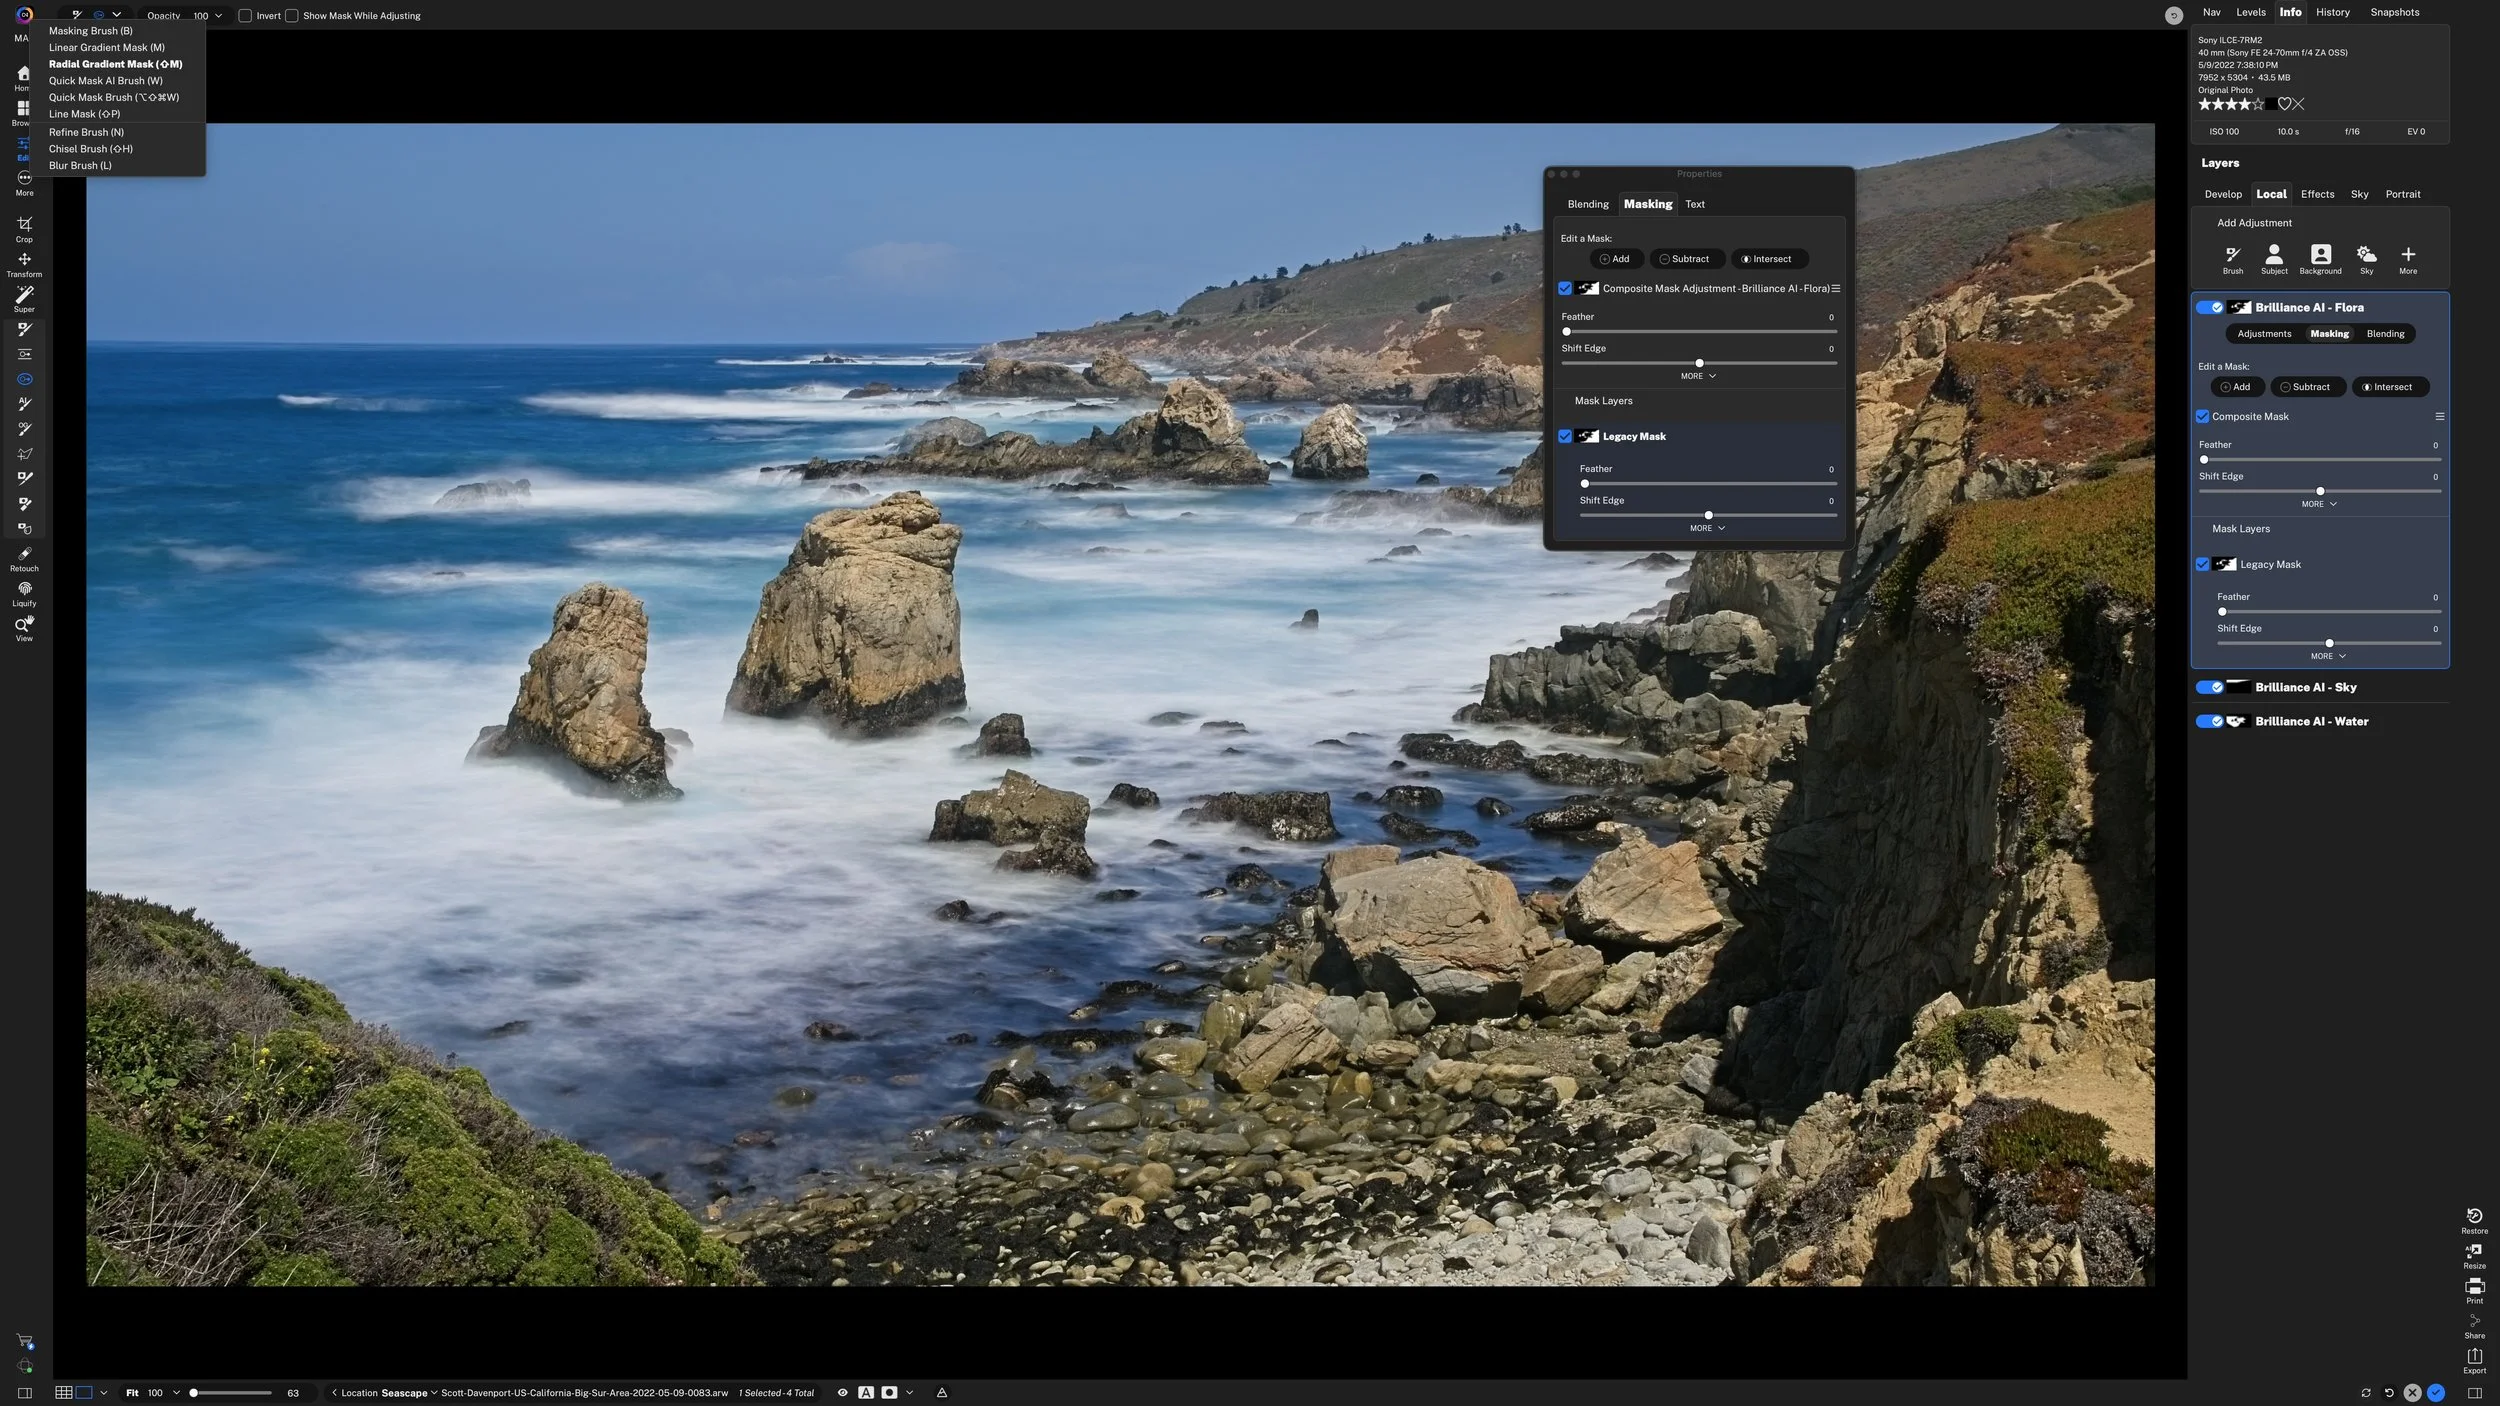
I wanted to bring out texture in the trees on the left side of the frame. The Flora region gave me a head start by masking the vegetation for Dynamic Contrast. It also included the trees on the right. Since I wanted to remove the effect across a broad area, I chose Subtract and used a linear gradient to fade it away toward that side.
The two parts of the mask do different jobs. The Flora selection follows the vegetation, and the gradient controls where the effect falls off across the frame. If I want some of that texture back on a branch that crosses into the upper right, I can add it locally with a brush. I can make that small decision after seeing what the broader edit does for the photo.
Intersect For Complex Selections
On the coast, I wanted to deepen the shadows on the rock faces. A land selection gave me the right general area, but lowering exposure across that whole selection also darkened the brighter sandstone. I needed to narrow the adjustment by tone as well as by location.
I started with Quick Mask AI to select the land, then used Intersect to combine that selection with a luminosity mask. Intersect keeps the overlap. As I narrowed the luminosity range toward the shadows, the adjustment settled into the darker parts of the selected land. A few other dark areas still came through, so I subtracted a gradient to concentrate the edit on the front-facing rocks.
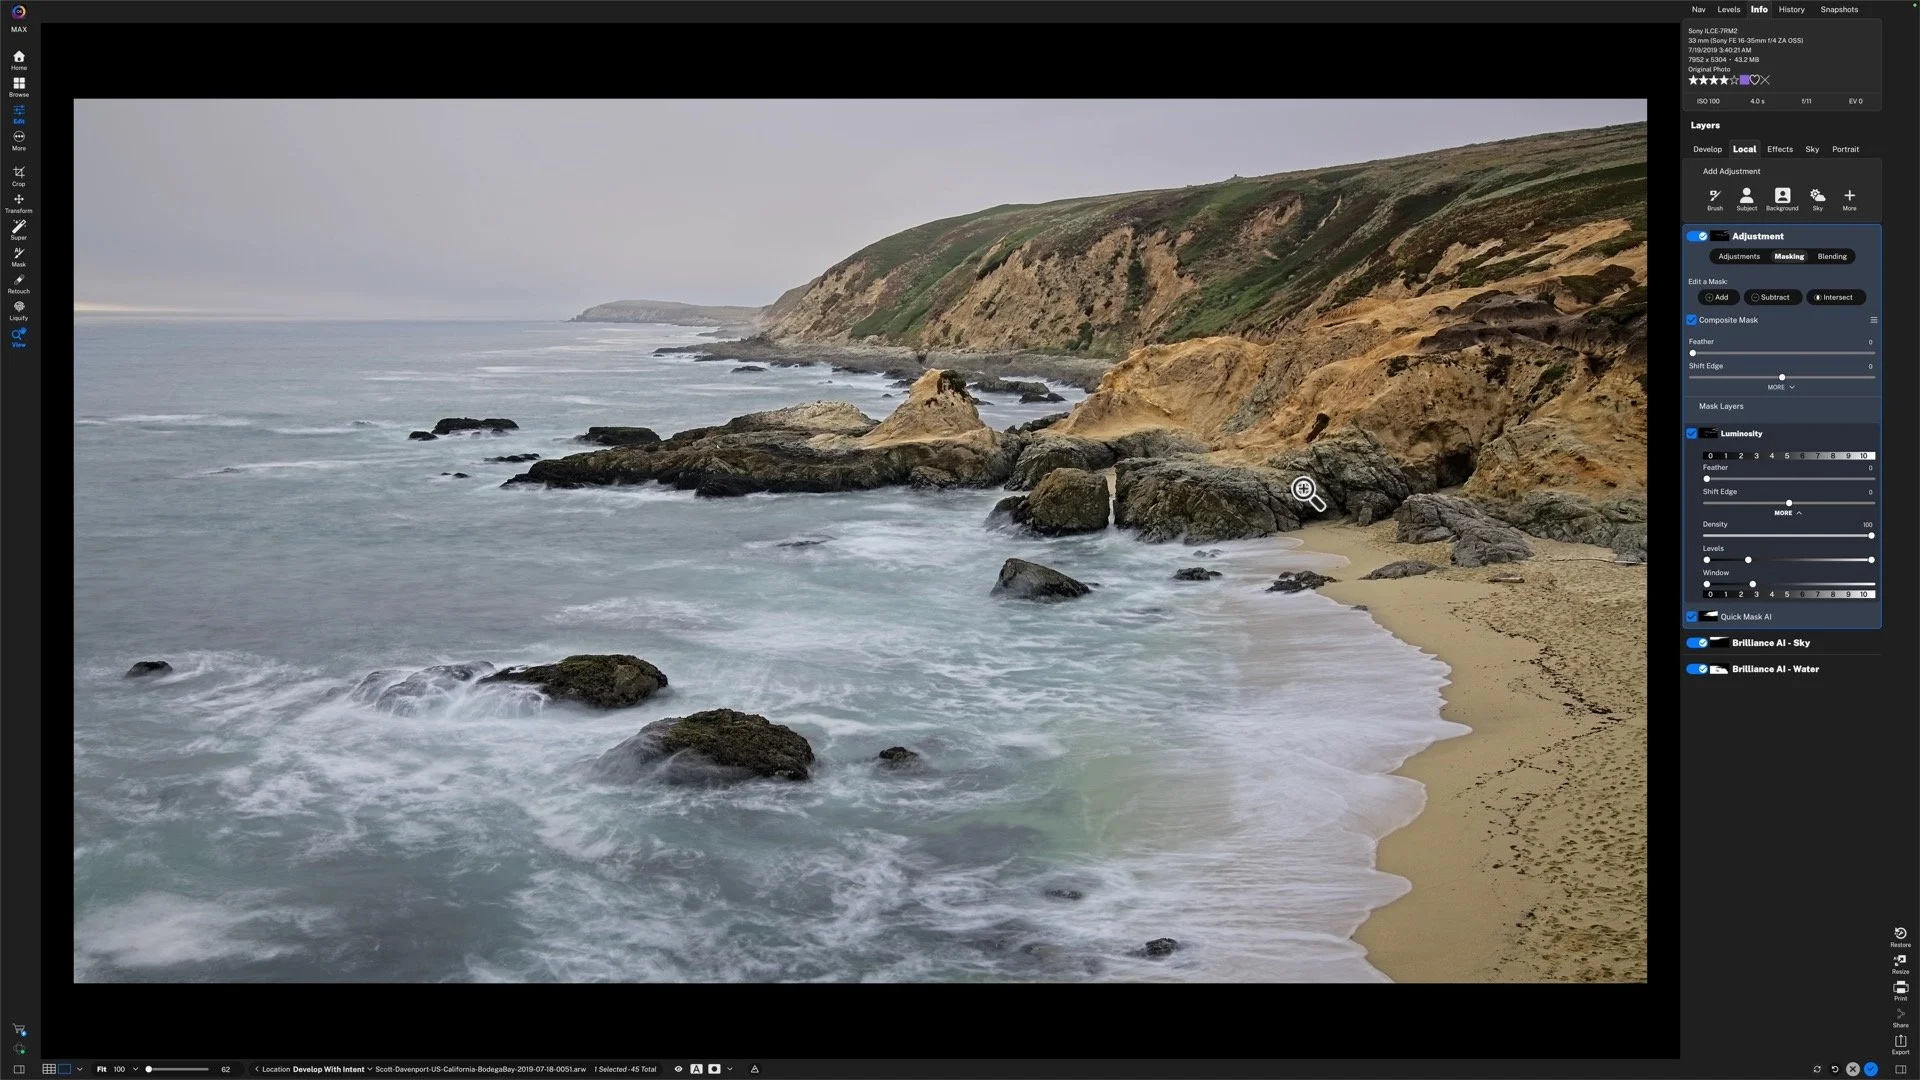
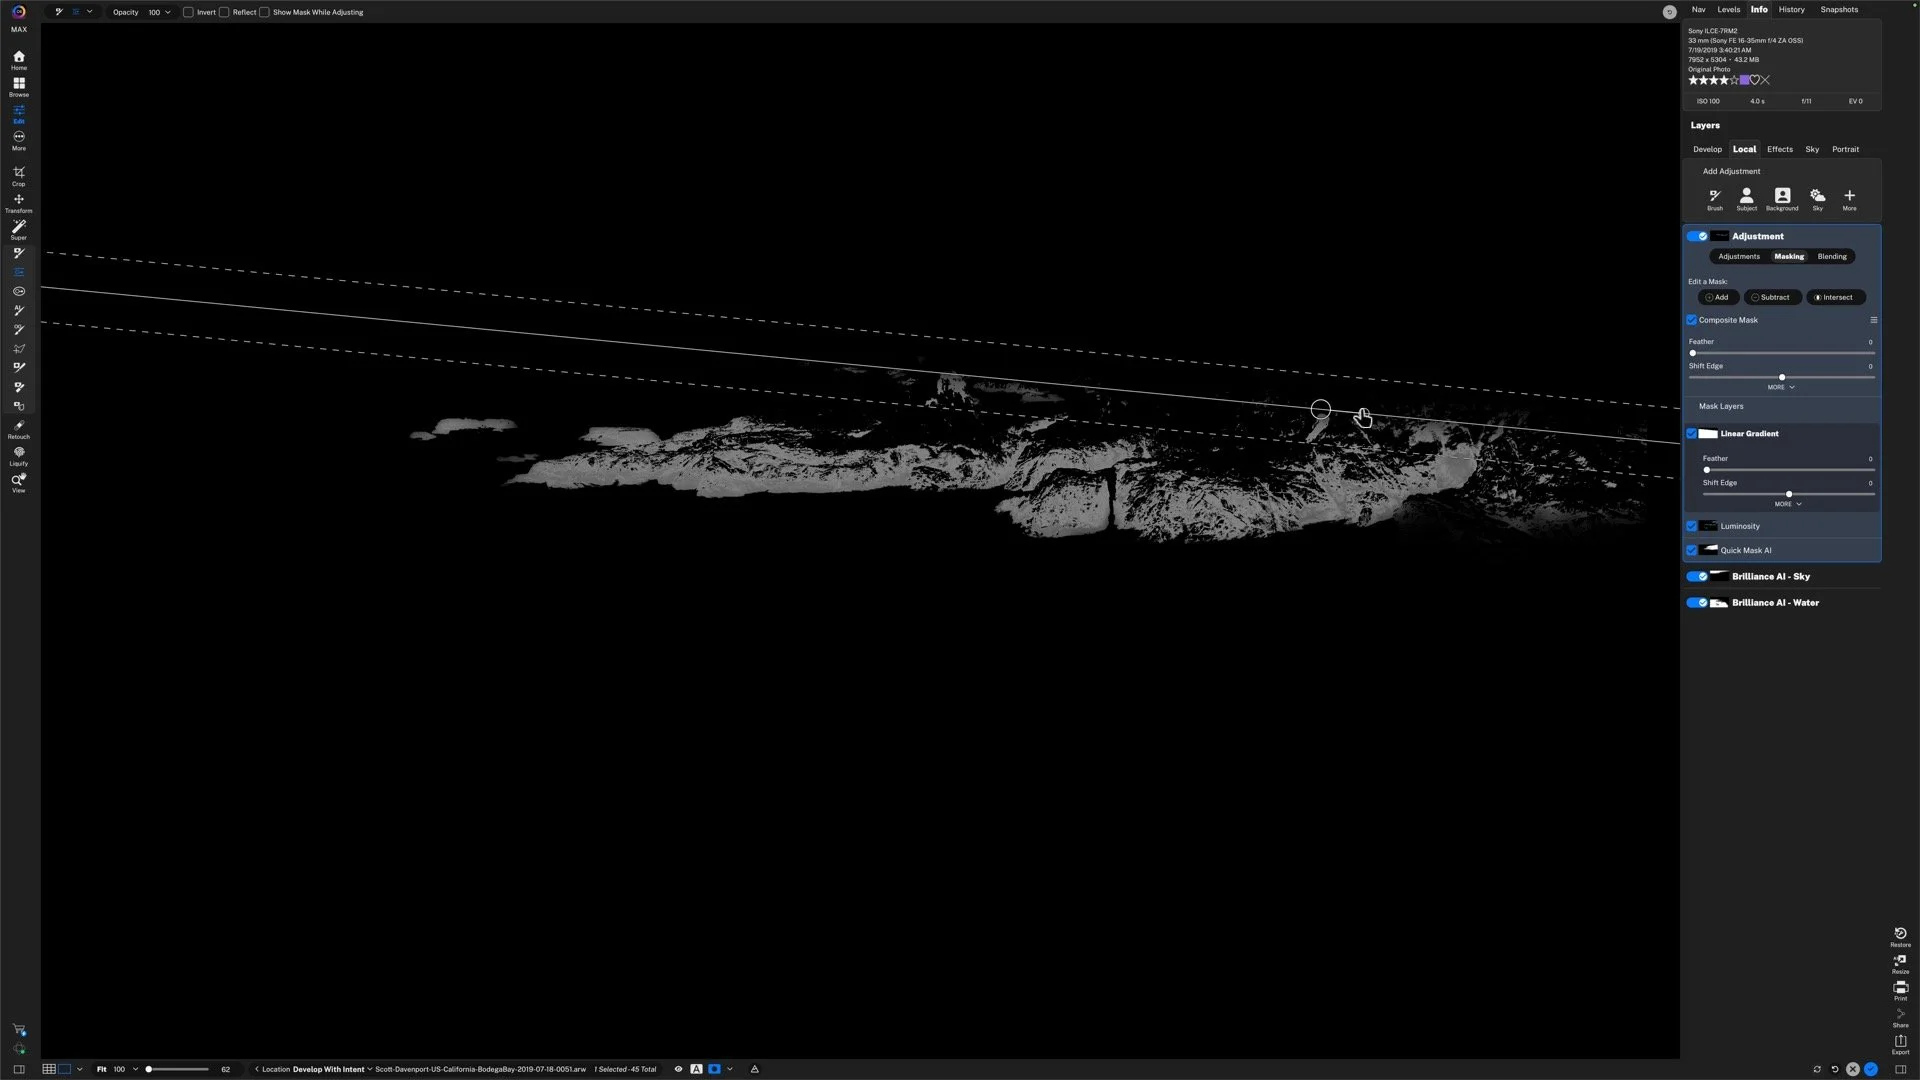
The land selection sets the boundaries, the luminosity mask narrows the edit to darker tones, and a gradient trims the remaining coverage.
Final Thoughts
The next time a mask is close, look at the photo and name what needs to change. A missed patch calls for Add. An effect that spreads too far calls for Subtract. An adjustment that needs to satisfy two conditions calls for Intersect. Once you know what the mask needs to do, choosing the tool becomes a much smaller decision.

A quick AI selection can get you most of the way to a good mask. The work that’s left might be a patch of gravel the selection missed, a group of trees that picked up too much contrast, or a rock face you want to darken without touching the brighter stone around it.
ON1 Photo RAW 2027 makes that refinement easier by putting Add, Subtract, and Intersect right where you’re editing. Three landscape examples show how I decide what a mask needs and which tool will get me there.