
If you are trying ON1 Photo RAW, the ON1 plug-ins like ON1 Effects or ON1 HDR, or upgrading your ON1 software to a newer version, please consider using my affiliate link. There is no extra cost to you and it helps support my work and this website.
There are two masking changes I’d point out to anyone upgrading to ON1 Photo RAW 2027. The Masking Bug has been split into separate Linear Gradient and Radial Gradient tools, and mask properties are now available directly in the local adjustment or Effects filter you’re working on. Both changes make the controls easier to find right when you need them.
The Masking Bug Is Now Two Gradient Tools
In earlier versions, you selected the Masking Bug and then chose a gradient shape. In Photo RAW 2027, you choose Linear Gradient or Radial Gradient directly from the masking tools. The Linear Gradient tool contains both the standard and reflected options. The Radial Gradient tool handles oval masks, which you can invert to target the area outside the oval for something like a custom vignette.
Once the gradient is on the photo, the controls will feel familiar. You can position and feather the gradient, adjust the edges of a reflected gradient, or shape and rotate a radial gradient.
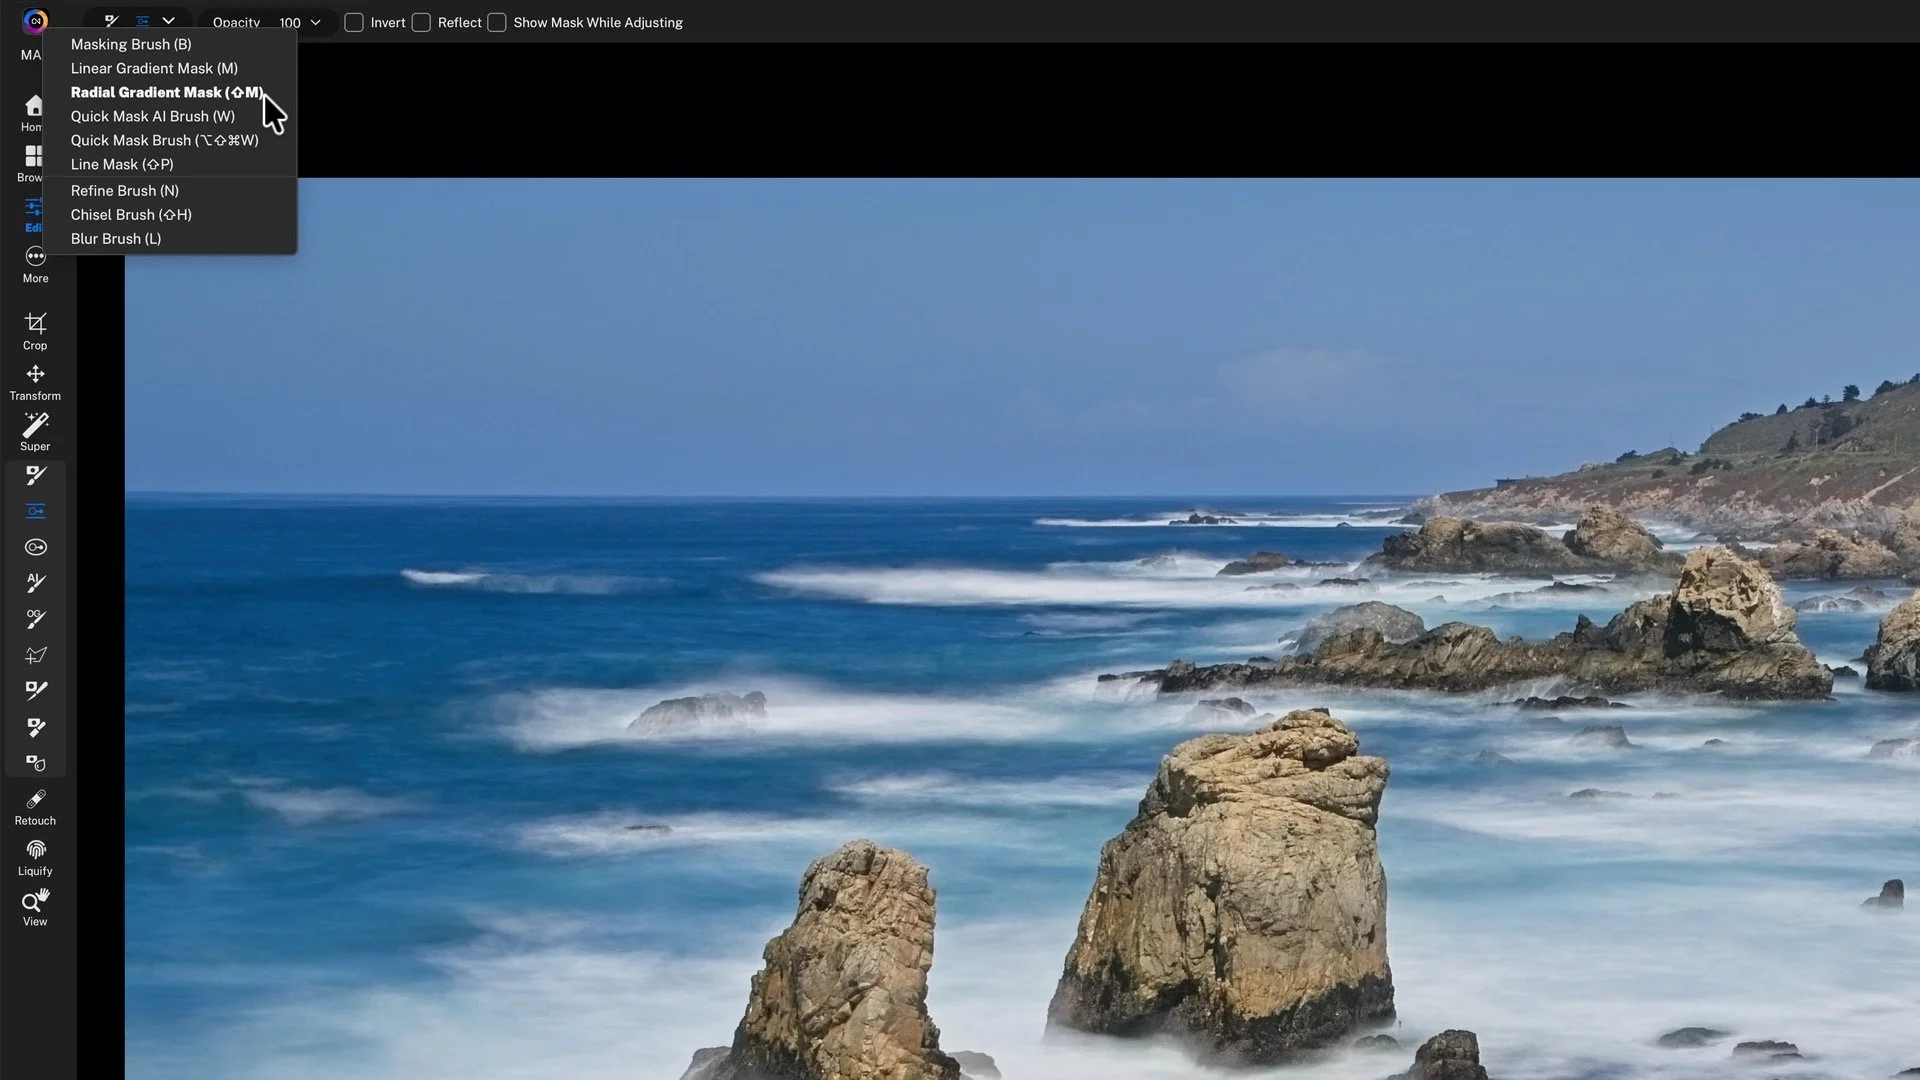
The former Masking Bug controls are now under Linear Gradient and Radial Gradient in the masking tool menu.
Click and Drag to Place Either Gradient
You can now click and drag directly on the photo to position and begin shaping either type of gradient. With a radial gradient, for instance, I can drag out the oval roughly where I want it, then use the handles to fine-tune its shape and feather. A single click still places a gradient if you prefer to work that way.
Mask Properties Are Right Beside the Adjustment
Open the Masking tab in the Local Adjustment or Effects filter you’re working with. That’s where you’ll find the properties for the combined mask and for each individual mask layer. While the separate Properties window is still available, I can do my day-to-day mask work directly in the tab.
You’ll also see Composite Mask, the new name for Target Mask. Its controls apply to the combined result of all the mask layers. In my Brilliance adjustment with an AI Flora mask, for example, I can use Feather or Shift Edge on the composite or open the Local Adjustment or Effect filter to refine that selection on its own.
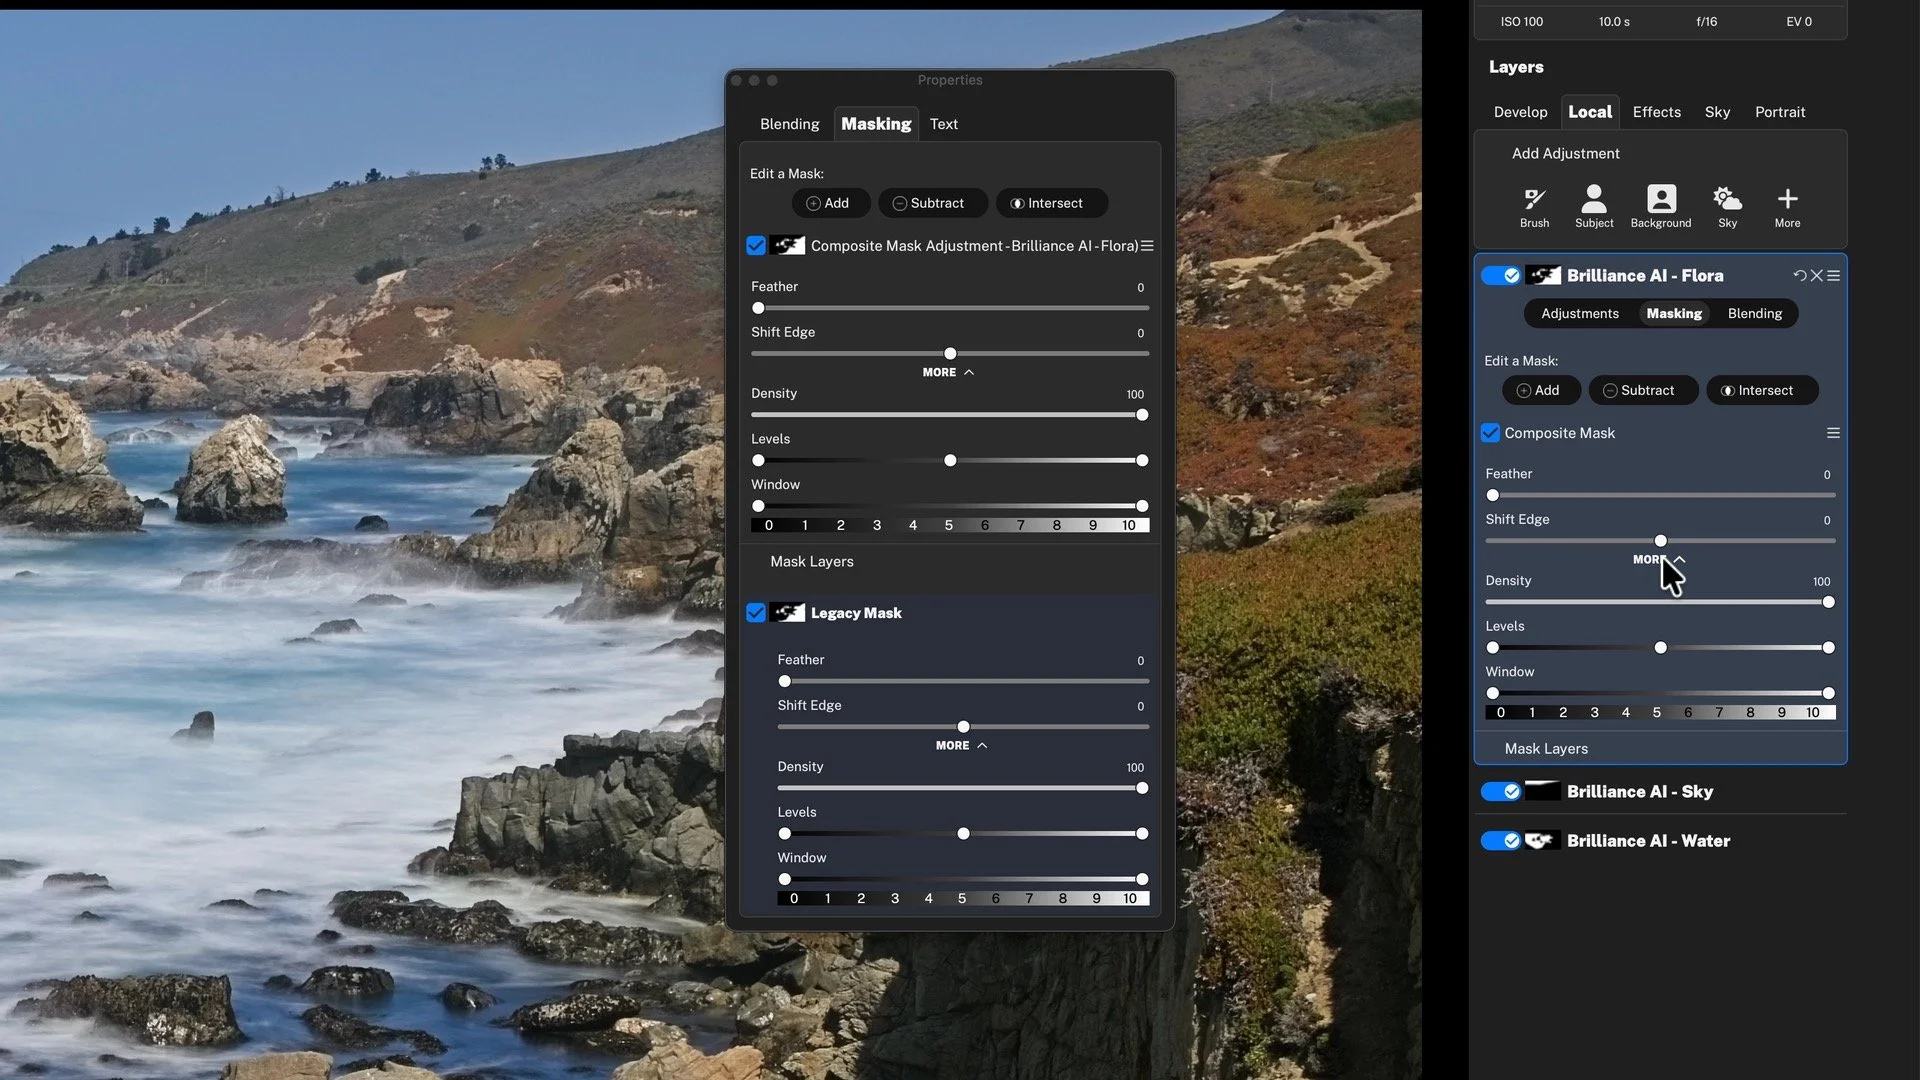
The Masking tab brings the composite controls, individual mask layers, and masking modes into the adjustment or Effect filter you’re working with.
Add, Subtract, and Intersect Are in Plain Sight
The Add, Subtract, and Intersect modes are now visible in the Masking tab. Previously, these modes were buried in a submenu inside the Masking properties panel. Now, as I build a mask, I can choose what the next selection should do right where I’m working. I can add an area, remove one, or keep only the overlap between the two selections. That order feels more natural to me because it starts with an action for what I want the mask to do.
Final Thoughts
If you used the Masking Bug, start by choosing the gradient shape directly from the masking tools. When it’s time to refine or combine masks, open the Masking tab on the adjustment or filter itself. Those are the two places I’d look first when getting used to masking in Photo RAW 2027.


Looking for the Masking Bug in ON1 Photo RAW 2027? Its controls are now split between two tools, Linear Gradient and Radial Gradient. You can also click and drag either gradient directly on the photo to shape it as you place it.
Mask properties have moved closer to the edit, too. You can refine the full mask or an individual mask layer right inside a local adjustment or Effects filter, with Add, Subtract, and Intersect in plain sight.