
Reading Light in Landscape Photography
You arrive at a location with a photograph in mind. Maybe you imagined warm light skimming across the mountains, and instead find a blanket of cloud. Or the sun is shining, but the landscape looks surprisingly flat through the viewfinder.
It is tempting to decide the light is wrong and wait for something better. Sometimes waiting is the right choice. But before you put the camera away, take a closer look at what the light is doing. The scene may offer a different photograph from the one you planned.
Understanding light gives you more choices. You can change your viewpoint, simplify your composition, or find a subject that benefits from the conditions in front of you. That starts with recognizing how the light reaches your subject.
Read the Light From the Camera’s Position
Front lighting, side lighting, and backlighting describe the relationship between the light source, your subject, and your camera.
Imagine photographing a solitary tree. With the sun behind you, light reaches the side of the tree facing your camera: front lighting. With the sun off to your left or right, light crosses the tree: side lighting. With the sun beyond the tree, its camera-facing side falls into shadow: backlighting.
Direction is only part of the story. Quality describes hard or soft light, recognizable in the sharpness of shadow edges. Intensity describes how much light reaches the subject. Color describes whether that illumination is warm, cool, or a mixture. Bright light can be soft, and dim light can still produce distinct shadows.
These characteristics overlap. Side lighting might produce crisp shadows under a clear sky or gentle transitions through cloud cover. A mountain may receive direct sunlight while your foreground sits in shade, illuminated by the sky and reflected light.
My teaching often returns to thinking like a painter. You decide what belongs in the photograph and what can be left out. Camera position and focal length help translate that choice into a composition. Recognizing what the light reveals gives those decisions a purpose.
Use the terms to understand what you see. Then look at individual parts of the scene. Moving around a nearby subject can change its relationship to the light; changing that relationship with a distant mountain may require a much larger move or a different time of day.
Front Lighting: Let Color and Composition Carry the Photograph
With front lighting, much of the shadow falls behind the subject, hidden from your camera. Visible surfaces can show their color clearly, but the shadows that reveal texture and volume become less prominent.
That can suit a hillside covered in autumn trees. The photograph might be about patches of red and gold, their arrangement, and their contrast with surrounding evergreens. Deep shadows across every tree could complicate that idea. Front lighting can help keep the color relationships clear.
The challenge comes when you expect the light to describe depth. A rugged rock face may look flatter than it does when illuminated from the side. Before abandoning the composition, ask what else can establish distance. A foreground boulder, overlapping ridges, or a path narrowing into the scene can give the viewer spatial cues.
Pay attention to your camera height. Lowering it may let a foreground element overlap the middle distance; raising it may reveal a useful arrangement of shapes. Choose the position that makes the scene easier to read. A foreground only helps when it contributes something.
The fence, lighthouse, and wooded hillside create overlapping layers that give the scene depth even when front lighting reveals relatively few shadows.
Side Lighting: Use Shadows to Describe the Landscape
Side lighting places illuminated and shaded surfaces beside one another. Those transitions reveal contours, helping the viewer understand the shape of the land.
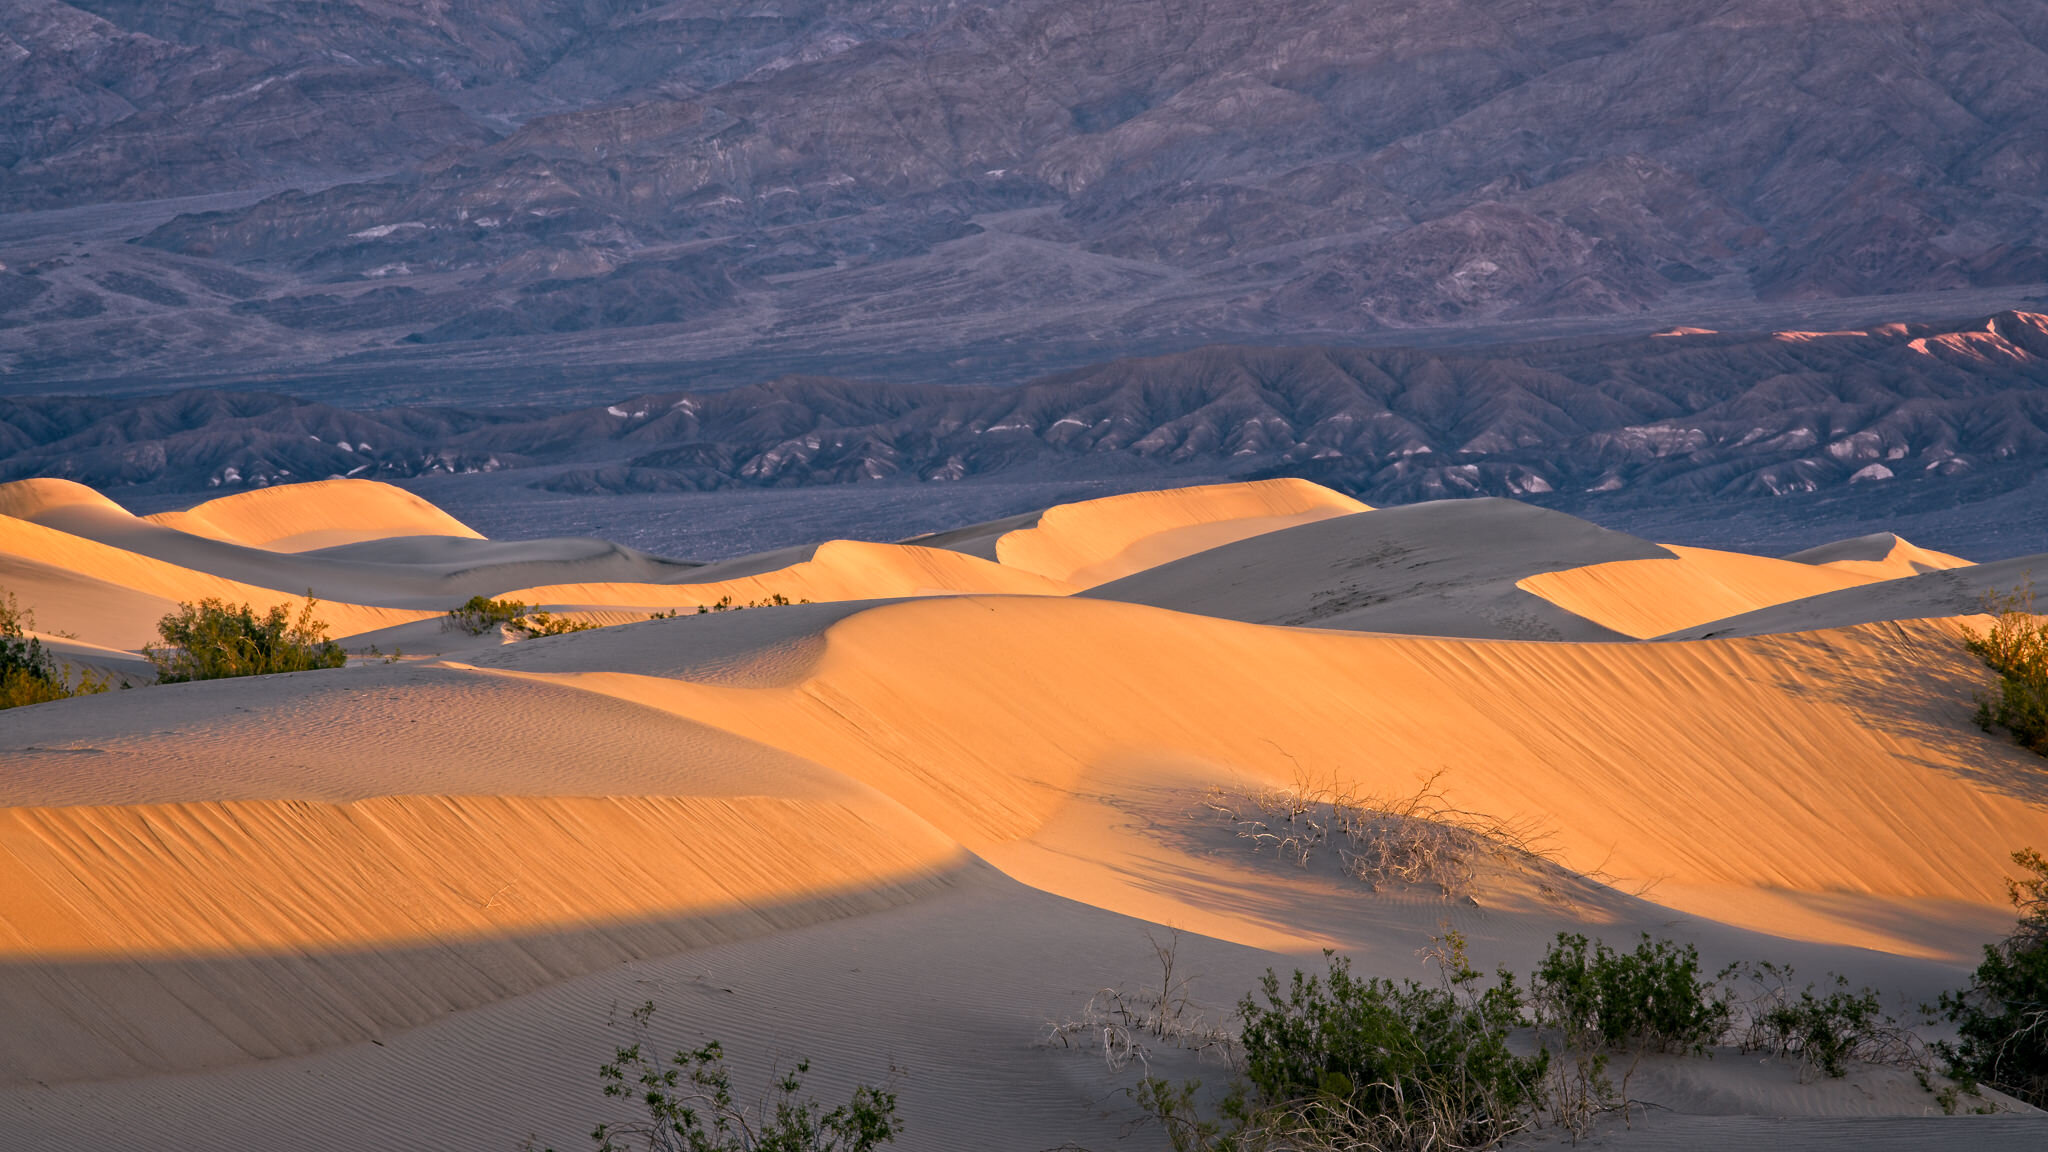
On a dune, light crossing the sand can reveal both the curve of the crest and small ripples on its surface. Across mountains, it can separate ridges and gullies. On trees, it can reveal rounded trunks and the texture of bark.
Look at the shadows as carefully as the highlights. A dark band might lead toward your subject, frame it, or separate it from the background. It might also cut across the photograph and become the strongest shape in the frame. Texture alone does not guarantee a coherent composition.
Suppose a bright rock formation catches your attention, but a broad foreground shadow divides the scene in half. You could reframe to reduce that shadow, move to change how it overlaps the rock, or include it deliberately as part of the design. If its position is almost right, waiting may help as the sun moves.
Exposure deserves attention, too. Decide which bright surfaces need detail and whether the darker areas need readable texture. Some shadows can remain dark. Lifting every shadow later can weaken the very separation that made the scene interesting. Keep detail where it helps describe your subject, rather than treating every part of the frame as equally important.
Side light reveals the curves and rippled surfaces of the dunes, while the alternating shadow shapes become part of the composition.


Backlighting: Decide What Needs to Be Visible
With backlighting, the light source is beyond the subject relative to your camera. The visible face may be shaded while edges catch light. Thin leaves can glow as light passes through them, and mist or spray can become conspicuous against a darker background.
The sun does not need to appear in the photograph. A backlit stand of trees can have glowing foliage with the light source outside the frame.
A narrow bright edge around a tree or rock is often called rim lighting. It can separate the subject from its surroundings even when the visible face is shaded. Look for a background that makes the edge easy to see. A bright rim against a bright sky may be less distinct than the same rim against shaded foliage.
Notice what the light draws your eye toward, then consider its role in the composition. A bright edge might define the main subject or provide a small accent. Changing your position can alter both the background and how much of that edge remains visible.
Start by deciding what matters about the subject. If it is the outline of a lone tree, a silhouette may communicate the idea clearly. Look for clean separation between branches and the bright background. If the tree merges into another dark shape, moving a few steps may improve the photograph more than changing exposure.
If bark or foliage detail matters, you need enough exposure to record it while considering the bright background. Check the histogram and highlight warnings, particularly for important areas of sky, water, or illuminated leaves. A small reflection may reasonably lose detail; a large featureless patch where you wanted cloud texture is a different compromise.
When the brightness range exceeds what one exposure can hold, decide what information the photograph needs, adjust the framing, or wait for a change in light. Increasing exposure for the subject also brightens everything else.
Backlighting makes the mist visible as sunbeams and traces bright edges around the foliage, separating the cypress trunks from the woodland behind them.
Overcast Light: Find Structure Beyond Strong Shadows
Under heavy cloud cover, illumination arrives from a broad area of sky. Shadow edges soften, and pronounced light-and-shadow patterns may largely disappear. That is a change in light quality, rather than a new front, side, or back direction.
Overcast light can still have direction. One part of the sky may be brighter, and a forest canopy may admit more light from one side. Look for gentle differences across surfaces rather than expecting obvious cast shadows.
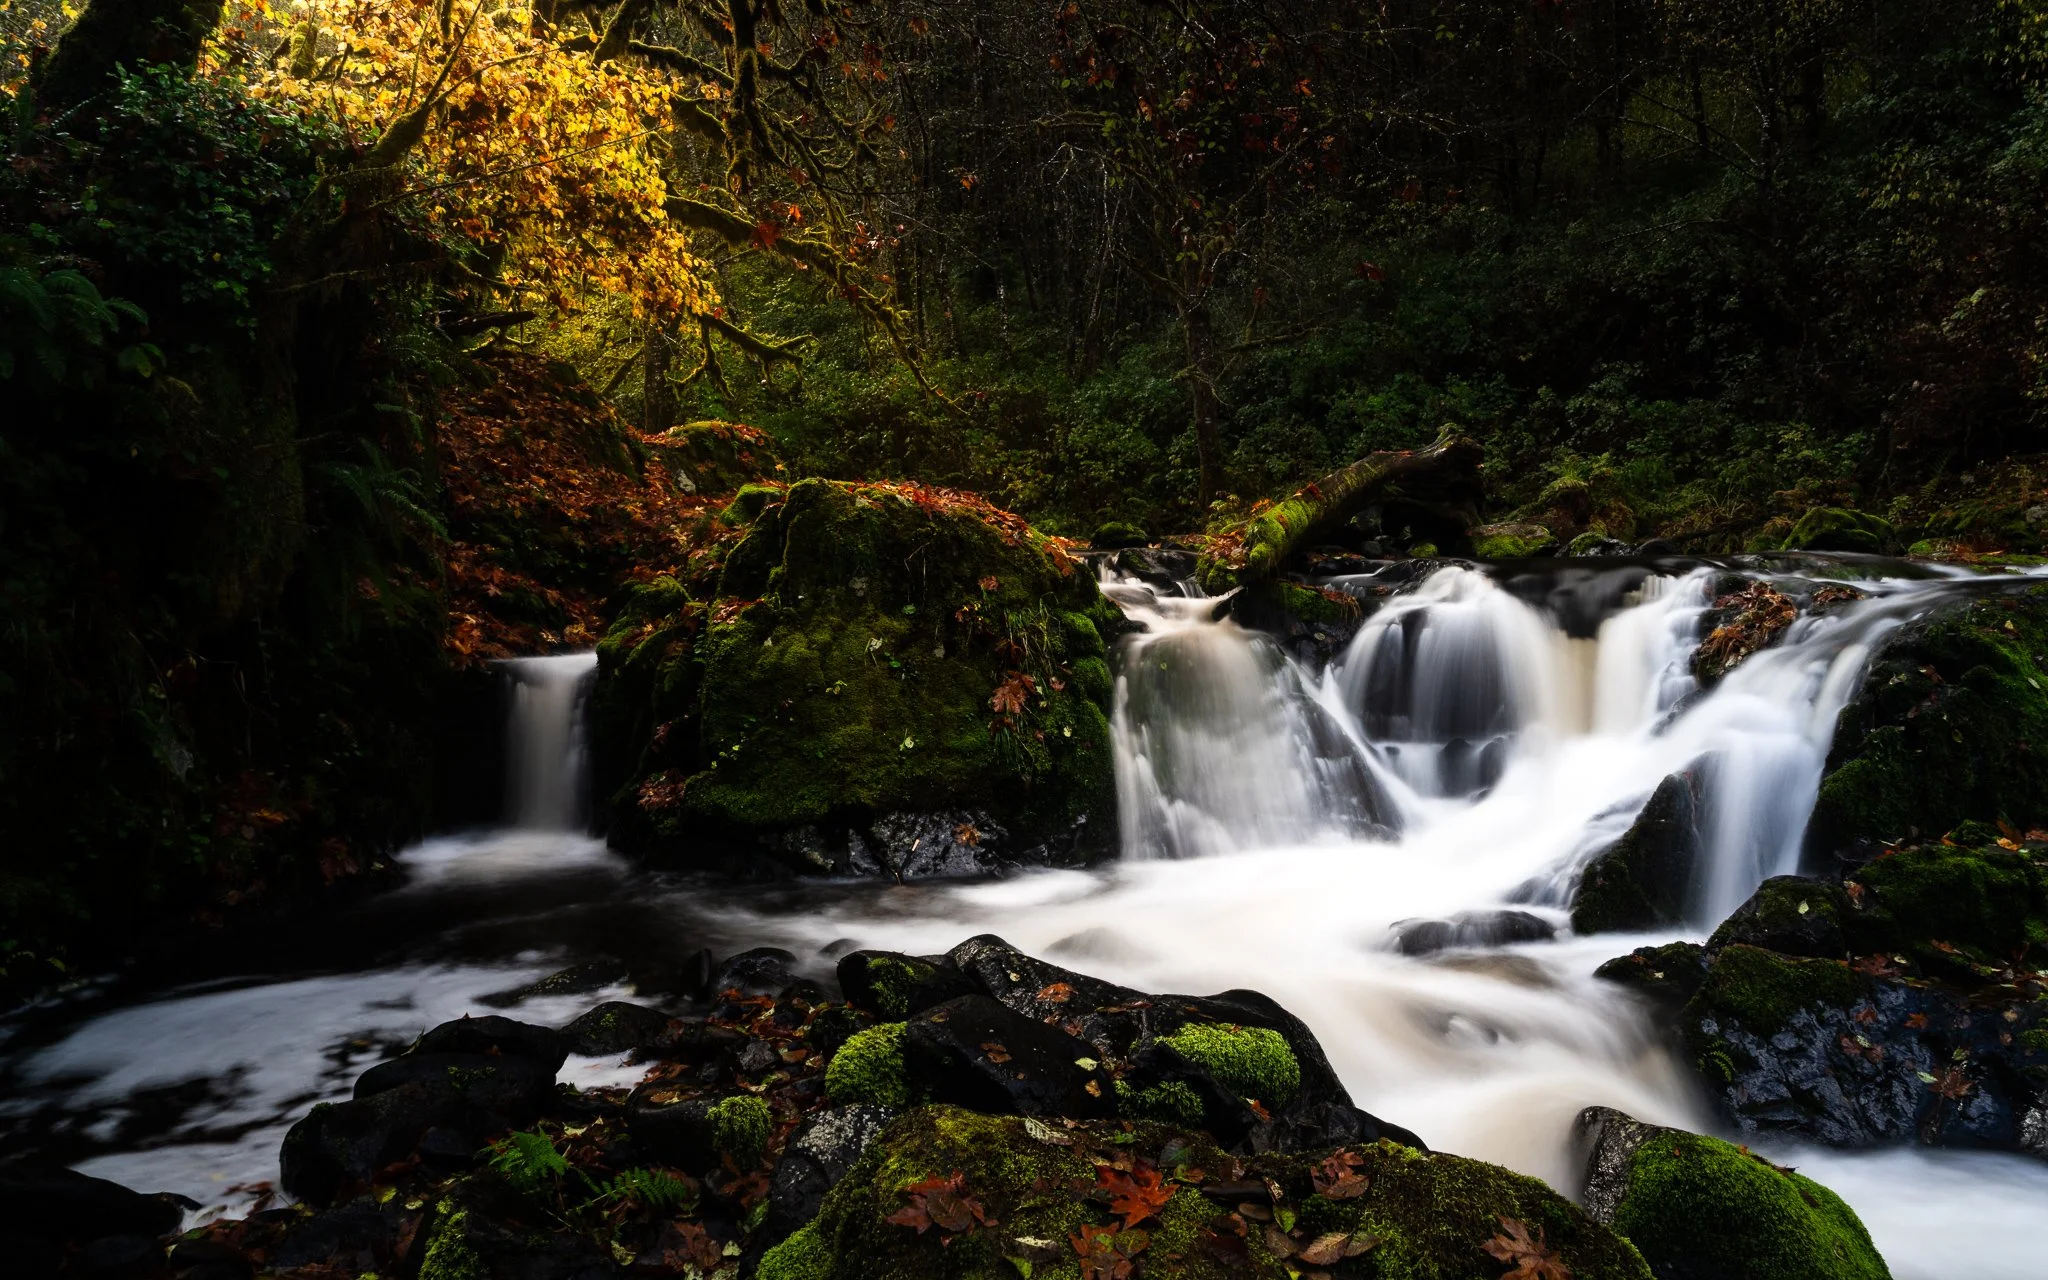
This can be useful for forests, waterfalls, and intimate landscapes. Consider white water surrounded by dark rocks and moss. Diffuse illumination can reduce the additional contrast that direct sun would create, letting you concentrate on the flow of water and the relationships among those elements.
To create structure, look for differences already present in the subject: pale trunks against dark foliage, overlapping branches, or a curved stream separating areas of moss. Subtle light does not require an indistinct composition.
Overcast conditions do not always drain color. They may reveal subtle color relationships without bright sun patches competing for attention. When color contributes little, consider whether tone and shape carry the idea more clearly. Monochrome is an option to evaluate, rather than an automatic treatment for a gray day.
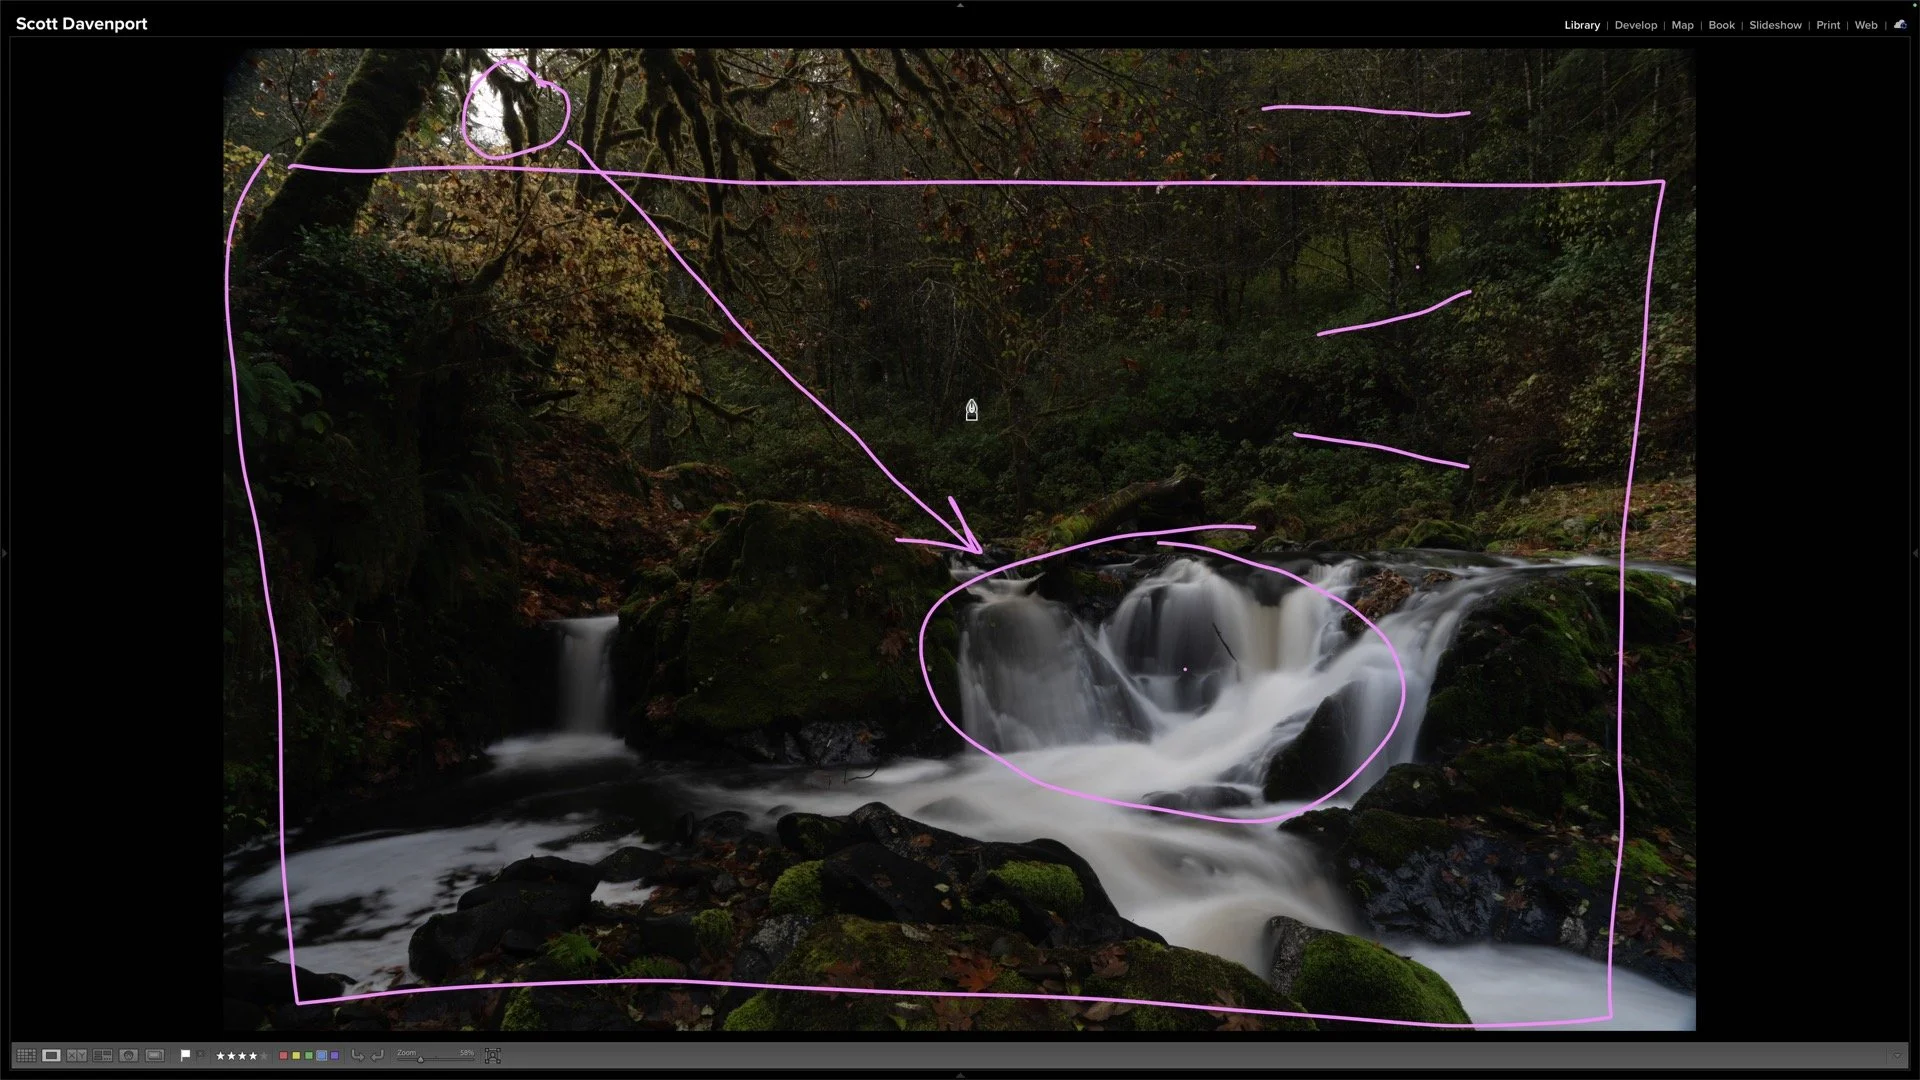
Be deliberate about the sky. A bright, featureless opening above a waterfall may pull attention away from the water. Try framing beneath it or concentrating on a smaller section of the scene. Include the sky when its texture or openness supports your idea.
This is also a reason to have alternatives when weather changes. In Making the Best of Bad Weather, I discuss approaching an outing with contingency plans. A different subject can be a productive response to different conditions.
In diffuse light, pale water and bright moss separate from the darker forest, providing structure without strong shadows.
Midday Light: Look at the Angle, Then Choose the Subject
High-angle sunlight is still directional light. It can illuminate upper surfaces while leaving areas beneath ledges or branches in deep shade.
Midday does not necessarily put the sun directly overhead. Its height depends on your location and the season. Even at solar noon, when it reaches its highest daily position, the sun may remain relatively low. Judge the actual shadows rather than the clock.
Under clear skies with a high sun, short, distinct shadows can make a broad landscape feel visually busy. A scene you hoped would have long, graceful shadows may offer little of that character.
Try looking more closely. A rock shelf casting a dark shape across pale stone, cracks in dry ground, or repeated shadows beneath small ledges may offer a composition built around pattern. High-angle light can reveal rugged surfaces when their orientation catches the light usefully.
Choose a frame in which the bright and dark areas work together. If one illuminated patch dominates without contributing to your subject, exclude it or change your viewpoint. Protect detail in the important bright surfaces, and decide how much information the shadows need. If the broad scene depends on lower light, returning later remains a reasonable choice.
There are also occasions when you photograph a place at the time available to you. Look in more than one direction before settling on a view. A slope facing the sun may show little relief, while a differently oriented slope reveals useful shadows. If scattered clouds are moving overhead, watch how their shadows change the balance of the scene. You may find an opportunity by choosing a different subject or waiting for a patch of light to reach it.
In direct daytime light, differently oriented slopes alternate between illumination and shade, separating the folds and layers of the Big Sur coast.
At Night, the Same Relationships Still Apply
Night changes the amount of available light and the sources you work with. Moonlight or an artificial source can still reach your subject from the front, side, or behind.
Identify what is actually lighting the land. Stars visible in the sky are luminous subjects; their presence does not mean your foreground has enough illumination to reveal useful detail. Likewise, a distant light may appear bright in the photograph without substantially lighting a nearby rock.
When moonlight or an artificial source does illuminate your subject, consider the same front, side, and back relationships. Look for separation between shapes, and decide whether a dark foreground provides a useful outline or simply occupies space.
Moonlight does not have one fixed appearance. Clouds can soften it, while clearer conditions can produce distinct shadows. Look for which surfaces receive light and whether their contrast with the shaded areas reveals the terrain. A test exposure can make those relationships easier to evaluate when they are difficult to see with your eyes.
If the land remains a silhouette, choose a viewpoint with a readable horizon and distinct outlines. If moonlight reveals texture, consider whether a closer composition would make that texture more prominent. Judge the result against the nighttime feeling you want the photograph to convey.
Moonlight reflects across the sea and reveals the forms of the coastal rocks, while their shaded faces preserve the feeling of night.
Make a Lighting Decision Before an Exposure Decision
Give yourself time to observe before settling on camera settings. Identify what the light is doing, then decide which part of the landscape benefits from it. Consider these questions:
Find the source. What is illuminating the main subject, and from where?
Read the surfaces. What do the highlights reveal, and what do the shadows conceal?
Choose the emphasis. Is the photograph about color, texture, shape, atmosphere, or a relationship between elements?
Adjust your approach. Would moving, reframing, changing subjects, or waiting strengthen that idea?
Then choose an exposure that records what matters. Check the important bright areas and consider whether the shadows need detail. Your exposure should support the subject and composition you have chosen.
Final Thoughts
Recognizing light gives you a starting point for making a photograph. Front lighting can support color and arrangement. Side lighting can describe texture and form. Backlighting can emphasize outlines and atmosphere. Diffuse and high-angle light offer their own possibilities when you choose subjects that suit them.
On your next outing, choose an accessible subject you can safely walk around. Make photographs from three positions without waiting for the light to change. Compare which surfaces become visible, where the shadows fall, and how the subject separates from its background.
Let those observations guide your next composition. The more clearly you understand what the light is doing, the more deliberately you can use it.
Contact Scott to commission a print or license for any images in this article.







Shape The Light – Tell Your Story
Light shapes your story, and Lightroom gives you the tools to mold it. In Mastering Light & Shadow, we’ll dive into how to read the light in your photos, control it with intention, and shape it to match the story you want to tell. You’ll walk away with practical techniques, clear workflows, and the confidence to interpret your photos and bring your creative vision to life.