How to Fade an Adjustment with Intersect in ON1 Photo RAW
If you are trying ON1 Photo RAW, the ON1 plug-ins like ON1 Effects or ON1 HDR, or upgrading your ON1 software to a newer version, please consider using my affiliate link. There is no extra cost to you and it helps support my work and this website.
Sometimes a mask selects the right subject but applies the adjustment too evenly. You may want the full effect in one part of the selection and a gradual fade as it approaches another area.
A gradient seems like the obvious solution, but adding one can introduce a new problem: the adjustment spreads beyond the subject you originally selected. This is a good example of when Intersect mode becomes useful in ON1 Photo RAW.
When One Mask Isn’t Enough
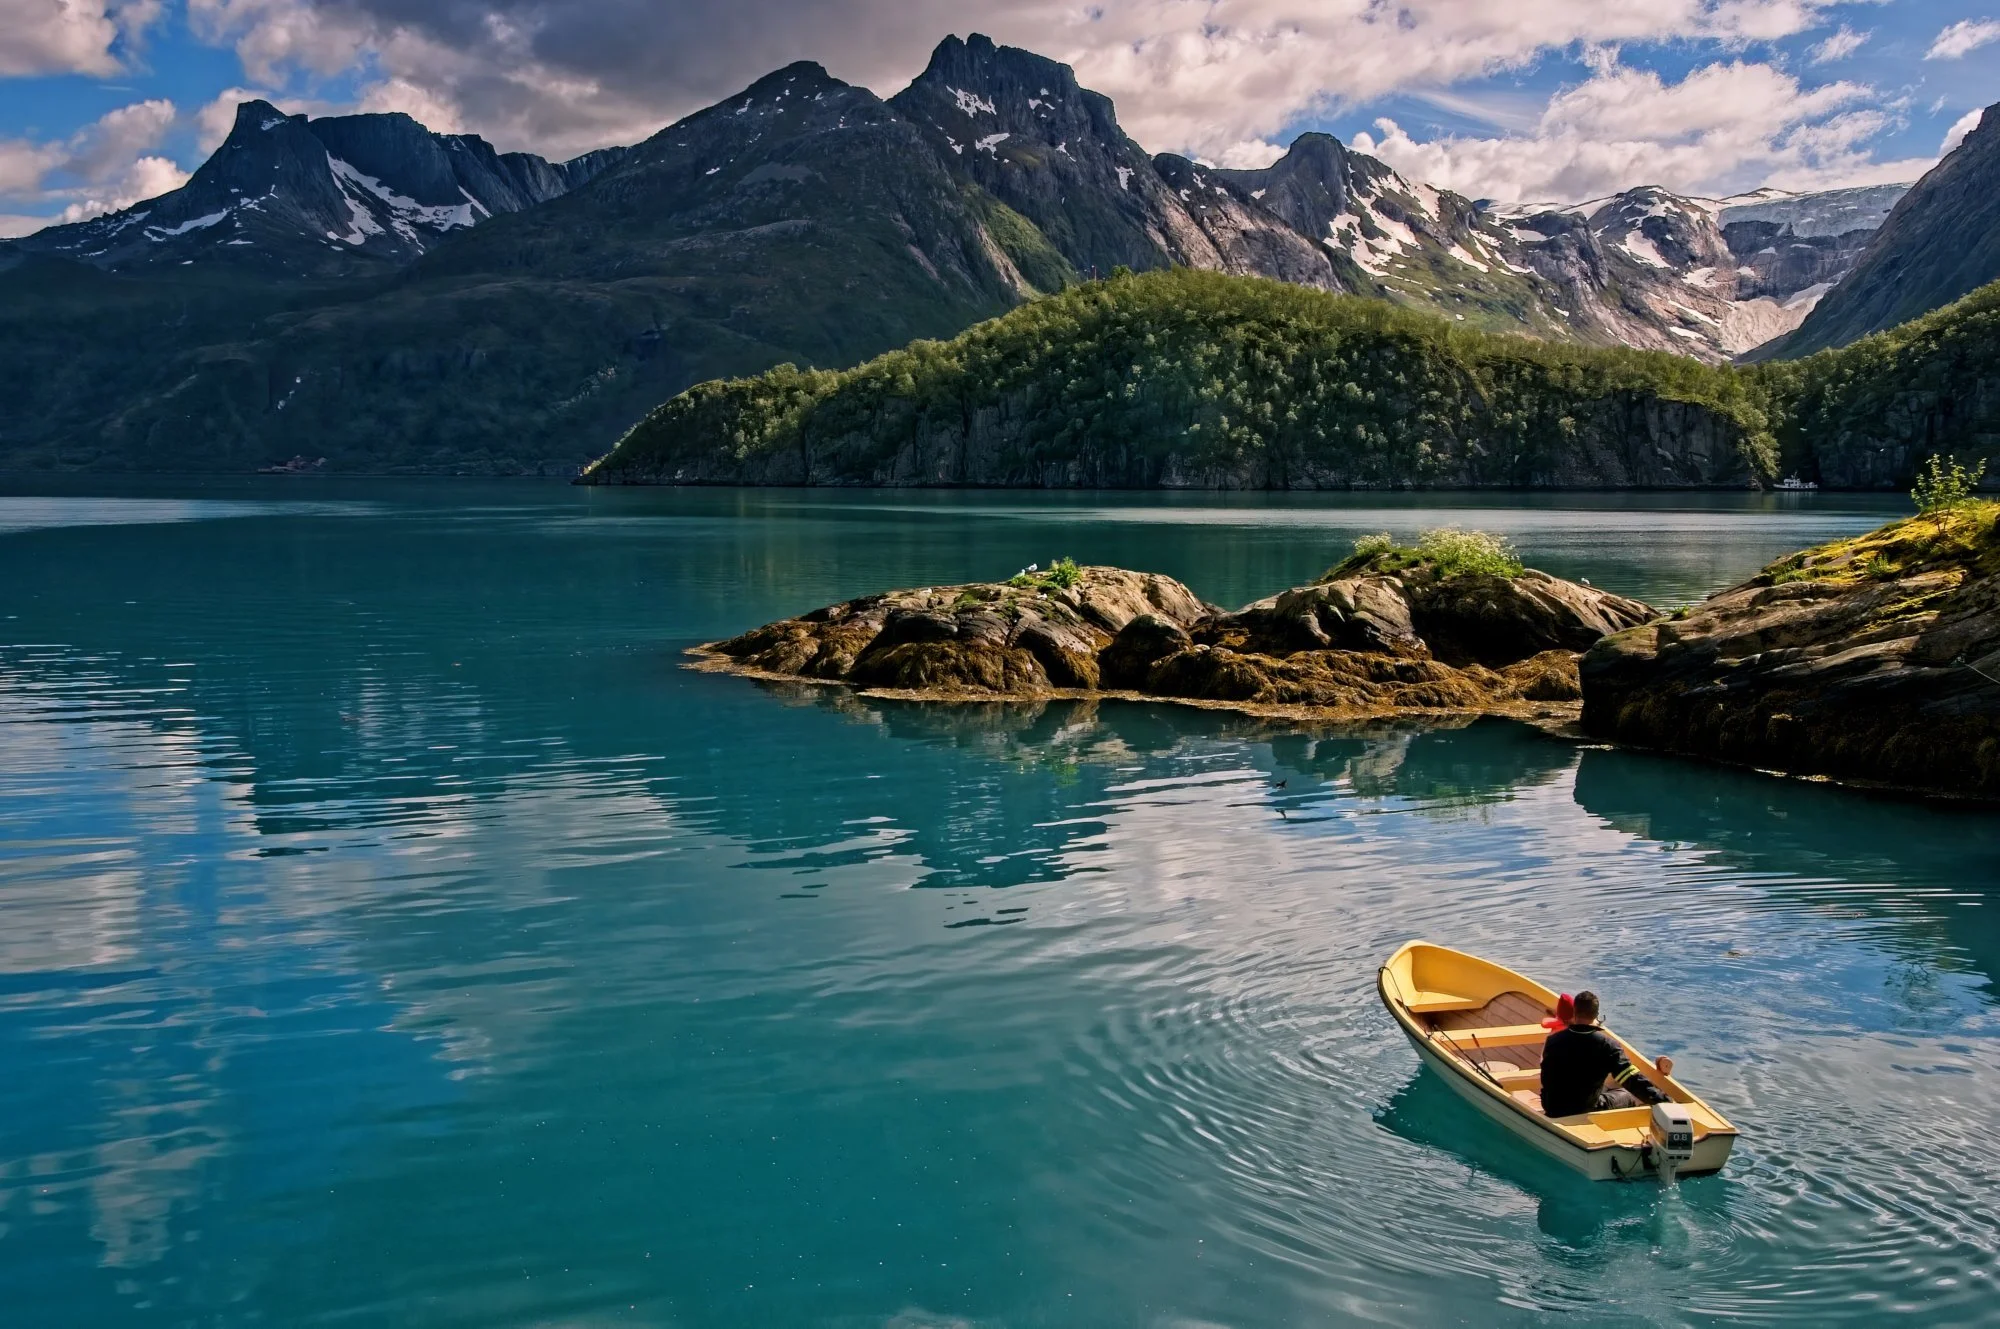
In this photograph, the mountains on the right side of the frame have a hazy, slightly chalky appearance. I want to reduce that haze, deepen the midtones, and add a little structure and contrast.
Quick Mask AI gives me a good starting point by selecting the mountain areas. The selection isn’t perfect—it extends into some of the sunlit peaks—but it isolates enough of the scene for me to build the adjustment.
If I apply the adjustment evenly across the entire mask, the right side looks good. However, I don’t want the same strength carried all the way toward the light. I want the effect to be strongest in the shadowed mountains on the right and gradually fade as it moves left.
That is a directional problem, which makes a gradient a natural choice.
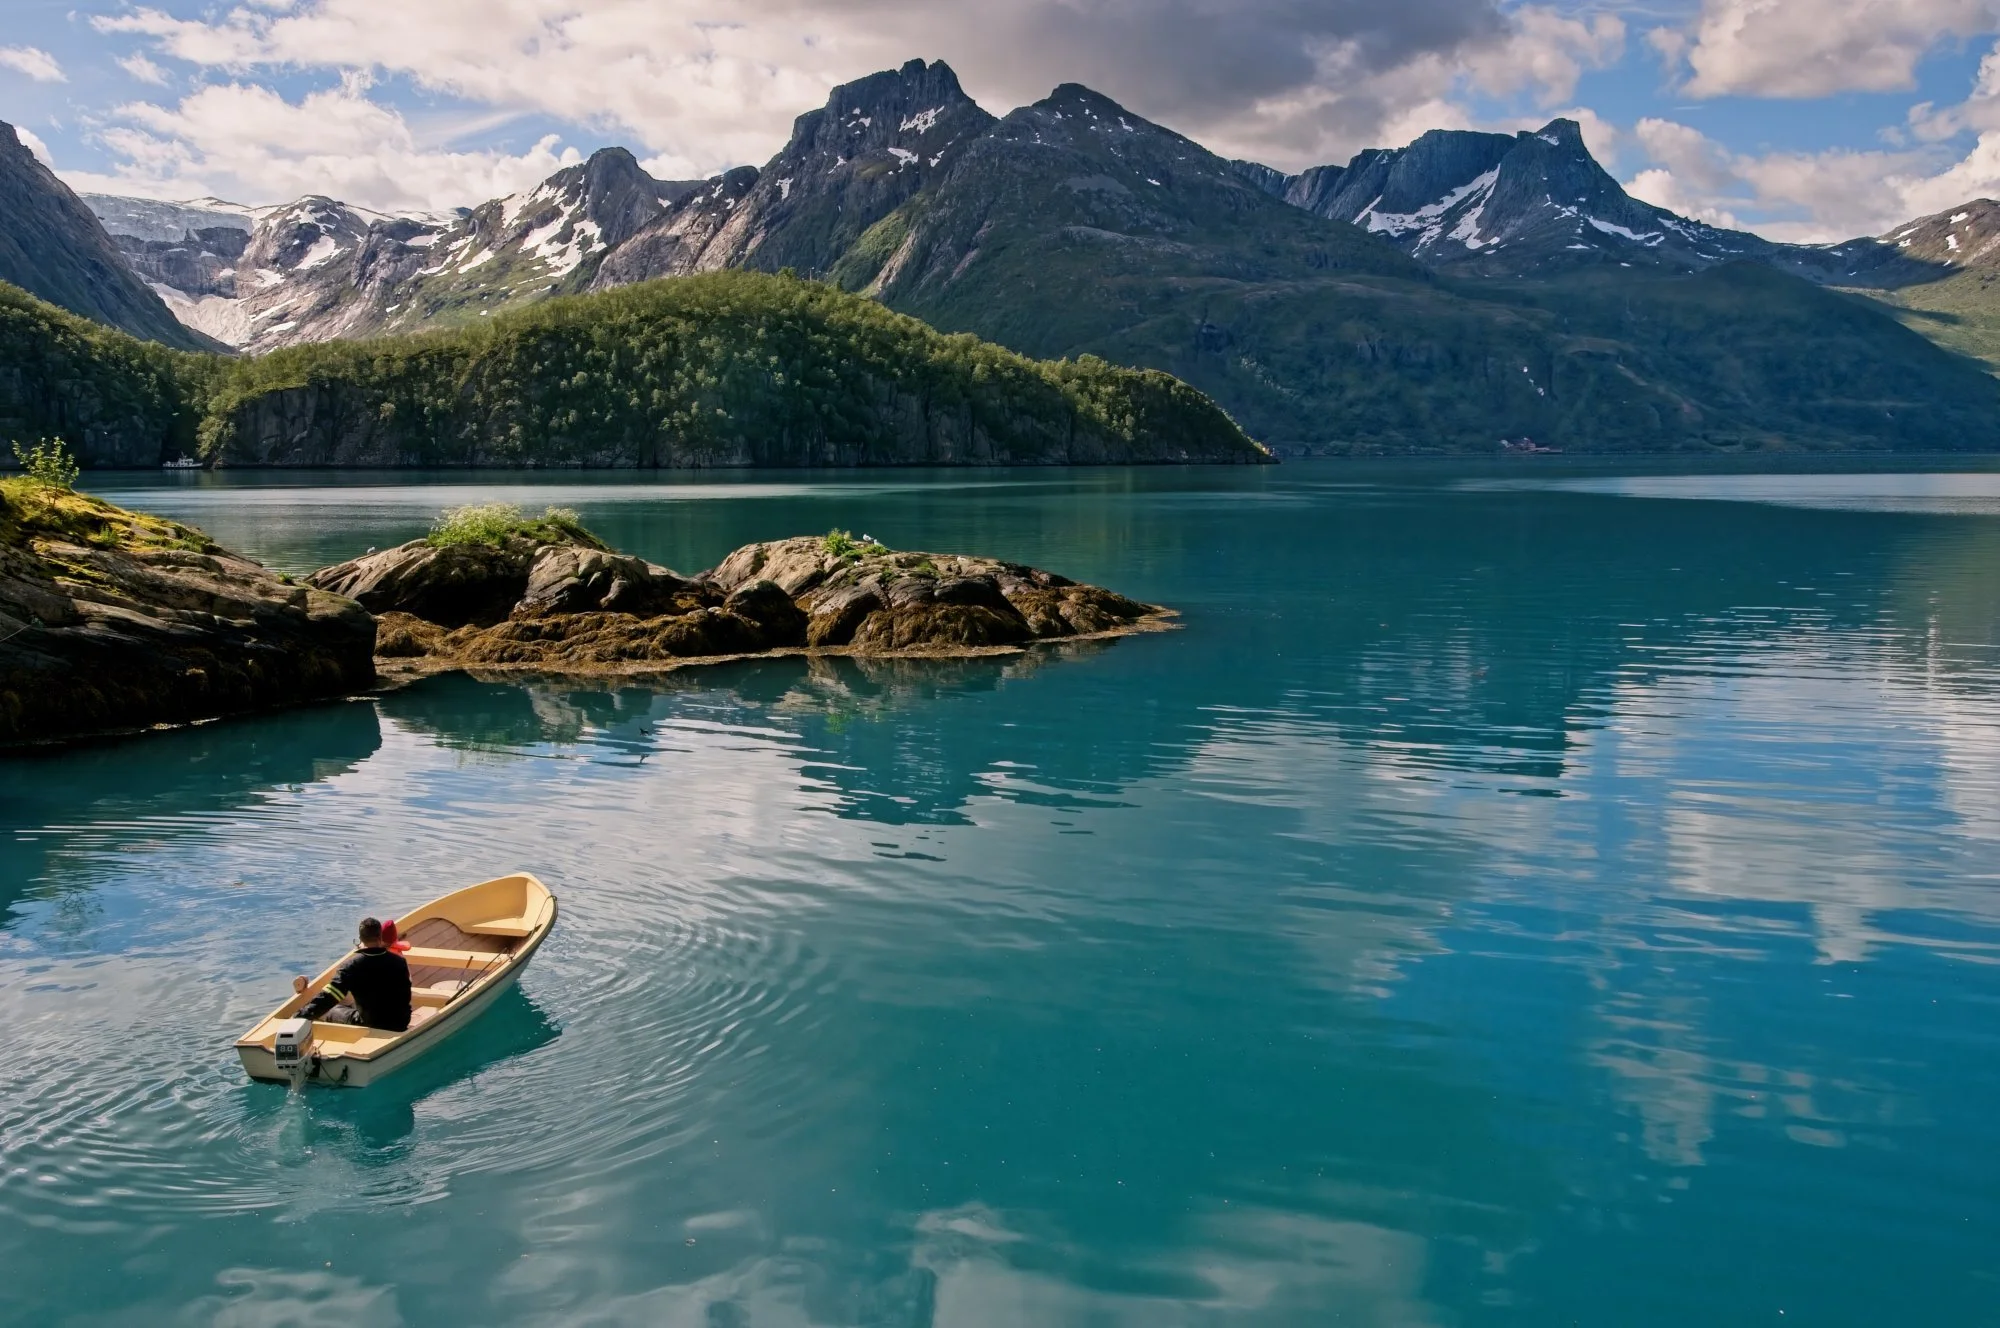
The mountains at right in this image are faded and washed out. The middle gray tones need to be reduced.
Why a Gradient Alone Doesn’t Solve the Problem
A gradient can create the fade I want, but by itself it has no understanding of the mountain selection. It simply extends across the image.
That means the same adjustments intended for the mountains can also affect the sky reflections, foreground, and other parts of the scene. The fade is correct, but the adjustment is no longer confined to the subject.
I could try to position the gradient more carefully or erase the unwanted areas afterward. However, that adds unnecessary cleanup and can make the mask more difficult to maintain.
A better approach is to let each mask do one job:
The AI mask identifies where the adjustment is allowed.
The gradient determines how the adjustment fades across that area.
Intersect combines those two instructions.
Understanding What Intersect Does
Intersect keeps only the area where two masks overlap.
Think of two overlapping circles in a Venn diagram. One circle represents the mountain selection. The other represents the gradient. Intersect discards everything except the shared area in the middle.
In this example, the Quick Mask AI selection establishes the boundaries of the mountains. The gradient establishes the direction and strength of the fade. When I change the gradient mask to Intersect mode, the adjustment is limited to the portion of the mountains that overlaps the gradient.
The gradient no longer changes the foreground or other parts of the photograph. At the same time, I can still reposition and reshape it to control exactly where the adjustment reaches full strength and how gently it fades away.
Building the Adjustment in Two Stages
I begin with the subject mask and make the local adjustments while watching the shadowed mountains. I lower the midtones, add a small amount of white and structure, reduce the haze, and introduce a little contrast.
At this point, I’m concentrating on the area where I want the adjustment to be strongest. I’m not worried yet about the fact that the AI selection reaches farther than I ultimately want.
Next, I add a gradient to the same local adjustment. I position it so the effect is strongest over the mountains on the right and fades toward the left. The gradient initially affects too much of the photograph, but switching its mode to Intersect immediately confines it to the original mountain selection.
From there, fine-tuning is straightforward. I can move the gradient, lengthen its transition, and decide where the adjustment should reach full strength without rebuilding the AI mask.
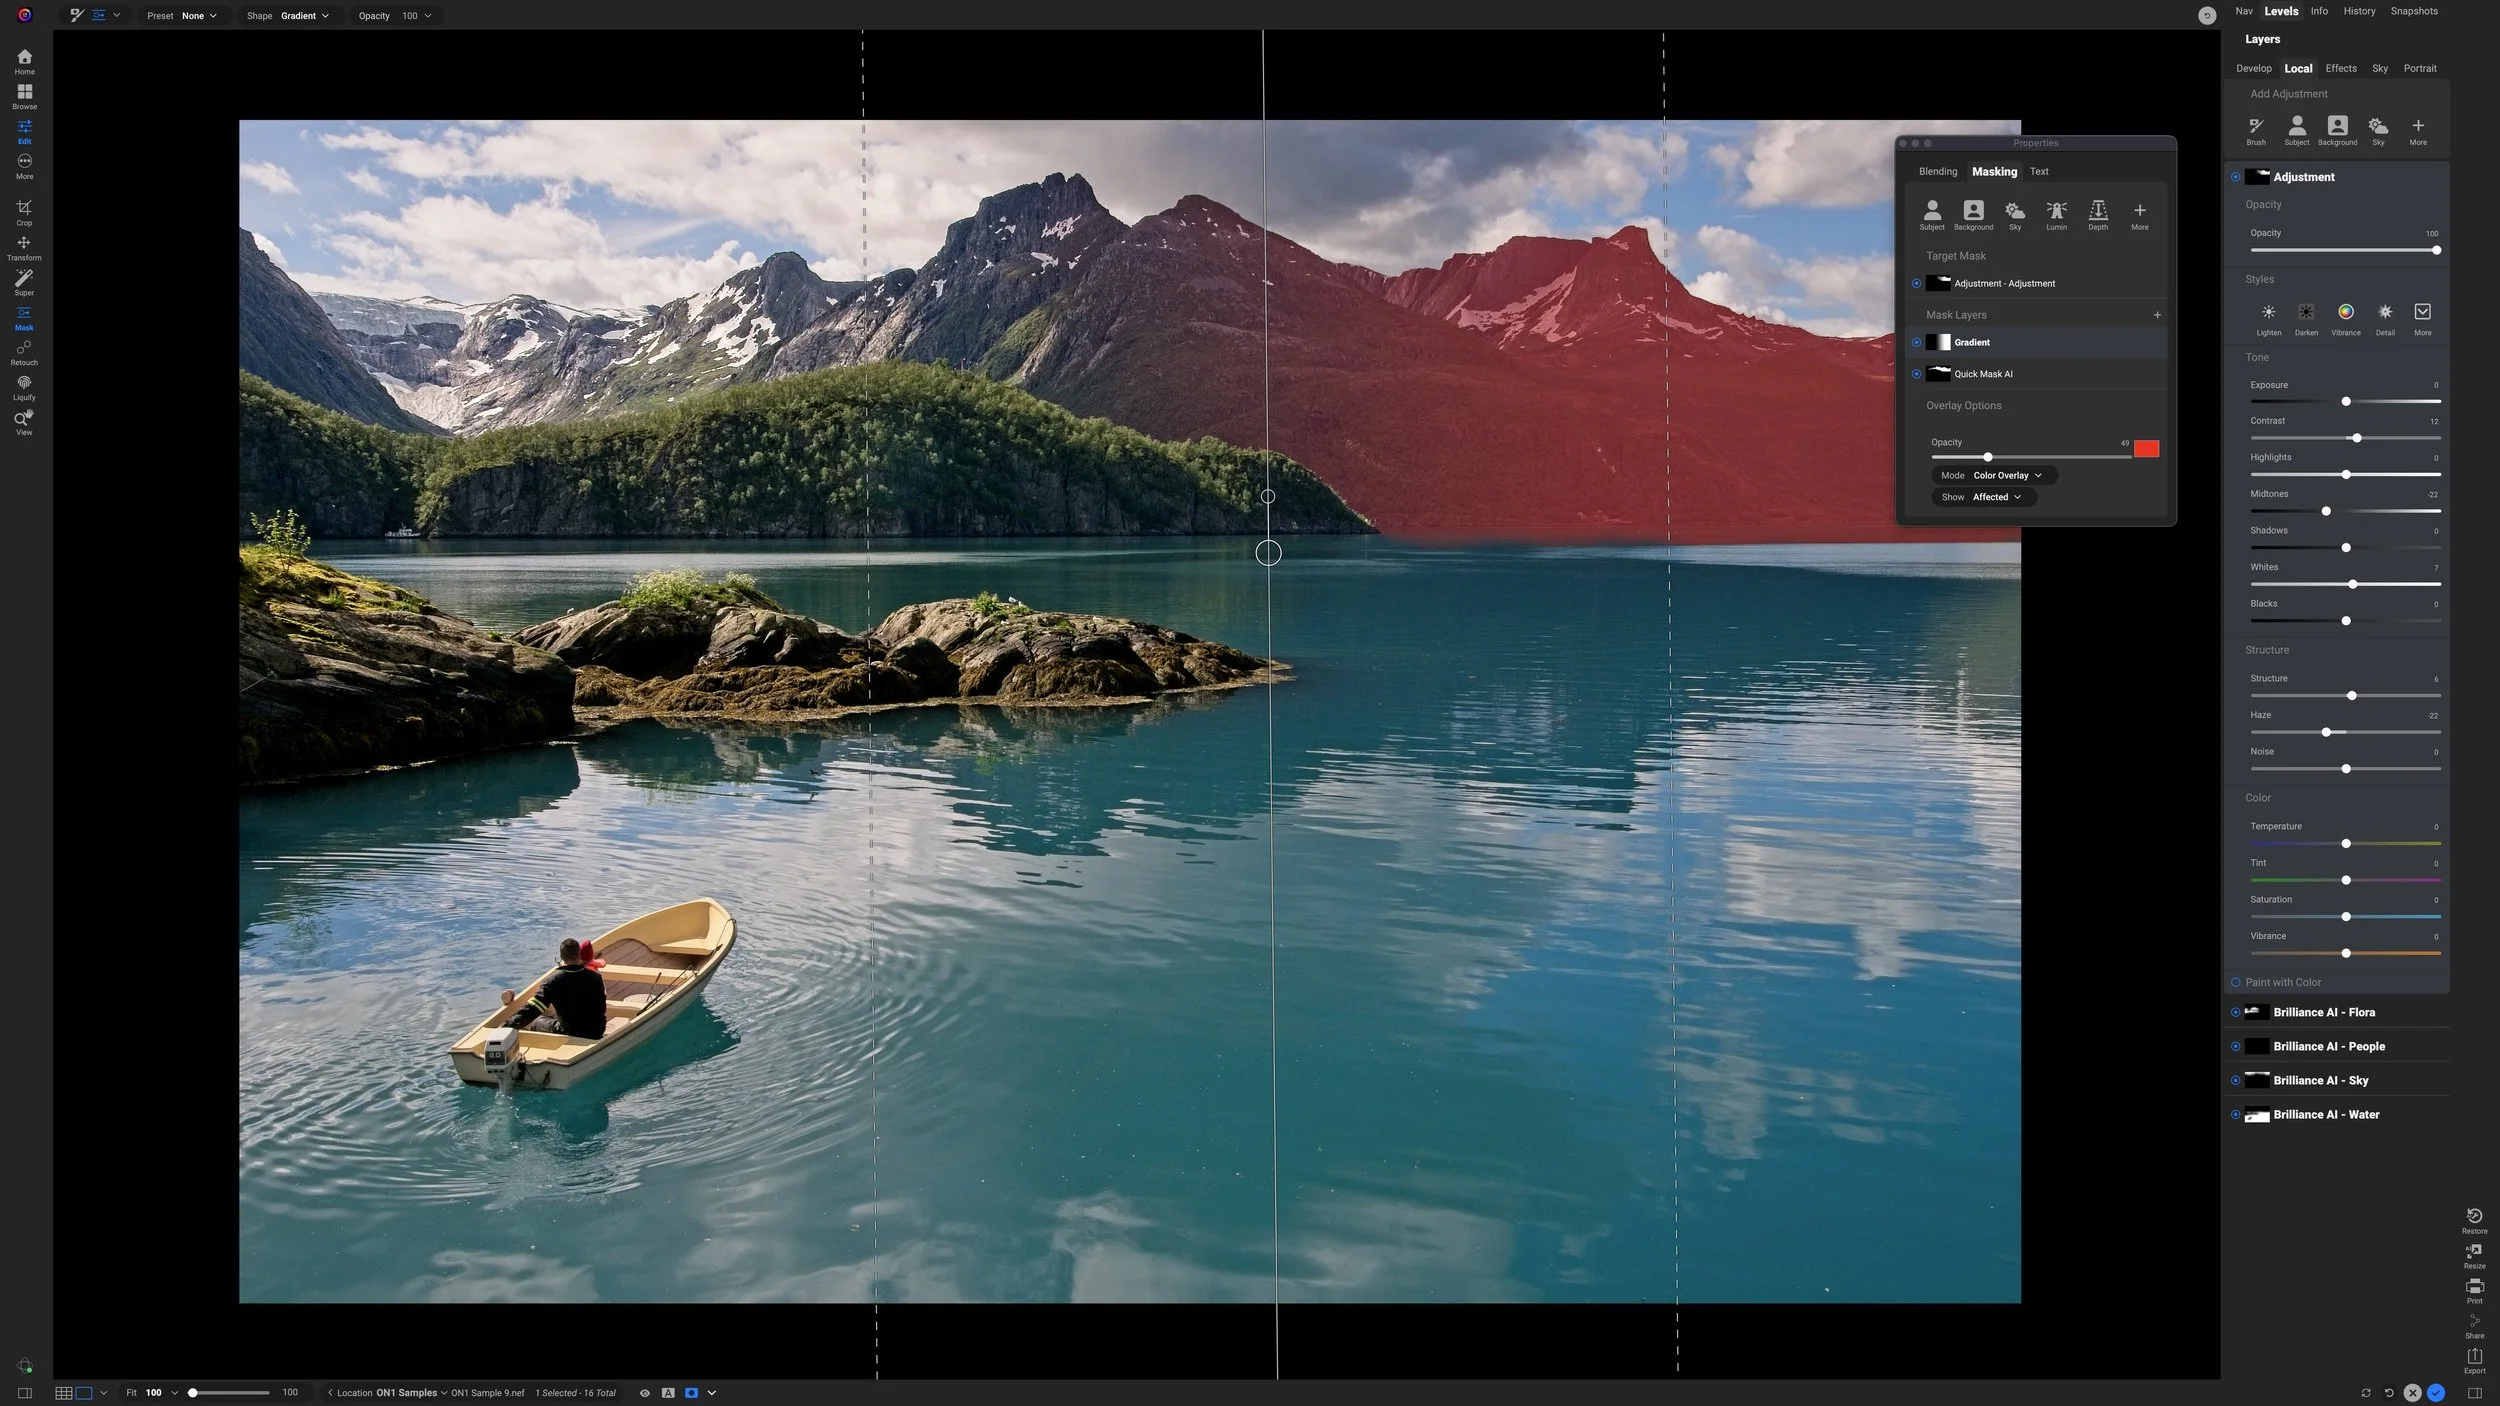
A Quick Mask AI selection intersected with a Gradient creates a mask targeted to the mountain range. The fade is easily controlled with the gradient.
Match the Mask to the Light
The real value of this technique isn’t simply cleaner masking. It gives the adjustment a better relationship with the light in the photograph.
The mountains on the right are in deeper shadow, while the peaks toward the left are receiving more light. Applying the same correction everywhere would flatten that natural transition. Fading the adjustment lets me improve the hazy area without making the entire mountain range look artificially uniform.
That is an important part of selective editing. The goal isn’t always to apply an effect perfectly evenly. Often, the photograph looks more natural when the mask follows the direction, quality, and strength of the existing light.
When to Use This Technique
Intersect is worth considering whenever one mask gives you the correct subject and another gives you the correct transition.
A subject or AI mask is useful for defining boundaries. A gradient is useful for controlling direction and falloff. A luminosity mask can isolate a tonal range. Intersect lets those different types of masks work together instead of asking one mask to solve the entire problem.
You don’t need Intersect for every adjustment. Many basic masking jobs can be handled directly with the masking tools. It becomes valuable when you need to preserve one selection while refining where or how strongly the adjustment appears within it.
Final Thoughts
The key idea is simple: use one mask to define the subject and another to shape the adjustment within that subject.
In this example, Intersect combines the precision of an AI mountain mask with the smooth transition of a gradient. The adjustment stays where it belongs, fades in a way that matches the light, and remains easy to refine.