Speed Up Your Lightroom Workflow With Accent Presets
In a post last week, I showed how Lightroom presets can include masks. In this article, let’s expand on that idea. Not only can Lightroom presets include masks, they can only include masks. That may not seem like a big deal, but it is a big deal. Why? You can build a set of thoughtfully constructed presets to speed up local adjustments you do again and again with your imagery.
Speed Up Lightroom Workflow
I am a landscape photographer and over the years have developed my particular post-processing style. There are certain techniques and adjustments I made to my landscape photos again and again. For example, I photograph water often and like my whitewash to be white. I’ll use a color range mask to select a certain tone of blue in the water, bound that mask with a radial filter, and adjust sliders like Saturation and Exposure to remove color casts from rivers, streams, and ocean foam. Lightroom’s recent updates to their masking tools have made this much easier to do and quite powerful.
As streamlined as it is, I still need to create that mask and adjust the sliders every time. Or do I? Now that I’ve discovered Lightroom presets can include masks - and only masks - I created what I’ll call an accent preset to brighten my whitewash. The preset contains only one thing: a radial mask intersected with a color range mask, that decreases saturation and slightly increases exposure. Now, I can apply the preset, position the radial, and I’m on to the next adjustment.
You might be thinking … hmm, well, that’s not much faster. It doesn’t take much to create a mask and if a custom Effect is saved, that’s a quick selection in a popup. All true … however, when thinking at scale, the time savings add up. And I don’t just mean brightening whitewash. There are other accents and local adjustments I do over and over again with a high percentage of my landscape photos. A few examples: a vignette on just the lower portion of the frame, adding negative texture and clarity to highlights to produce a glow, accent a scene with simulated off-camera sunlight. The list goes on and on. With accent presets for each of these often-executed local adjustments, my workflow is speeding up.
Less time in front of the screen, more time behind the camera.
A Directional Light Effect In Lightroom
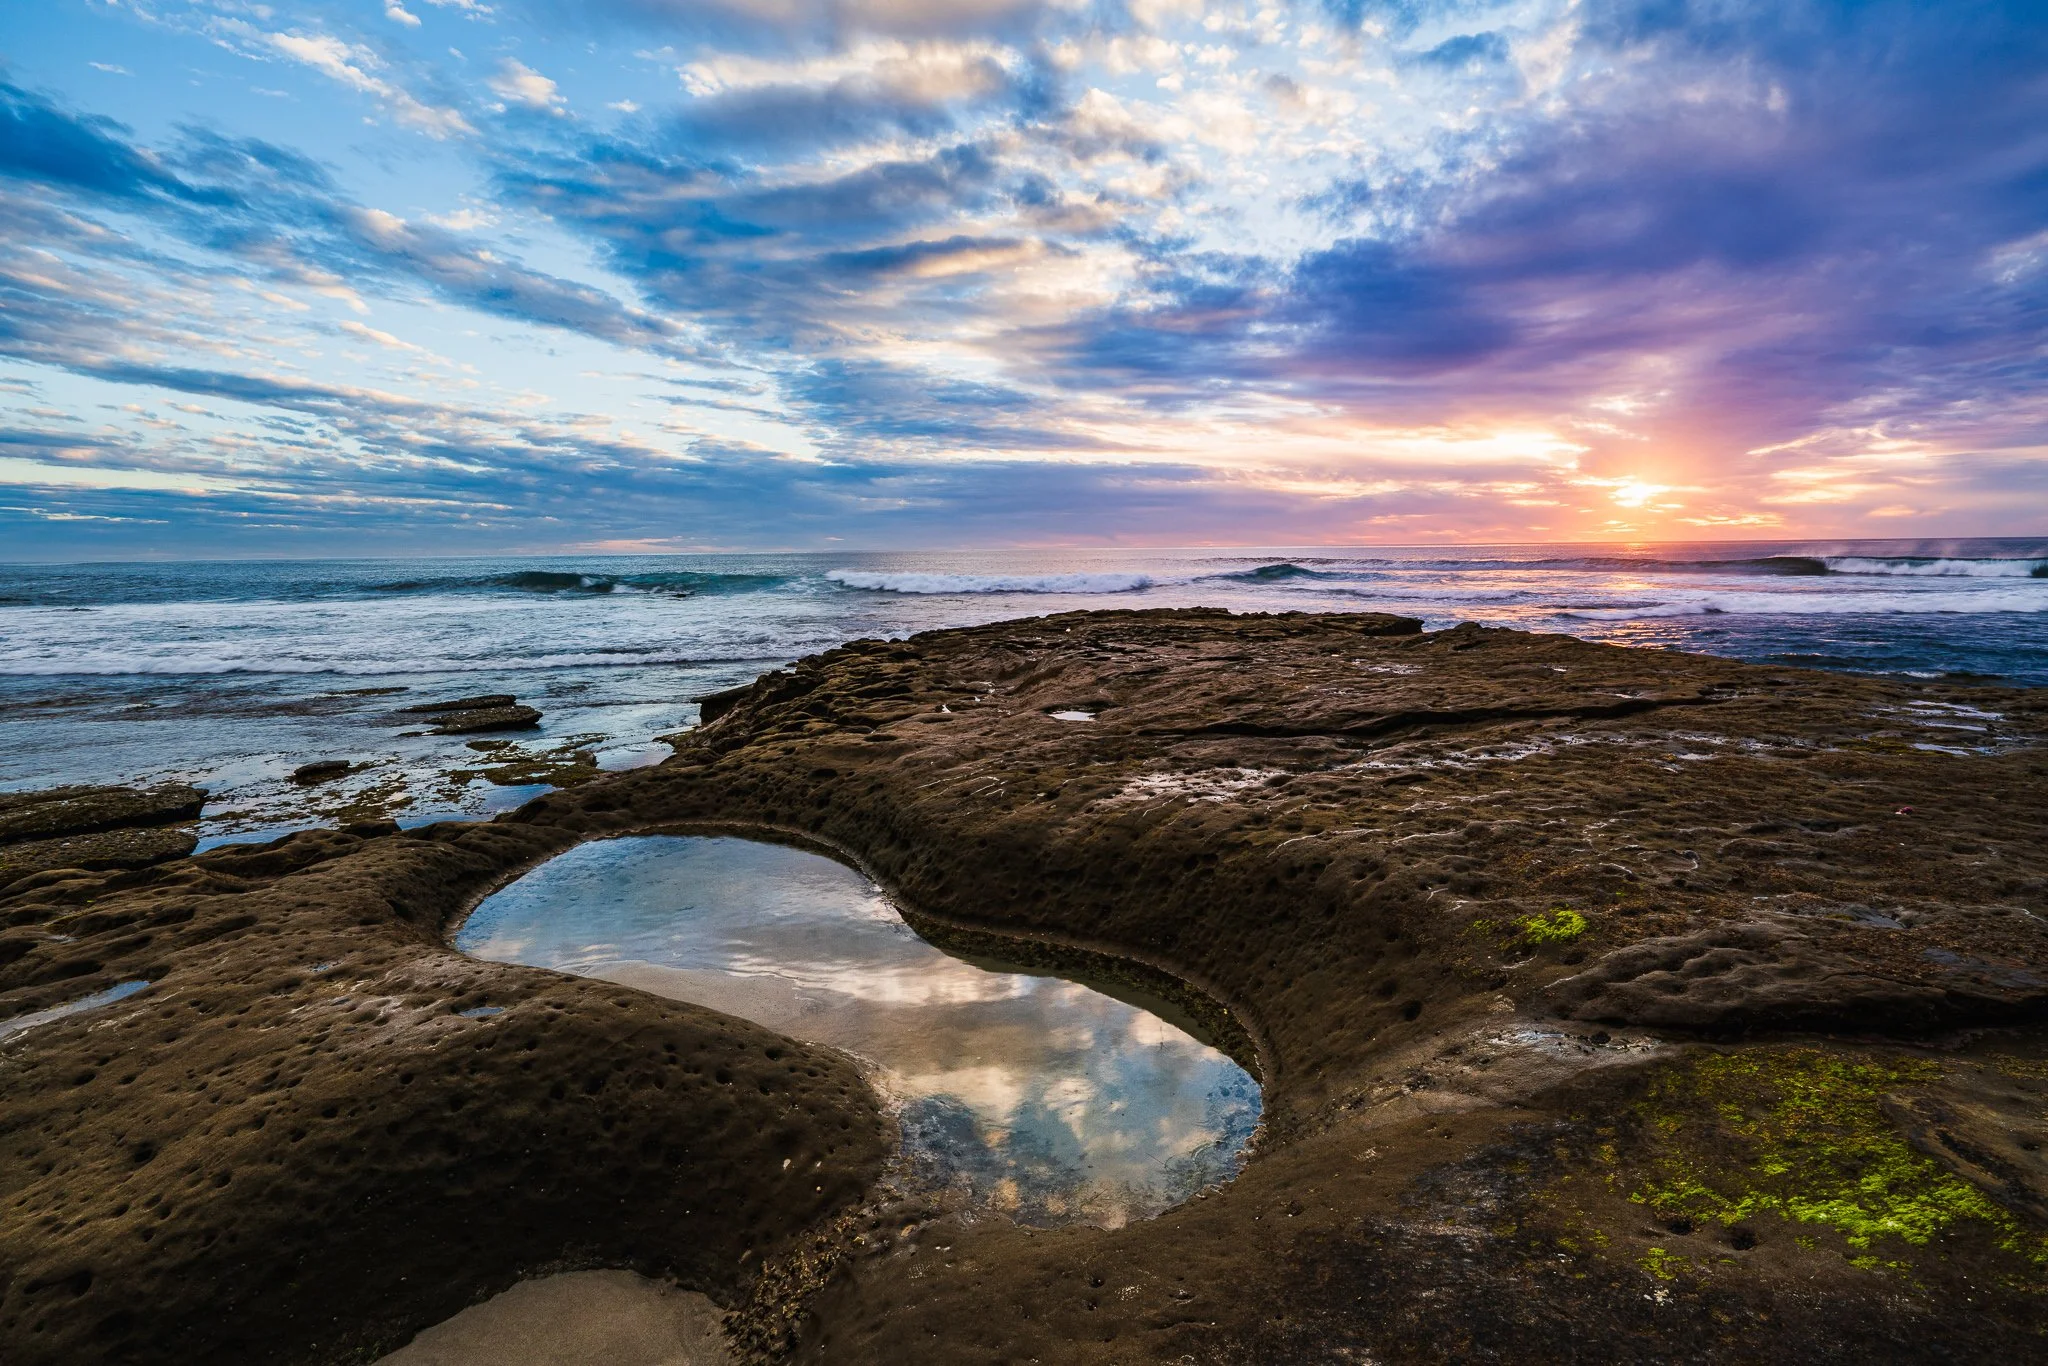
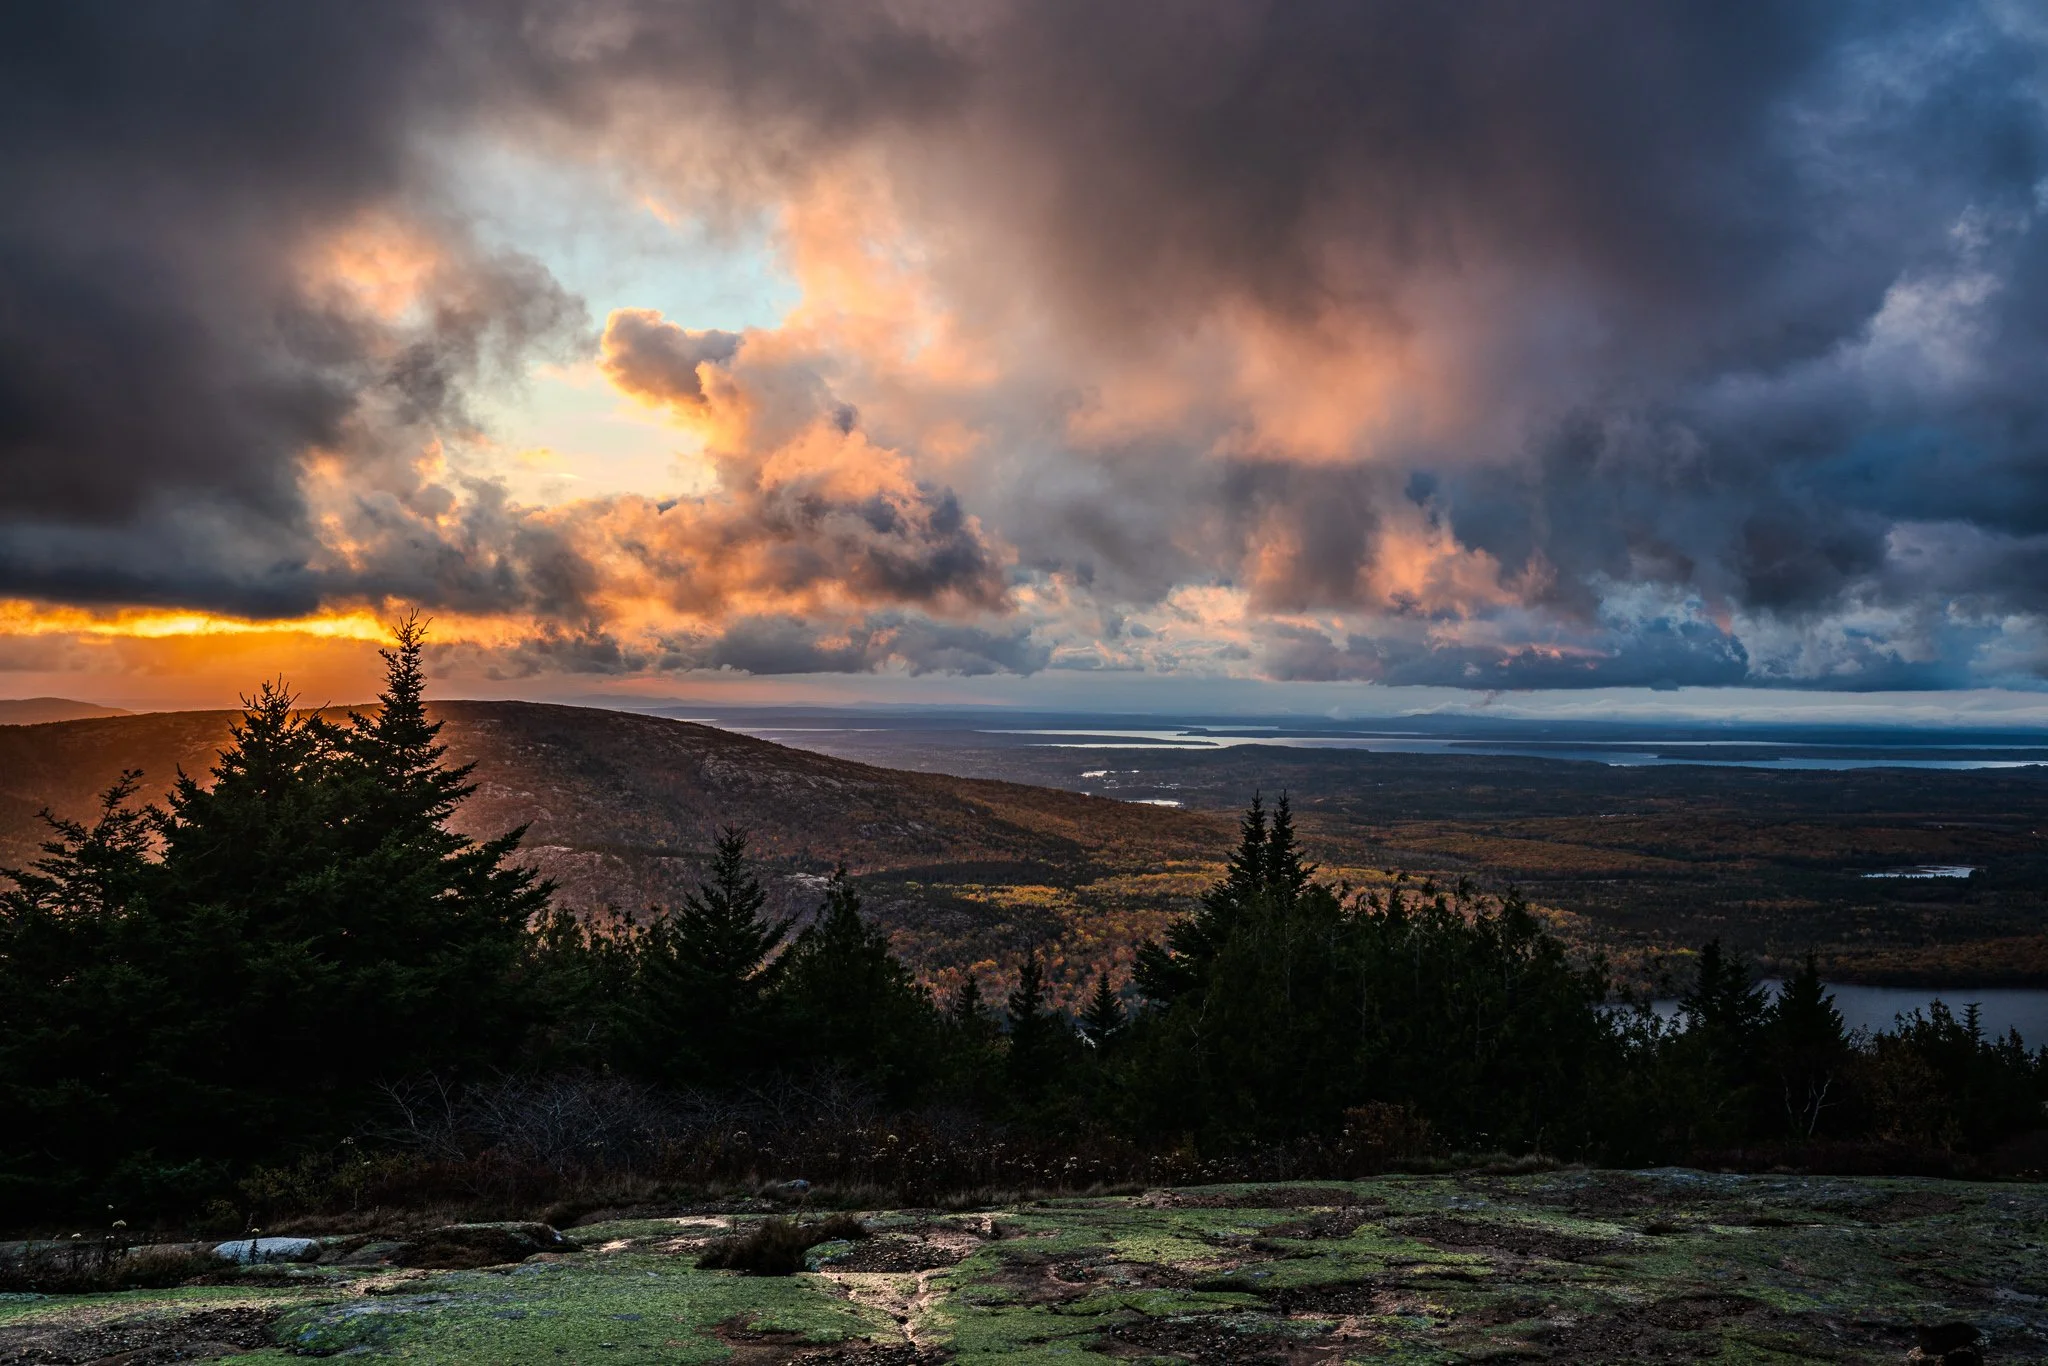
Adding directional light in a natural, nuanced way is an adjustment I add to many of my landscapes. Even in scenes that don’t have a strong source of sunlight, like this scene here. It’s a misty, overcast day, yet there is still a clear sense of the direction of the light coming in from the upper left corner. My technique for accenting directional light is to use a radial gradient intersected with a luminance range mask. The center of the radial acts like the light source and the shape and feather of the oval control the direction and falloff of the effect. To protect the shadows, I intersect the radial with a luminance range masks, limiting the effect to the midtones and highlights. The fade on the luminance range offers another control for the falloff of the lighting effect.
A combination of a radial gradient and a luminance range mask is a simple yet effective way to add directional light to a scene.
The radial gradient controls the direction and the falloff of the effect, while the luminance range mask protects deep shadows.
I use this type of technique very often. It’s effective, easy to assemble, and reasonably quick to apply. And … the look is not based on the elements in the photo. The effect is based on the tonality of the scene. That’s the key. Nothing in the mask is unique to the subjects in the photo. It is “portable” because it can and does apply to all different types of photos.
Creating An Accent Preset
Since I use this directional light accent often, I can make a preset for it and save myself steps for other photos. I encourage you to name the mask something other than “Mask 1” before creating an accent preset. Descriptive names help both in creating the accent preset and unwinding a Masks panel that has half a dozen or more masks in it.
The New Develop Preset dialog in Lightroom allows individual masks to be included in a preset. I can choose just a single mask and turn it into a reusable accent for other photos. In the example below, I’ve selected just the “Sunlight Upper Left” mask to include in my preset.
Create an accent preset by selecting just the mask that delivers a singular effect.
Applying An Accent Preset
Applying an accent presets is the same as any other preset. In the Develop module, select a preset from the Presets are in the left-hand navigator. Hovering over a preset also shows a preview of it on your photo, so you can get a quick idea of how it will look.
Properly build accent presets will blend well with all sorts of photos. Notice in the screenshots below the “Sunlight Upper Left” accent preset I created above is available. Selecting that preset adds the masks it contains to the Masking panel. Notice the resulting mask is using the tonal values of this forest scene. The accent preset include mask parameters (shapes, luminance tonal ranges) and the actual mask is built using the tonal values of the photo being edited.
Apply an accent preset just like any other preset.
The mask created by the accent preset uses the tonal and color values of the photo being edited (not the photo used to create the preset).
Build up the look of photo using multiple accent presets for a fast, efficient workflow.
From here, I can make any modifications to the settings I want. For most accent presets, all that’s required is a repositioning of any gradient shapes used in the mask. For this photo, I moved the radial gradient center from the upper left corner to the center, then rotated the radial so the warmth extends downward into the scene, simulating mid-day overhead light. You can also apply more accent presets, or the same one multiple times. Ultimately, they are masks with local slider adjustments.
Build Your Collection Of Accent Presets
Now it’s your turn. As you develop your photos, pay attention to those local adjustments that you do again and again. Think about them. Can they be done with a basic shape, a range mask, or a combination of the two? If the answer is yes, it’s a great candidate for an accent preset. Again, the key is the effect is not unique to the subjects in the photo, so typically masks with brush strokes are not good candidates for accent presets. The power of accent presets is they are “portable” and use the color and tonal information in the photo being adjusted.
Fallen Tree At Sweet Creek
Contact Scott to commission a print or license this image.