How To Invert Simple And Complex Masks In Lightroom
Update
In June 2022, Adobe added proper invert support to Lightroom. There is an Invert and a Duplicate And Invert option for simple and complex masks now. Much easier!
The latest update to Lightroom added several exciting new masking features. It is a huge update and I describe the changes in a separate article and video. Masking is an important part of shaping and crafting a final photo. Selective adjustments are what make an image reach its full potential.
A common selective adjustment sequence goes like this:
Create a mask for the primary subject, or a primary color, you want to accentuate
Apply a set of adjustments to that mask
Copy and invert the mask
Apply a different set of adjustments to the inverted mask to downplay secondary elements in your photo
With Lightroom’s new masking experience, inverting a basic mask is simple and easy. Inverting a complex mask with multiple components requires a few more steps.
Invert A Basic Mask In Lightroom
Invert a basic Lightroom mask by using the Invert checkbox in the controls on the right hand side.
Inverting a basic brush, gradient, radial, or range mask in Lightroom is a straightforward affair. With the mask selected, check the Invert box just above the sliders on the right hand side. Voila! You’ve inverted your mask. As noted above, inverting a mask often follows duplicating the mask, so a different set of adjustments can be applied to other areas of a photo.
Another use of inverted masks is when it is easier to create a mask for the area you don’t want to affect. Create the mask for the simple area, invert it, and then make adjustments. For example, if you want to affect all the colors except blue in a photo, create a color range mask for the blue tones, invert it, and then make adjustments. All tones except the blues are affected.
Invert A Complex Mask In Lightroom
With Lightroom’s new multi-component masks, a single mask can get complex. The mask may start with a gradient, and then subtract or add brush strokes. The mask may be intersected with another mask, like a range mask or another brush. How do you invert a multi-component mask in Lightroom?
The good news - you can invert these masks. It just takes a few more steps. The recipe to invert a complex mask in Lightroom is:
Start at the bottom of a complex mask.
Invert the base mask (the bottom-most component)
Select the next mask component up.
Right click and choose Convert to Add or Convert to Subtract.
Continue converting the remaining mask components.
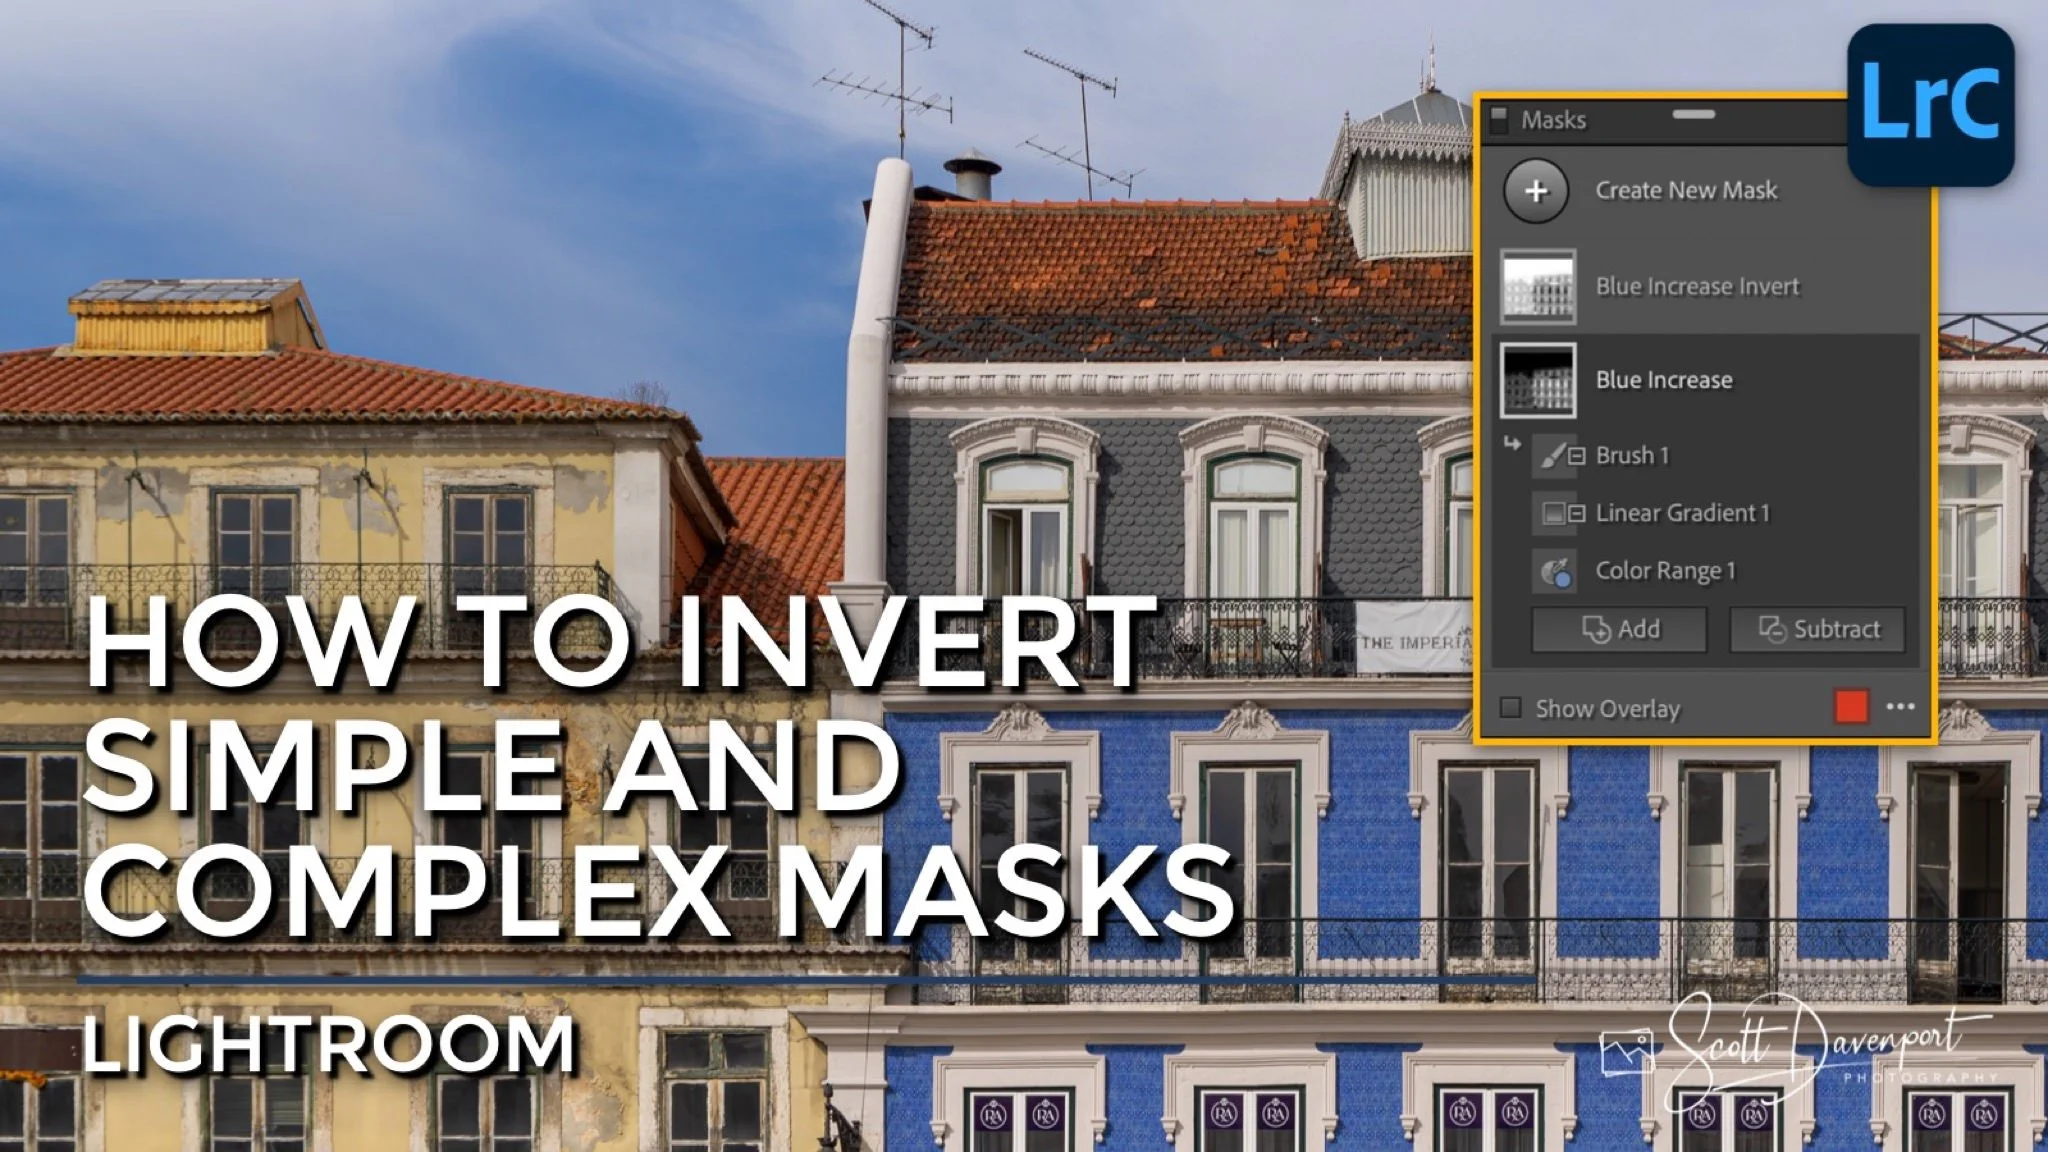
Below is an example of part of this sequence using the common “duplicate & invert” editing technique. The first mask is a Luminance Range mask affecting the blue tones that is intersected with a gradient removing the treatment from the sky. The multi-component mask is duplicated and the base component, in this example the Luminance Range mask, is inverted. Then, the component mask is switched from a subtract to an add with Convert to Add.
Note: Masks created with Intersect With result in Subtract component masks.
Step 1 - Duplicate the multi-component mask
Step 2 - Invert the base component
Step 3 - Convert the other components to Add (or Subtract)
Here is the original mask and the inverted mask side by side. Indeed the mask is inverted and all of the nuance and subtlety of the Luminance Range mask is maintained.
The first complex mask
The duplicated and inverted complex mask
I Hope Adobe Makes This Even Eaiser
I am hopeful that in a future update to Lightroom, Adobe will add an Invert option into the right-click menu for a multi-component mask. Lightroom can do all of the inverting and converting for us and streamline this workflow down to a couple of clicks.
In the meantime, photographers can invert masks in Lightroom. Use the recipe.
The Imperial Guesthouse Lisbon
Contact Scott to commission a print or license this image.