
If you are trying Luminar or upgrading from a prior version, please consider using my affiliate link. There is no extra cost to you and it helps support Luminar tutorials like this one. Ready to buy? Use the offer code SDP10 at checkout and Save US$10!
A little softness can change the feeling of a landscape photograph. Mist can become more atmospheric, clouds can feel a little dreamier, and the image can take on an almost ethereal quality.
The problem is that softness applied everywhere can also remove the very detail that makes a landscape interesting. If the mountains have jagged rocks and strong texture, I don't necessarily want to soften those areas along with the mist.
That's the approach I took with this landscape photograph. I wanted to make the mist at the base of the mountains and the sky a little dreamier while keeping the mountains crisp. Luminar's Mystical tool gives me a good way to create that effect, but the important part isn't simply turning Mystical up. It's deciding where the effect belongs.
Softness Is Another Kind of Contrast
When we talk about contrast in photography, we often think about light and dark or perhaps complementary colors. Those are important, but they're not the only kinds of contrast available to us.
Texture can contrast with softness.
In this photograph, the mountains have a strong, rugged character. The mist and sky are naturally softer. By emphasizing those differences, I can create a visual relationship between the textured and ethereal parts of the image. That's why I don't want the Mystical effect across the entire photograph. The goal isn't to make everything dreamy. The goal is to make selected areas feel dreamy while allowing the mountains to retain their visual strength.
Why Applying the Effect Everywhere Doesn't Work
It's tempting to find an effect you like and apply it globally. When the effect looks good, more of it can seem even better. But that's not always how photographic adjustments work.
Luminar's Mystical tool diffuses the image and creates a softer appearance. Pushing it strongly can produce exactly the kind of atmosphere I'm looking for in the mist. At the same time, that diffusion also affects detail. For this photograph, I want the viewer's attention to land on the crispness of the mountains. Softening those areas would remove some of the contrast I'm trying to create.
This is where selective editing becomes useful. Instead of asking, "How much Mystical should I apply to this photograph?" I'm asking, "Where should this effect appear?"
Use Masking to Put Softness Where It Belongs
I started by pushing the Mystical adjustment farther than I ultimately wanted. This makes it easier to see what the tool is doing and gives me something meaningful to control with the mask. Then I used Luminar's AI masking to identify the mountains. That gave me a useful starting point for separating the areas I wanted to keep crisp from the areas where I wanted the softer effect.
The mask doesn't have to be perfect immediately. I can refine it with a brush, removing the effect from areas of the foreground and adding a little more where needed around the mist and hills.
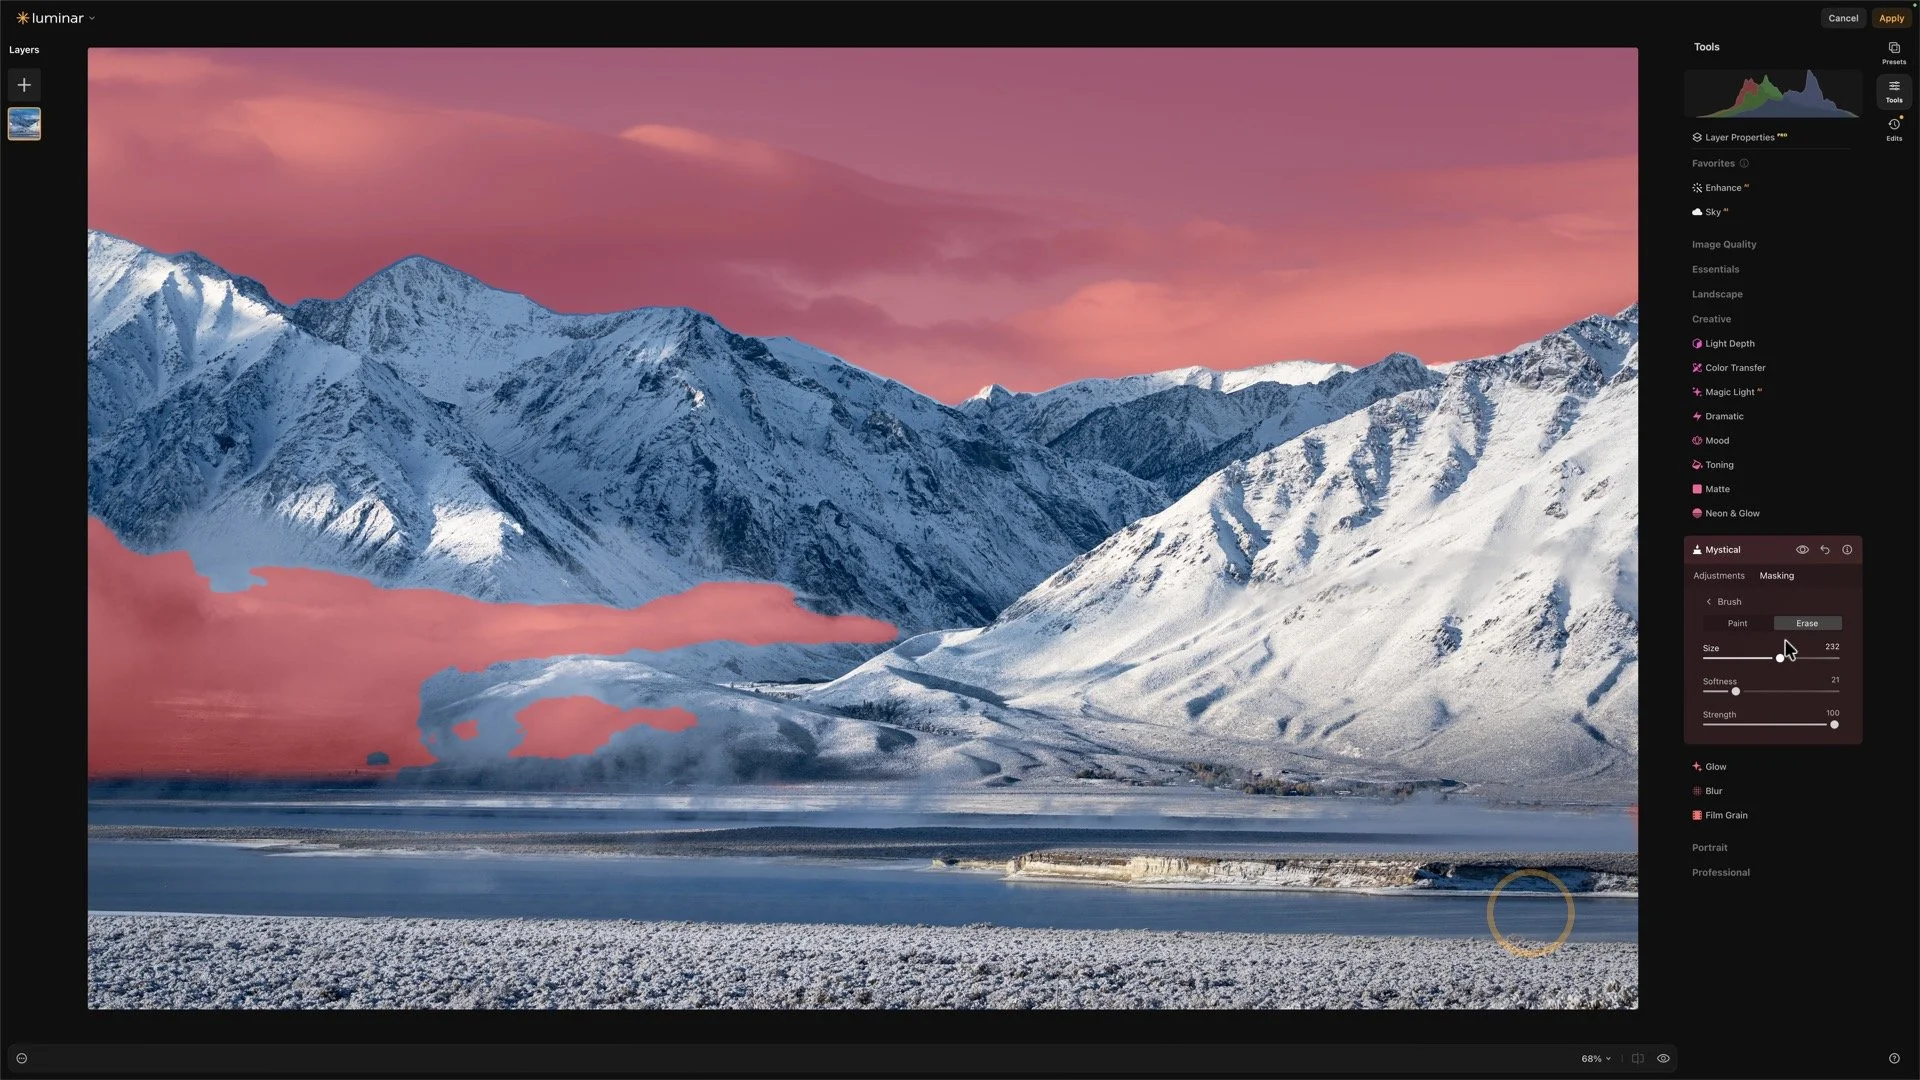
Using Mask AI to apply Luminar's Mystical adjustment to just the mist and sky
The important decision here isn't which masking option I clicked. It's the reason for the mask: I want different parts of the photograph to have different visual qualities. That approach also makes the adjustment easier to control. Rather than weakening Mystical until the whole photograph looks acceptable, I can keep the stronger effect where it helps and remove it where it doesn't.
Watch the Edges When Masking
There's one detail worth paying attention to whenever you combine strong adjustments with masks: the edges. In this image, applying Mystical around the mountains created a subtle halo along the top edge. The effect was being applied right up against the transition between the mountains and sky, and that created an edge that didn't look natural.
This is a common thing to watch for with masked adjustments, particularly when AI selections or edge detection are involved. A mask can look reasonable at first glance and still need some refinement when you zoom in.
Luminar's Shift Edge control was useful here. Rather than simply feathering the mask, I could shift the edge farther into the mountain area. That allowed the adjustment to stay away from the boundary and eliminated the unwanted halo.
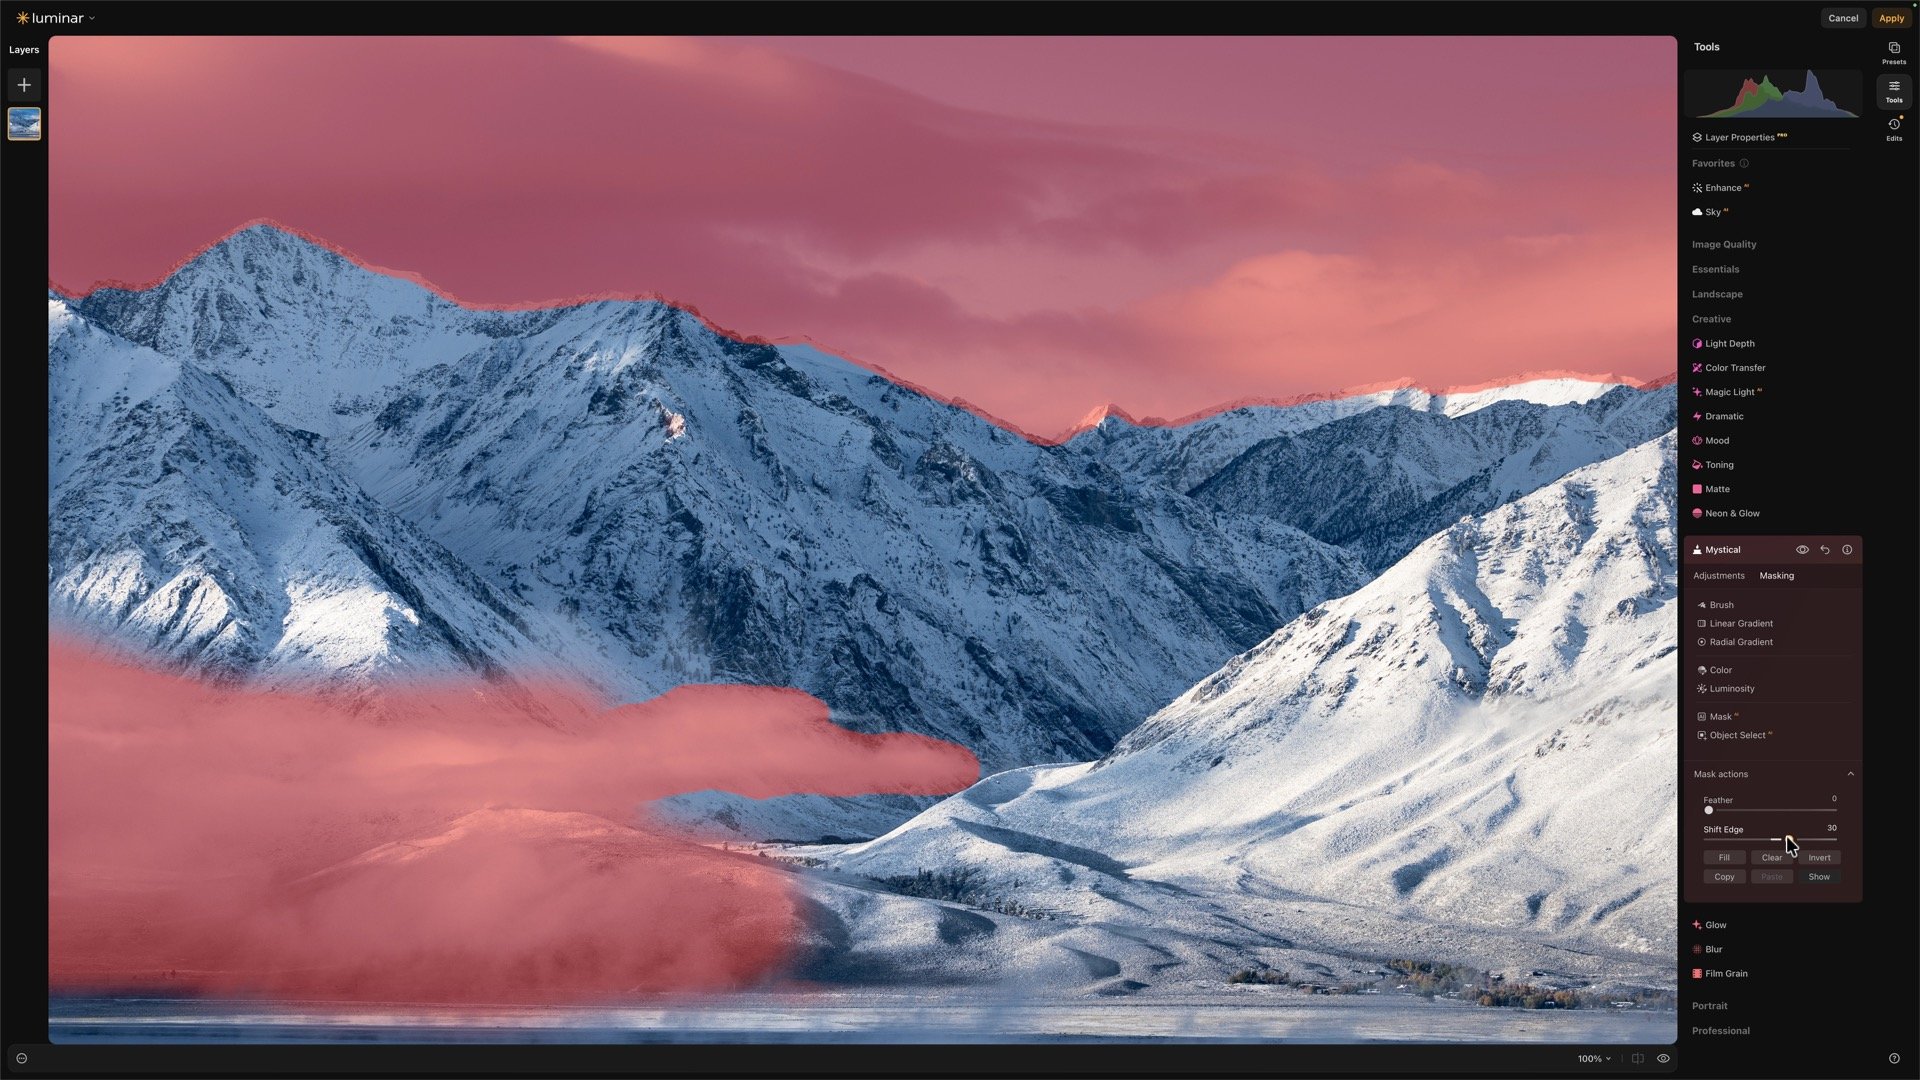
Watch for halos! Use the Shift Edge slider to expand or contract the edge of the mask.
Bring Back Texture Where You Need It
Once the softer areas were established, I could reinforce the other side of the contrast by adding some structure to the mountains. I used Structure AI and again masked the adjustment to the mountains rather than applying it to the entire photograph. The sky doesn't need to become extra crisp simply because the mountains do.
The combination is what makes the effect work. The mountains have texture and definition, while the mist and sky have a softer quality.
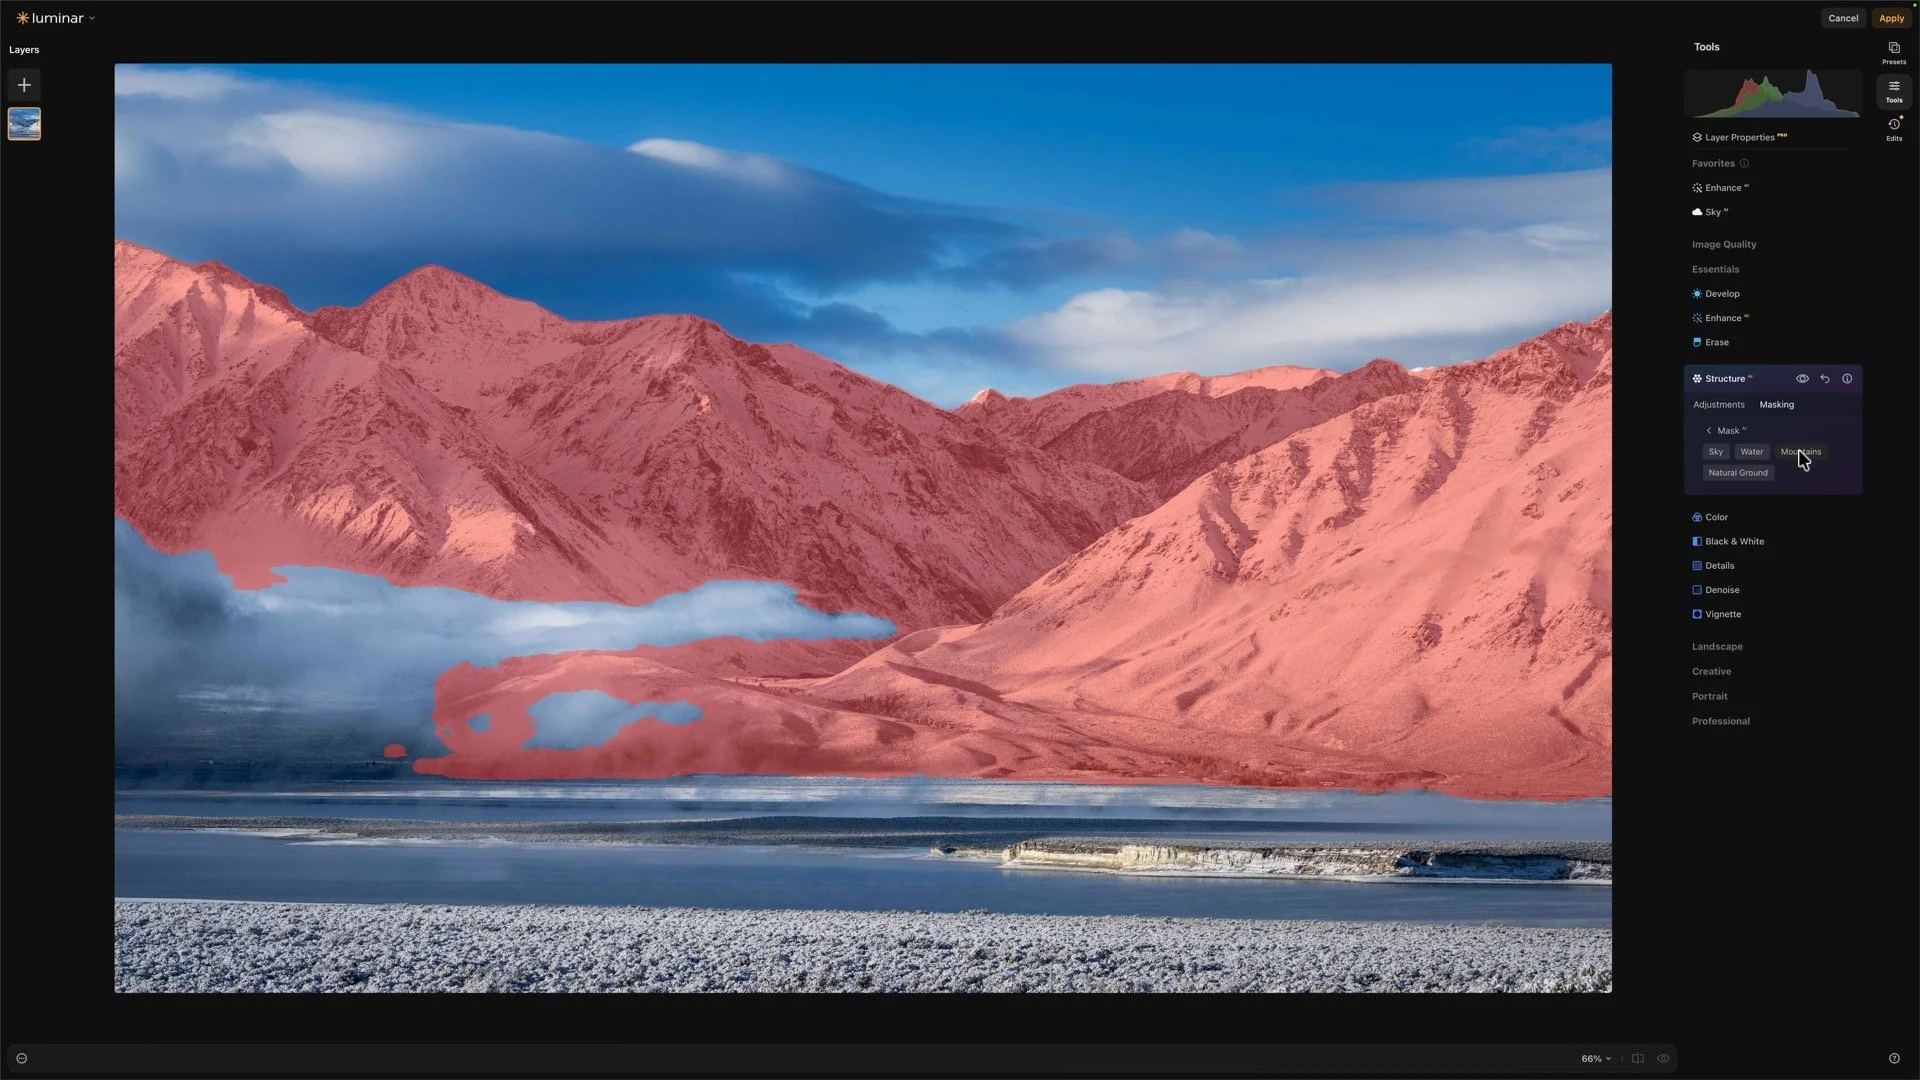
Adding structure to the mountains creates visual contrast of detail against softness.
This is a useful way to think about creative editing. You don't always need to make the entire photograph sharper, softer, brighter, darker, or more colorful. Sometimes the stronger result comes from making those qualities different in different parts of the image.
Final Thoughts
The important lesson for me isn't simply that Luminar's Mystical tool can create a dreamy look. It's that the effect becomes much more useful when I control where it appears.
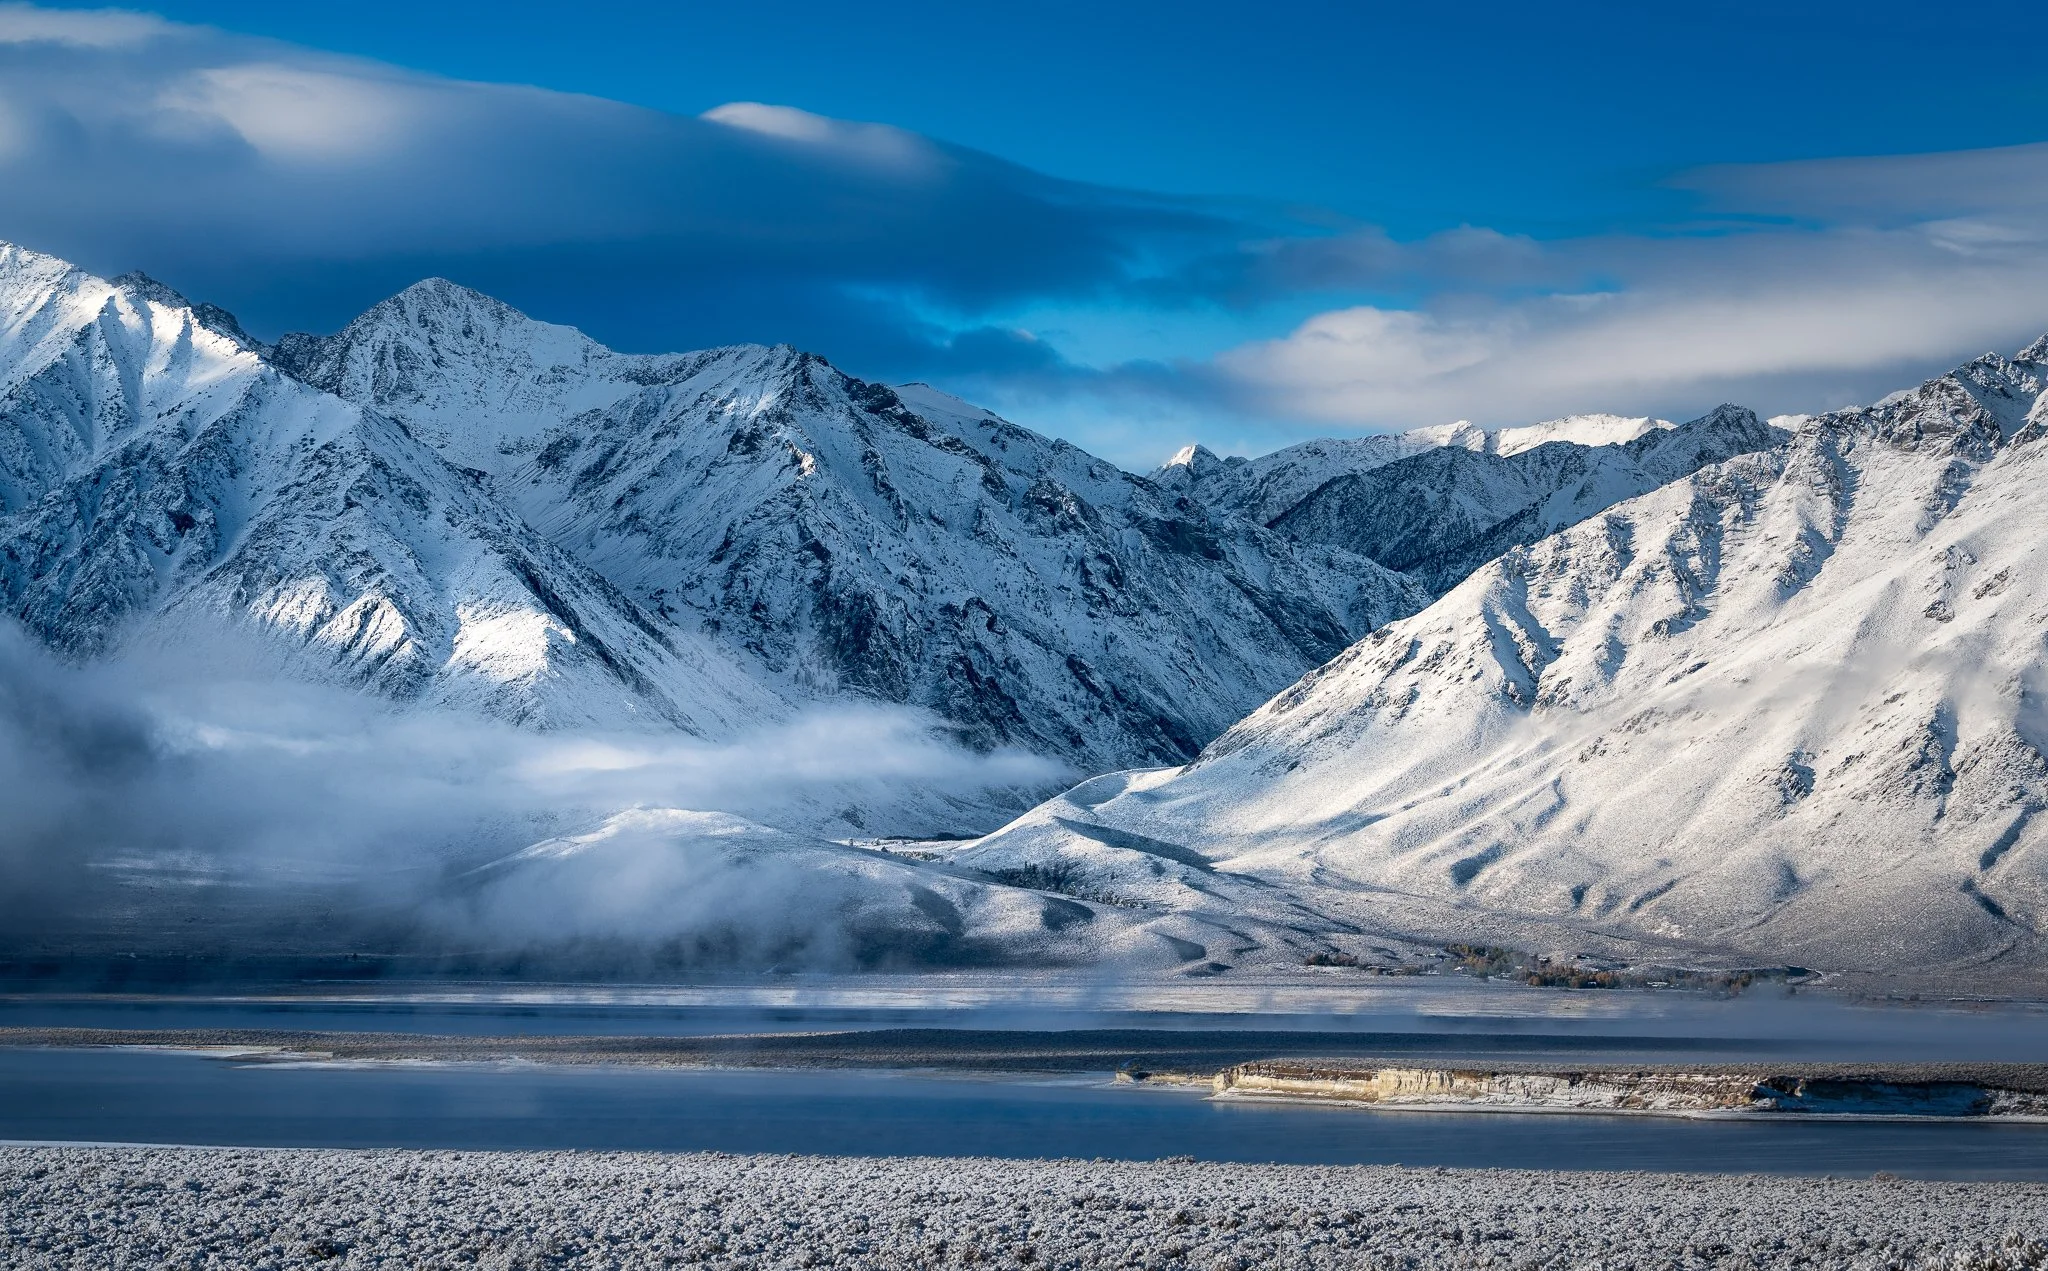
For this landscape, I wanted the mist and sky to feel soft and ethereal while the mountains remained crisp and textured. That difference creates another form of contrast—texture against softness—and it helps give the photograph more visual interest.
So when you find an effect that you like, don't automatically apply it everywhere. Ask where that effect supports the photograph and where it might work against it.
A selective adjustment can often do more for an image than a stronger global adjustment.
Eastern Sierra, California, Oct 2025
Contact Scott to commission a print or license this image.





A cityscape can have plenty of bright lamps and still feel a little flat. Luminar Magic Light tool can bring more atmosphere to those artificial light sources, but applying the same glow everywhere may pull attention away from the parts of the photograph that matter most.
The useful decision is where to let the light shine and where to hold it back. A modest starting adjustment, followed by a few selective changes, can give the scene more life while keeping its lighting believable.