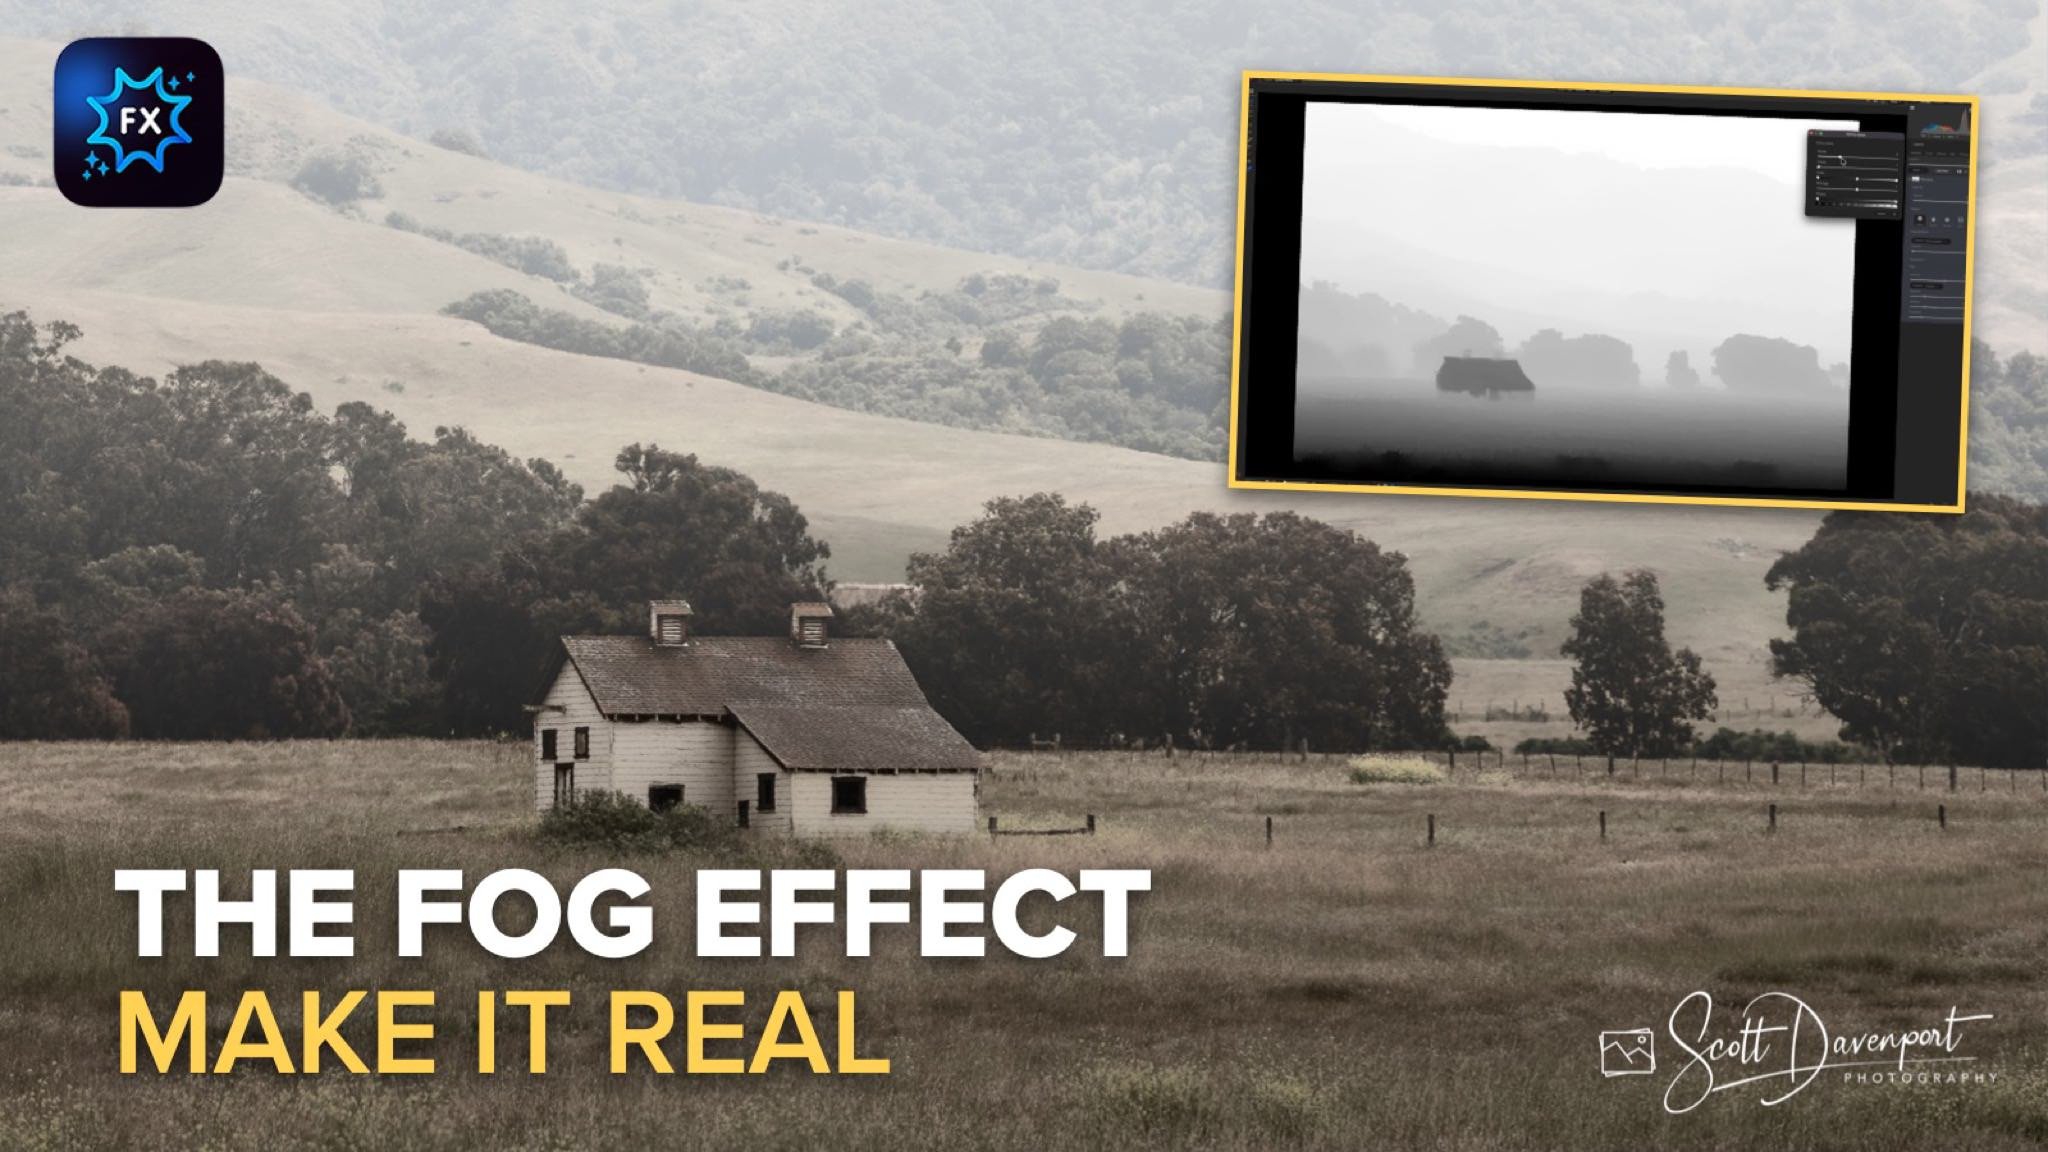
Add Realistic Fog in ON1 Effects
If you are trying ON1 Photo RAW, the ON1 plug-ins like ON1 Effects or ON1 HDR, or upgrading your ON1 software to a newer version, please consider using my affiliate link. There is no extra cost to you and it helps support my work and this website.
There’s a point where adding fog stops being about sliders and starts being about control.
In this tutorial, I’m working with the Weather filter in ON1 Effects to introduce a foggy mood into a landscape. It’s a solid tool on its own—plenty of controls for distance, transition, and overall look. But if you stop there, the effect can feel a bit uniform. Fog doesn’t behave that way in the real world. It builds, it fades, and it interacts with depth in the scene.
That’s where masking comes in—specifically the Depth Mask. This is what lets us take a good effect and shape it into something believable.
Start with the Weather Filter
The first step is straightforward: add fog using the Weather filter. I typically:
Start with a fog-based preset (like “Foghorn”)
Turn off any extra preset styling to keep things clean
Adjust the Distance so the fog sits where I want it in the scene
Increase the Transition for a smoother fade
At this stage, the effect is doing its job—the entire scene gets a foggy treatment. But that’s also the problem. It’s too even. The midground isn’t separating from the background the way I want, and the subject—this small farmhouse—needs more attention.
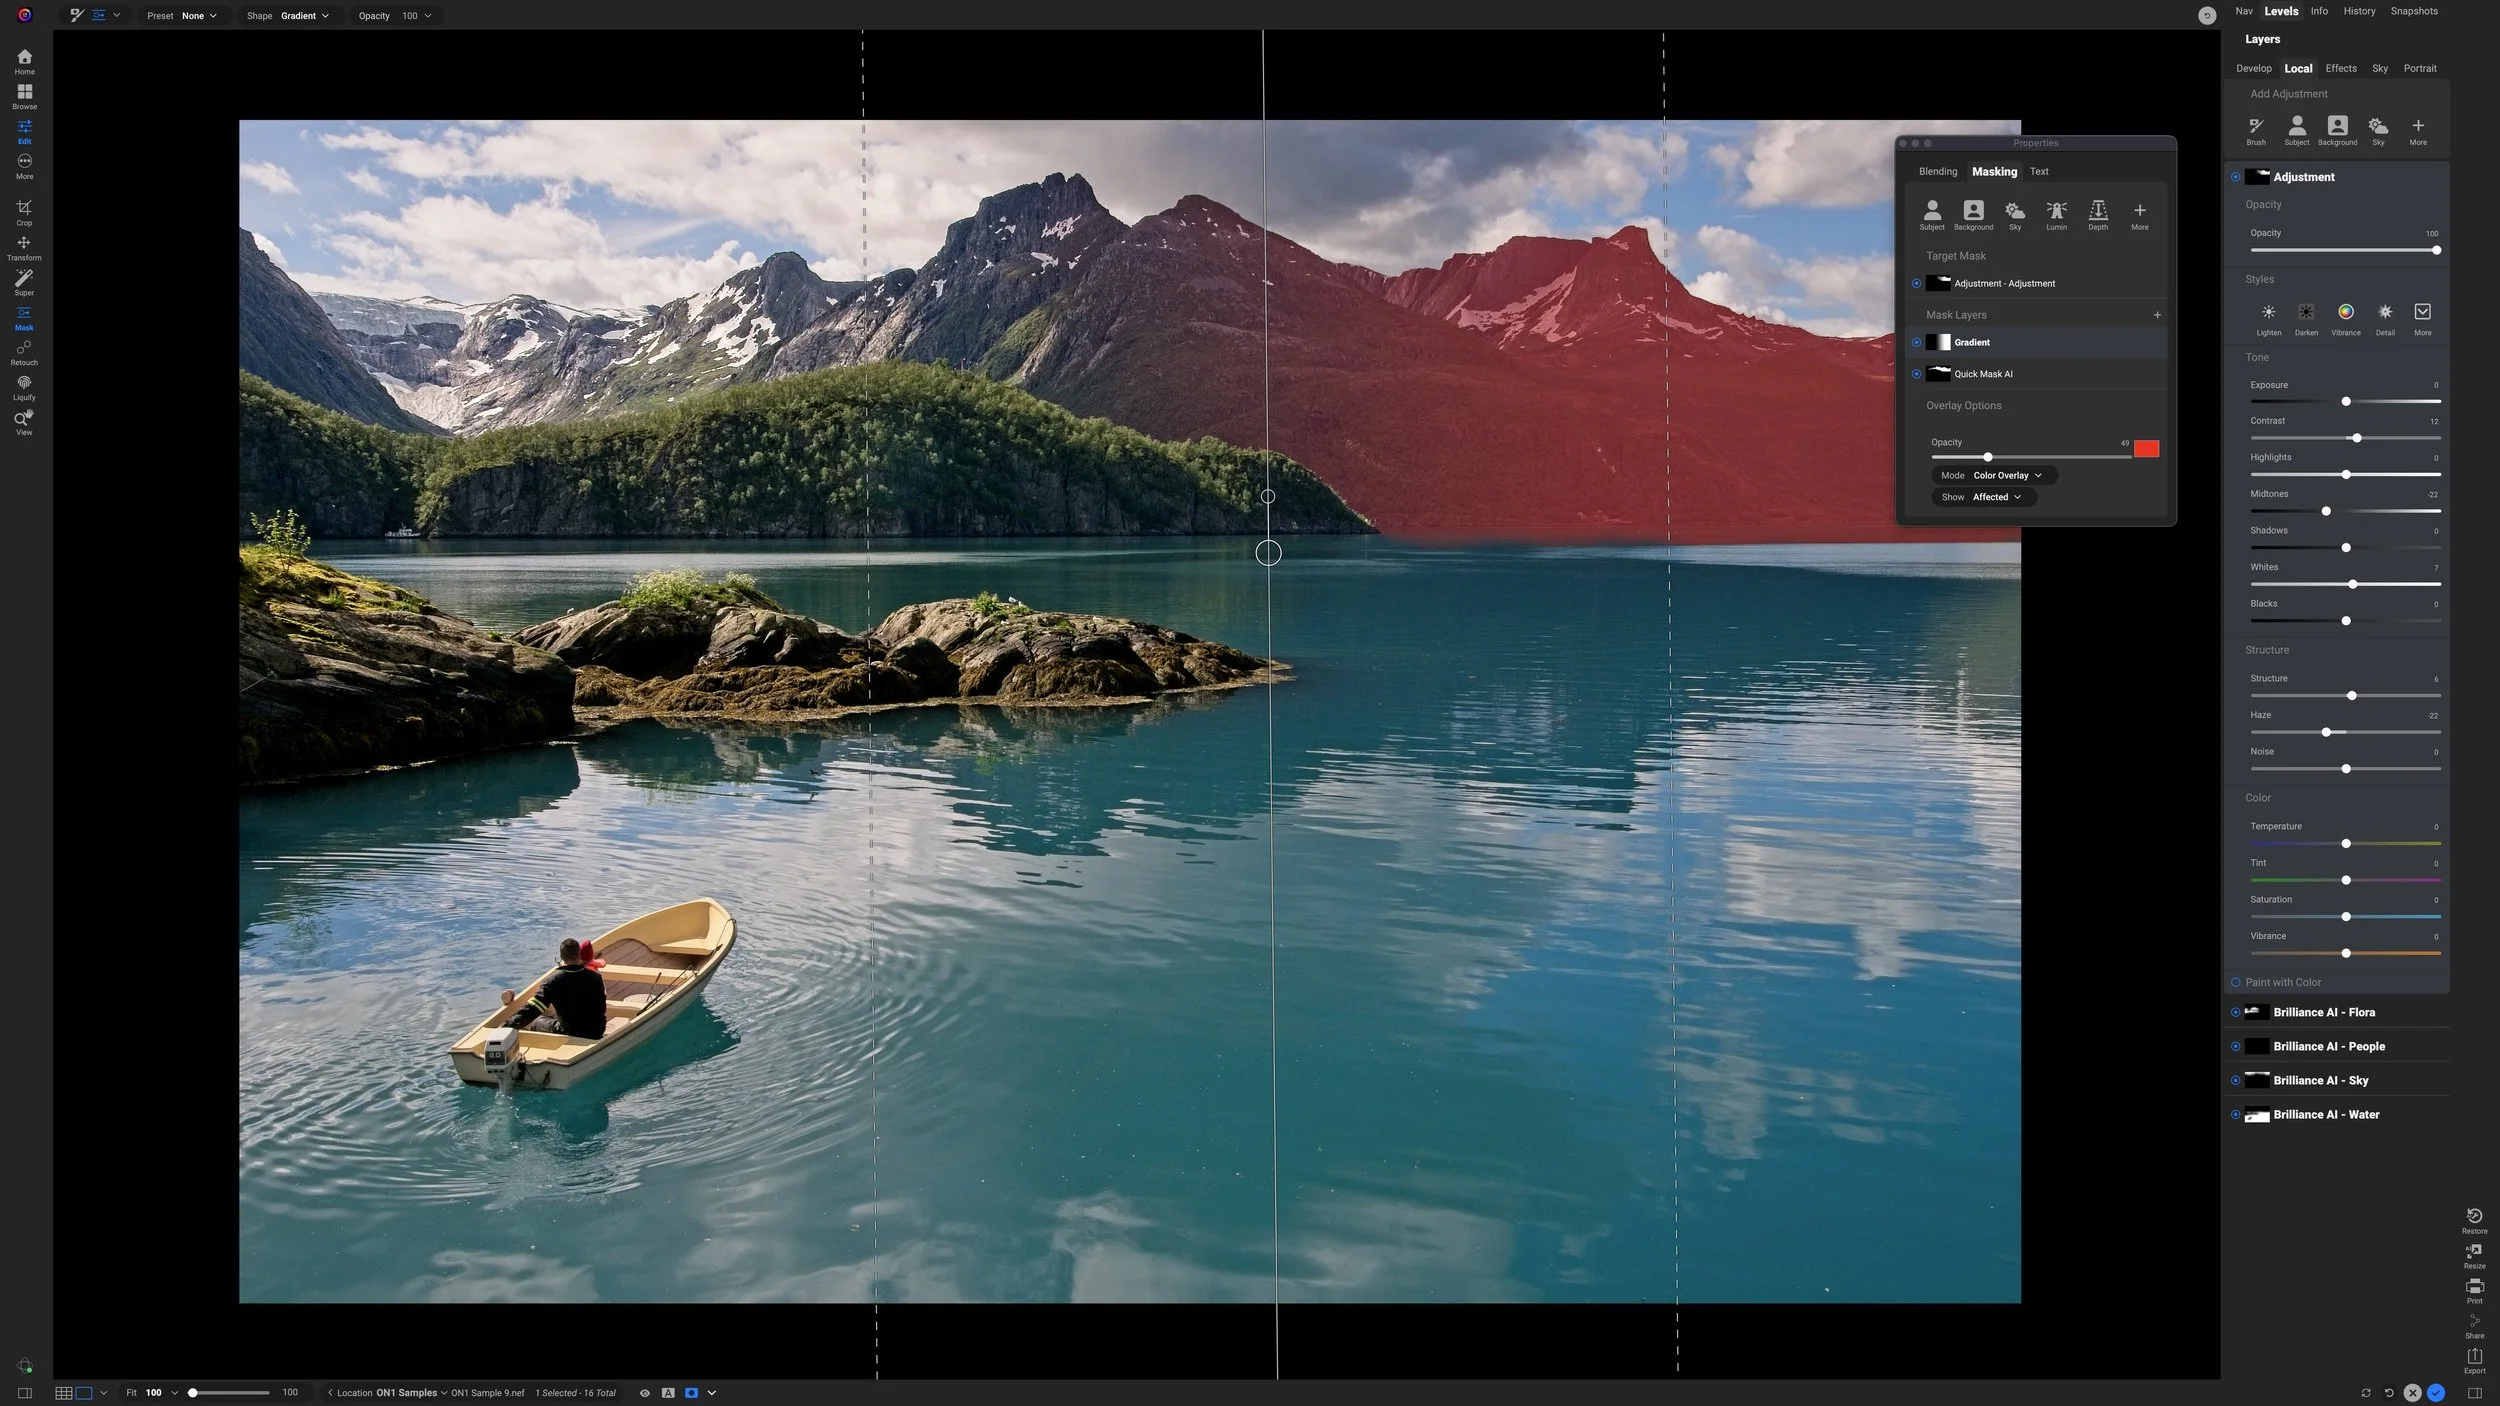
Use A Depth Mask to Shape the Fog
This is where things get interesting. The Depth Mask analyzes the scene and builds a mask based on distance from the camera. Instead of manually painting selections, you’re working with depth information.
A couple of key ideas:
White reveals the effect (fog)
Black protects from the effect
Once the depth mask is applied, for a foggy scene I’ll almost always invert it. That flips the logic so the fog is applied to the background instead of the foreground. From there, it’s a visual process:
Adjust the Distance slider to push fog deeper into the scene
Aim for darker tones (less fog) in the foreground
Keep brighter tones (more fog) in the background
You’ll see the image start to separate—foreground clears up, background recedes. That’s the natural depth you’re after.
Soften the Transition
Even with a good depth mask, edges can feel a little abrupt. Inside the mask refinement controls, I’ll add Feathering. This doesn’t soften the photo—it softens the mask itself. The result is a much more gradual transition between areas with and without fog.
It’s a subtle adjustment, but it makes a big difference. Fog should feel diffused, not cut out.
Bring the Subject Back with Local Masking
At this point, the fog is sitting nicely in the background—but the farmhouse is getting lost more than I’d like. So I’ll refine the mask further:
Add a new mask layer
Use Quick Mask AI to select the house
Subtract fog from that area
That gives me control, but at full strength it looks artificial—the subject may pop out too cleanly. The fix is simple: lower the mask density. This lets some fog remain over your subject, just enough to keep it grounded in the scene while still drawing attention. It’s a balance—too much removal and it looks cut out, too little and it disappears.
Key Takeaways
The Weather filter is a great starting point, but it’s only step one
Depth Mask lets you shape fog based on distance for a more natural look
Inverting the mask is often necessary to push fog into the background
Feathering the mask creates smoother, more realistic transitions
Local masking (like Quick Mask AI) helps refine key subjects without overdoing it
Final Thoughts
What I like about this workflow is that it stays flexible. You’re not locked into what the filter gives you—you’re building on top of it. Fog is one of those effects that can quickly look overdone. But when you combine the controls the Weather filter already gives you with depth-aware masking, you can guide it into something that feels like it belongs in the scene.
That’s the goal every time—use the tools, but don’t let the tools dictate the result.
Farmhouse, San Simeon, California
Contact Scott to commission a print or license this image.