A Deeper Look At Intersecting Masks In Lightroom
The Intersect Mask feature of Lightroom is a very powerful masking tool. I use it all the time when editing my landscape photos.
What Is An Intersected Mask?
An intersected mask is a combination of two or more types of masks. Wherever the different masks overlap, or intersect, is included in the final mask.
When Should I Use An Intersected Mask?
I think intersected masks are most useful with range masks. My rule of thumb for my landscape images is to use an intersected mask when I want to treat distinct, separate objects in my scene with a color or luminance range mask.
Building up a mask with brush strokes, objects selections, or gradient masks is served just fine using the Add and Subtract mask options. The power of intersected masks is to selectively treat specific tones or colors across a variety of objects or areas of a photo. It’s like making a selection within a selection.
How To Use Intersect Mask
Creating an intersected mask is straightforward. Here is my approach:
Use the Subject, Object, and other masking tools to build a selection of the areas to treat.
Click the triple-dot menu for the mask and choose Intersect With. I almost always use a Luminance Range or Color Range mask.
Refine the range mask to target the tones or colors of interest.
Make slider adjustments to taste.
The intersection limits the resulting mask to only the previously selected objects and areas.
Several objects are selected and added to a mask.
The mask is intersected with a luminance range mask.
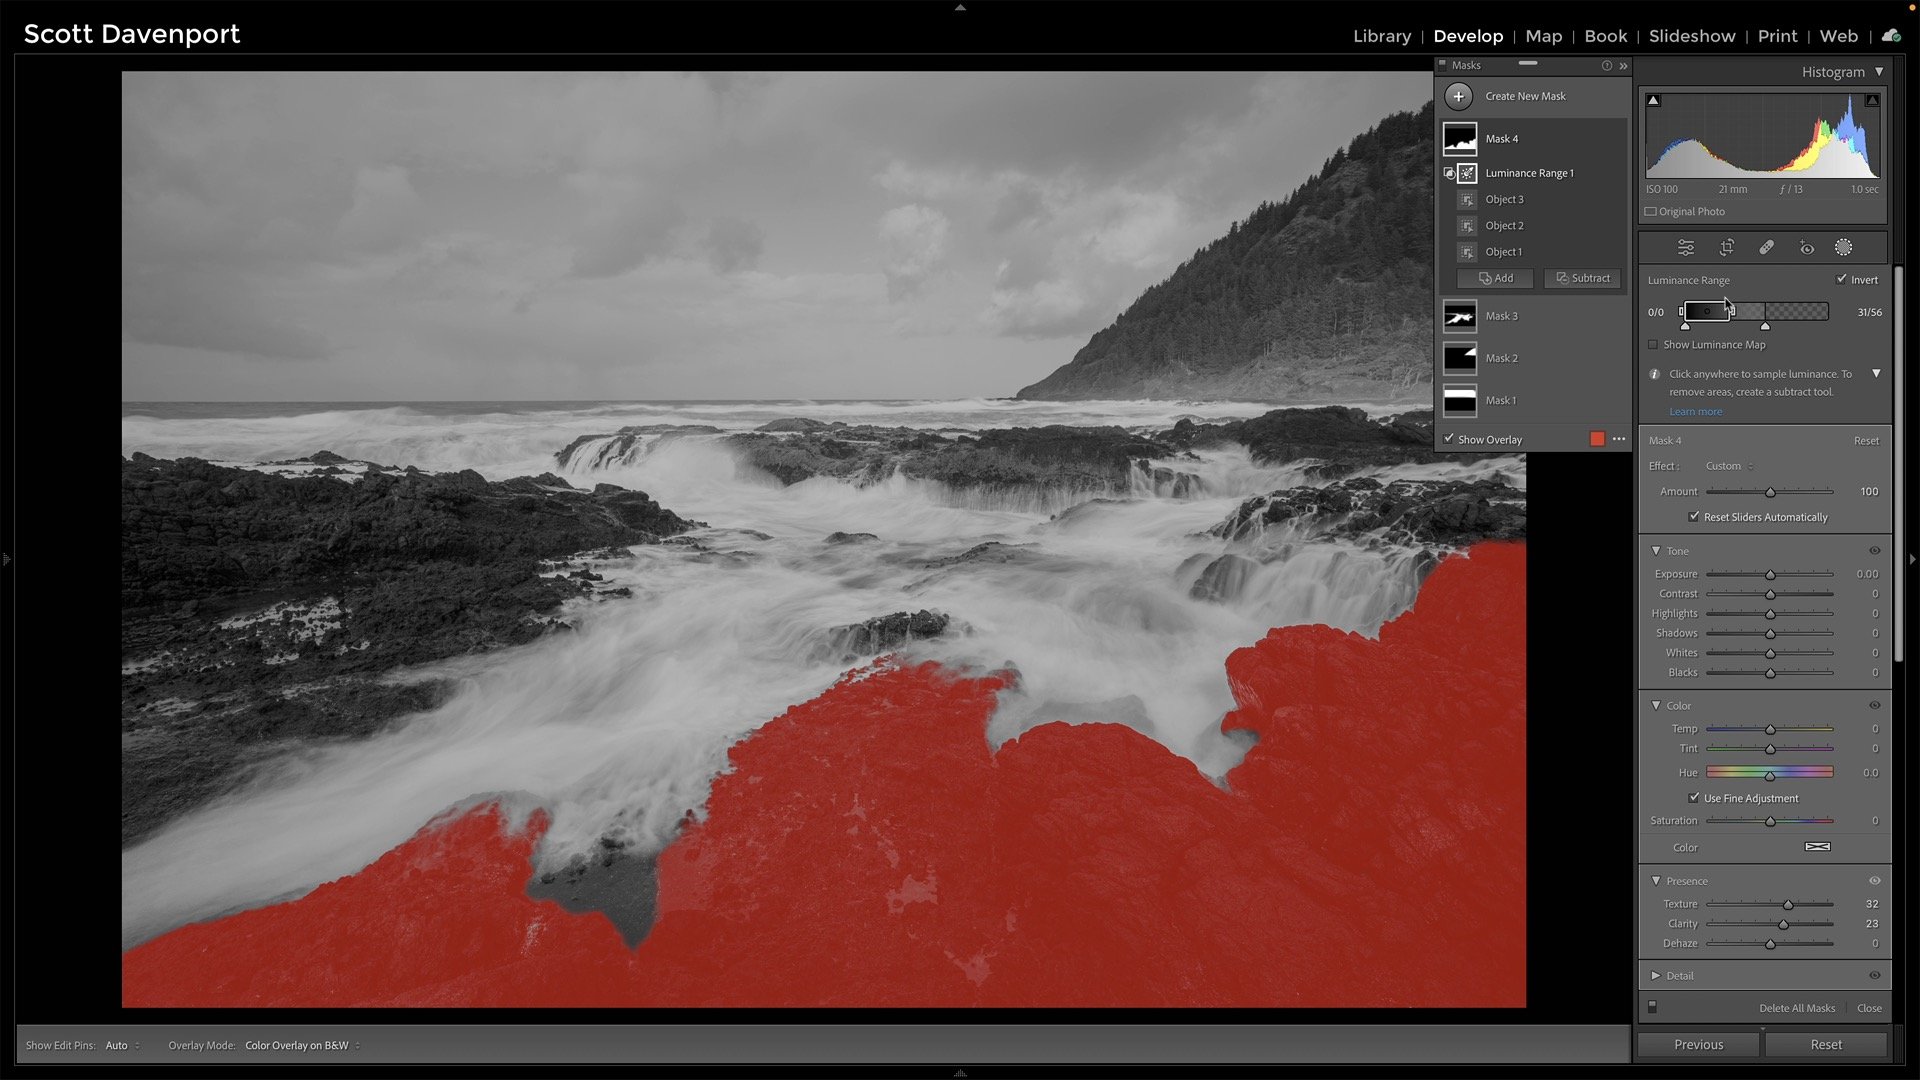
The luminance range mask is adjusted to protect the highlights. The intersection applies the range across all of the objects in the mask.
In the example above, I used 3 object selections to pick the foreground rocks. Next, I added an intersection with a Luminance Range mask and adjusted the range to affect only the deep shadows and lower midtones. The intersection of the two masks is the foreground rocks and only the darker tones of those rocks. The brighter foam and whitewash of the ocean is excluded.
The increase in Clarity and Texture added to the final mask pops the detail on the rocks while keeping the water soft and silky.
Adding Objects and Selections To An Intersected Mask
Like all masks in Lightroom, you can add additional selections. With an intersected mask, you’ll want the new selections to be below the intersection in the mask panel. Use drag & drop to reorder the elements of the mask:
Use the Subject, Object, and other masking tools to build a selection of the areas to treat.
The additional selection is put above the intersection in the masking panel.
Click and drag the individual mask selections so the intersected is above the others. You can either drag the new selections down or drag the intersection to the top.
Add a new selection to the mask. Notice it is placed above the intersection and does not take on the properties of the intersected mask.
Click and drag the mask components so the intersected mask is on top. In this example, I am dragging Object 4 from the top down so it is beneath the intersected Luminance Range mask.
Selections beneath the intersected mask are included in the intersection. Here, the surf and whitewash of the ocean is excluded courtesy of the intersected Luminance Range mask.
Conclusion
Intersecting masks is a powerful masking tool in Lightroom. Try them out with range masks and create intricate masks without painstaking brushing. Also, remember you can rearrange the selections in the masking panel with drag and drop. Mask selections below an intersected mask are all affected by the intersection.
Have fun!
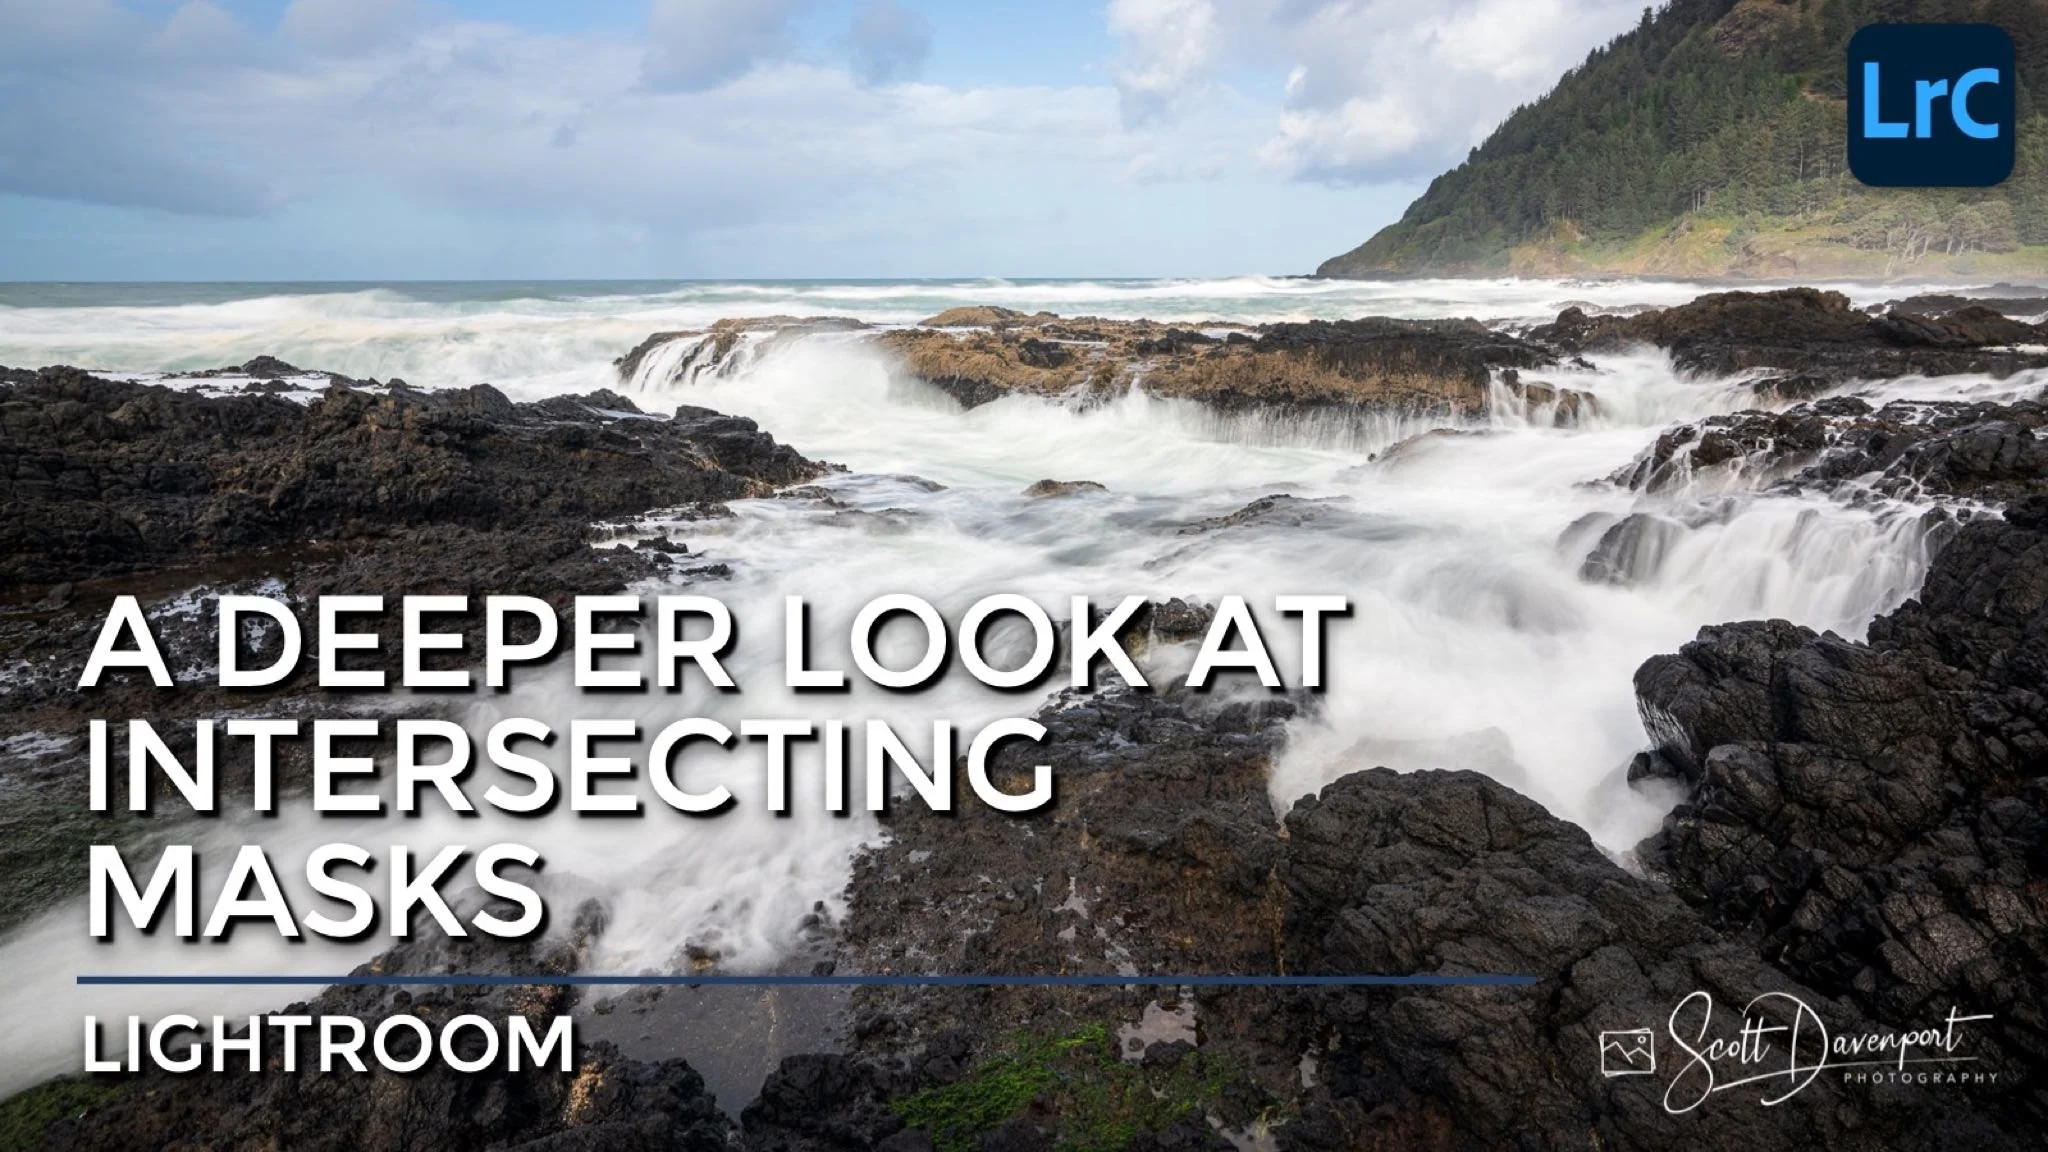
Surge Of Surf Cape Perpetual Oregon
Contact Scott to commission a print or license this image.