The Gritty Details Of Grunge - ON1 Photo RAW 2021
If you are trying ON1 Photo RAW 2021, the ON1 plug-ins, or upgrading from an older version, please consider using my affiliate link. There is no extra cost to you and it helps support ON1 tutorials like this one. Ready to buy? Use the offer code SDP20 at checkout and SAVE 20%!
The Grunge filter in the ON1 Effects module adds a dark, gritty feel to an image. For certain scenes, like urban exploration (urbex), abandoned buildings, or empty cityscapes, the Grunge filter can help foster a desolate or grimy mood to a scene. By default, Grunge darkens the photo and gives a scene a kind of “grimy” look. Notice how the histogram shifts left toward the shadows with the default settings for Grunge.
Before adding the Grunge filter. Notice the near-center histogram.
After adding the Grunge filter. The default look darkens the scene with a “grimy” kind of look. Notice how the histogram shifts left toward the shadows.
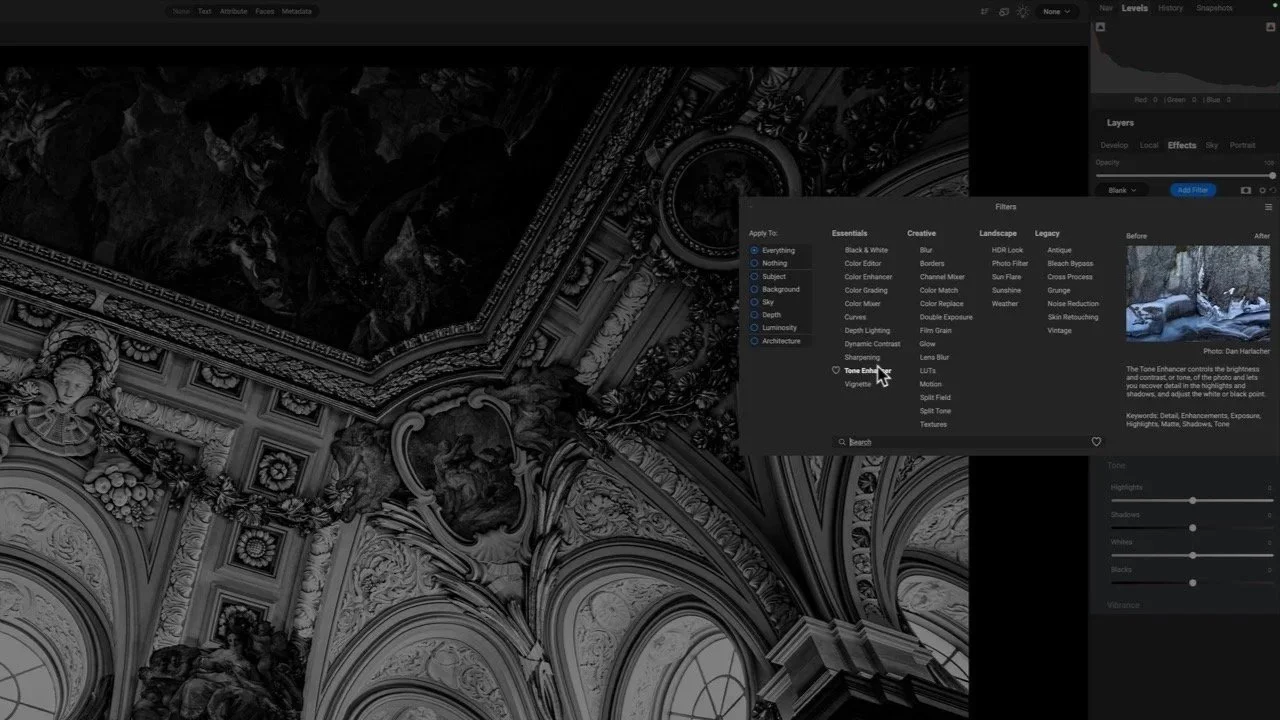
Almost every filter in ON1 Effects includes built-in styles and Grunge is no exception. Explore the styles to audition looks that best suit your photo. You’ll find a spread of dark, detailed looks and filmier, diffused looks. If you are photographing city streets (and are a fan of Batman), you’ll love the Arkham style in Grunge. Loads of dark, gritty detail to be had.
The Grunge Filter Controls
After selecting a style, tailor it to your taste - or dive into the sliders directly to craft your own signature look. There are four primary controls for Grunge:
Amount: Set the overall amount of grunge added to the photo. As noted above, the Grunge filter darkens a photo.
Brightness: Increase or decrease the luminance of the scene. If the Amount darkens the photo too much, compensate with brightness.
Saturation: Increase or decrease the saturation of the underlying image. This does not change saturation of the grunge look itself. It’s the underlying image (the pre-grunge look) that gets a boost in saturation as the pixels pass into the Grunge filter.
Detail: Increase or decrease the detail in the scene. High values can amp up micro contrast and texture to an extreme degree.
The main controls of the Grunge filter in ON1 Effects.
The Amount slider is the most important. This sets the overall mood of the photo. The other sliders are provided for convenience. Many other filters in ON1 Effects, as well as the Develop module if you are using Photo RAW, can adjust tonality and detail.
My typical workflow is to adjust the Amount slider first, then adjust Detail. I tend not to add too much detail with Grunge. When I need more, I turn to the Dynamic Contrast filter. I’ll finish off the grunge look with tweaks to Brightness and Saturation. Again, if the adjustments in Grunge are not enough, I’ll use other tools in ON1 to address luminance and color.


What About The Glow And Film Grain Controls?
The Grunge filter also has controls for Glow and Film Grain. Glow has a single control, Amount, and a blending mode can be chosen. The results are very much image dependent. For environmental portraits, a touch of glow can add a certain ambiance. The Film Grain section has an Amount for the level of grain to add and a Size control to increase or decrease the individual grains in the look.
To be blunt, I don’t use these sections of the Grunge filter. I prefer to use the dedicated Glow filter and Film Grain filter. Why? The individual, dedicated filters give me more control over my photo. For example, I often use masking with glow looks. The mask I use for the glow may not suit the look I want from the Grunge filter. By using two filters, I can apply independent masks. The dedicated Film Grain filter also has more power - a simulated film stock can be selected.
Fireplace In Fort Stevens
Contact Scott to commission a print or license this image.