The Ultimate Contrast Control With Dynamic Contrast - ON1 Photo RAW
If you are trying ON1 Photo RAW 2021 or upgrading from a prior version, please consider using my affiliate link. There is no extra cost to you and it helps support Photo RAW tutorials like this one. Ready to buy? Use the offer code SDP20 at checkout and Save 20%!
Dynamic Contrast Is All About Control
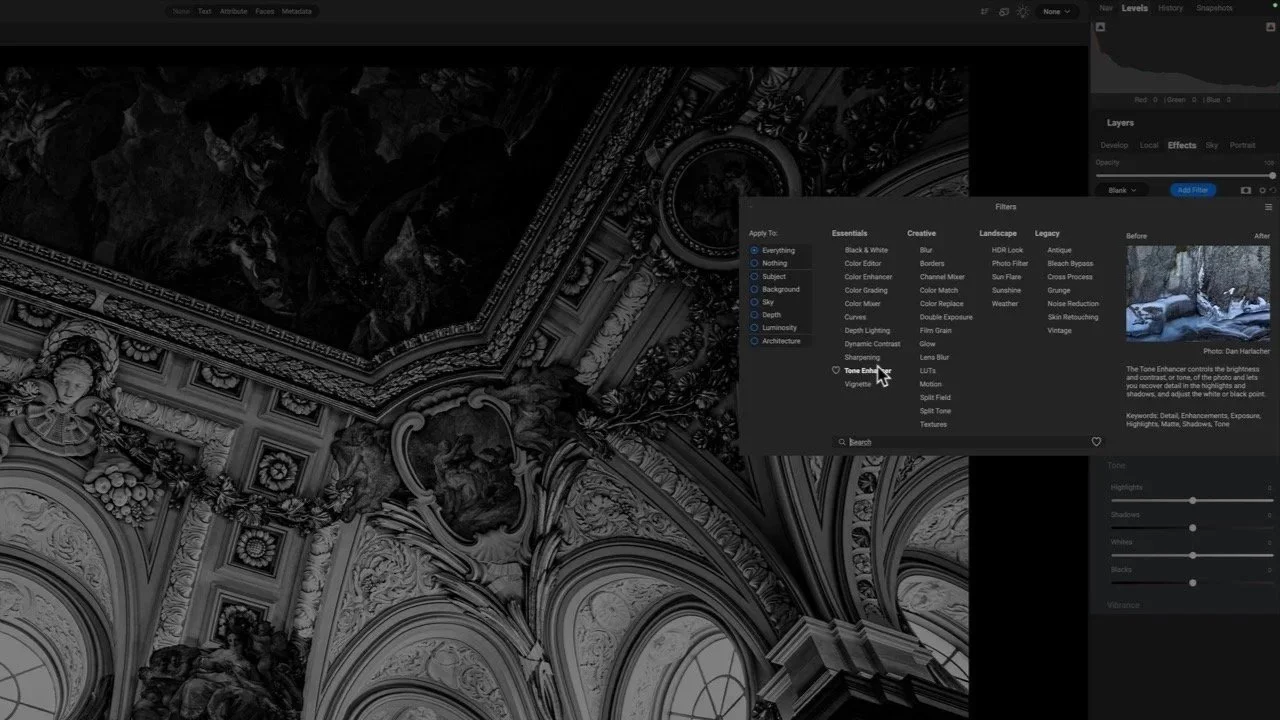
Dynamic Contrast is my favorite filter in the Effects module and it touches a lot of my photos. This filter gives you incredible control over the contrast of your images. The filter has individual sliders to target micro-contrast, moderate contrast, and large-scale contrast. Move the sliders and see the updates in real-time.
The core sliders are in the Dynamic Contrast section of the filter and they target the Small, Medium, and Large elements in the scene. The default is the Natural look and it’s a very good starting point. Depending on what your photo needs, you can go further and shape the amount of contrast.
In this photo of a golden metal door, the Small slider amplifies micro-contrast. In a textured subject like this, small scratches and fine details emerge. Medium and Large accentuate the rivets and the darker reflections in the uneven sheen of the metal.

Control small, medium, and large details independently with the Dynamic Contrast filter in ON1 Effects.
Gold Door In Cordoba Spain
Contact Scott to commission a print or license this image.
There are also several controls overall in the Tone & Color area to fix exposure, highlights, shadows, and the like. I don’t typically use these sliders and prefer to adjust tonal fundamentals in Develop or the Local Adjustments area. Nevertheless, for a quick fix, these sliders are here and convenient.
Here are just a few ways to leverage Dynamic Contrast with your images.
Make A Wet Pavement Look
Try out the Surreal style in the Dynamic Contrast filter for a wet pavement look. Street scenes, alleyways, and city streets look really good after it’s rain. If it hasn’t rained, use this filter instead! Use the masking tools to paint the effect on paved streets. It looks awesome on cobblestone streets! The look boosts the Small slider pretty high, as well as adding a healthy amount of Medium and Large contrast.
The Bridge To Castel Sant Angelo
Contact Scott to commission a print or license this image.
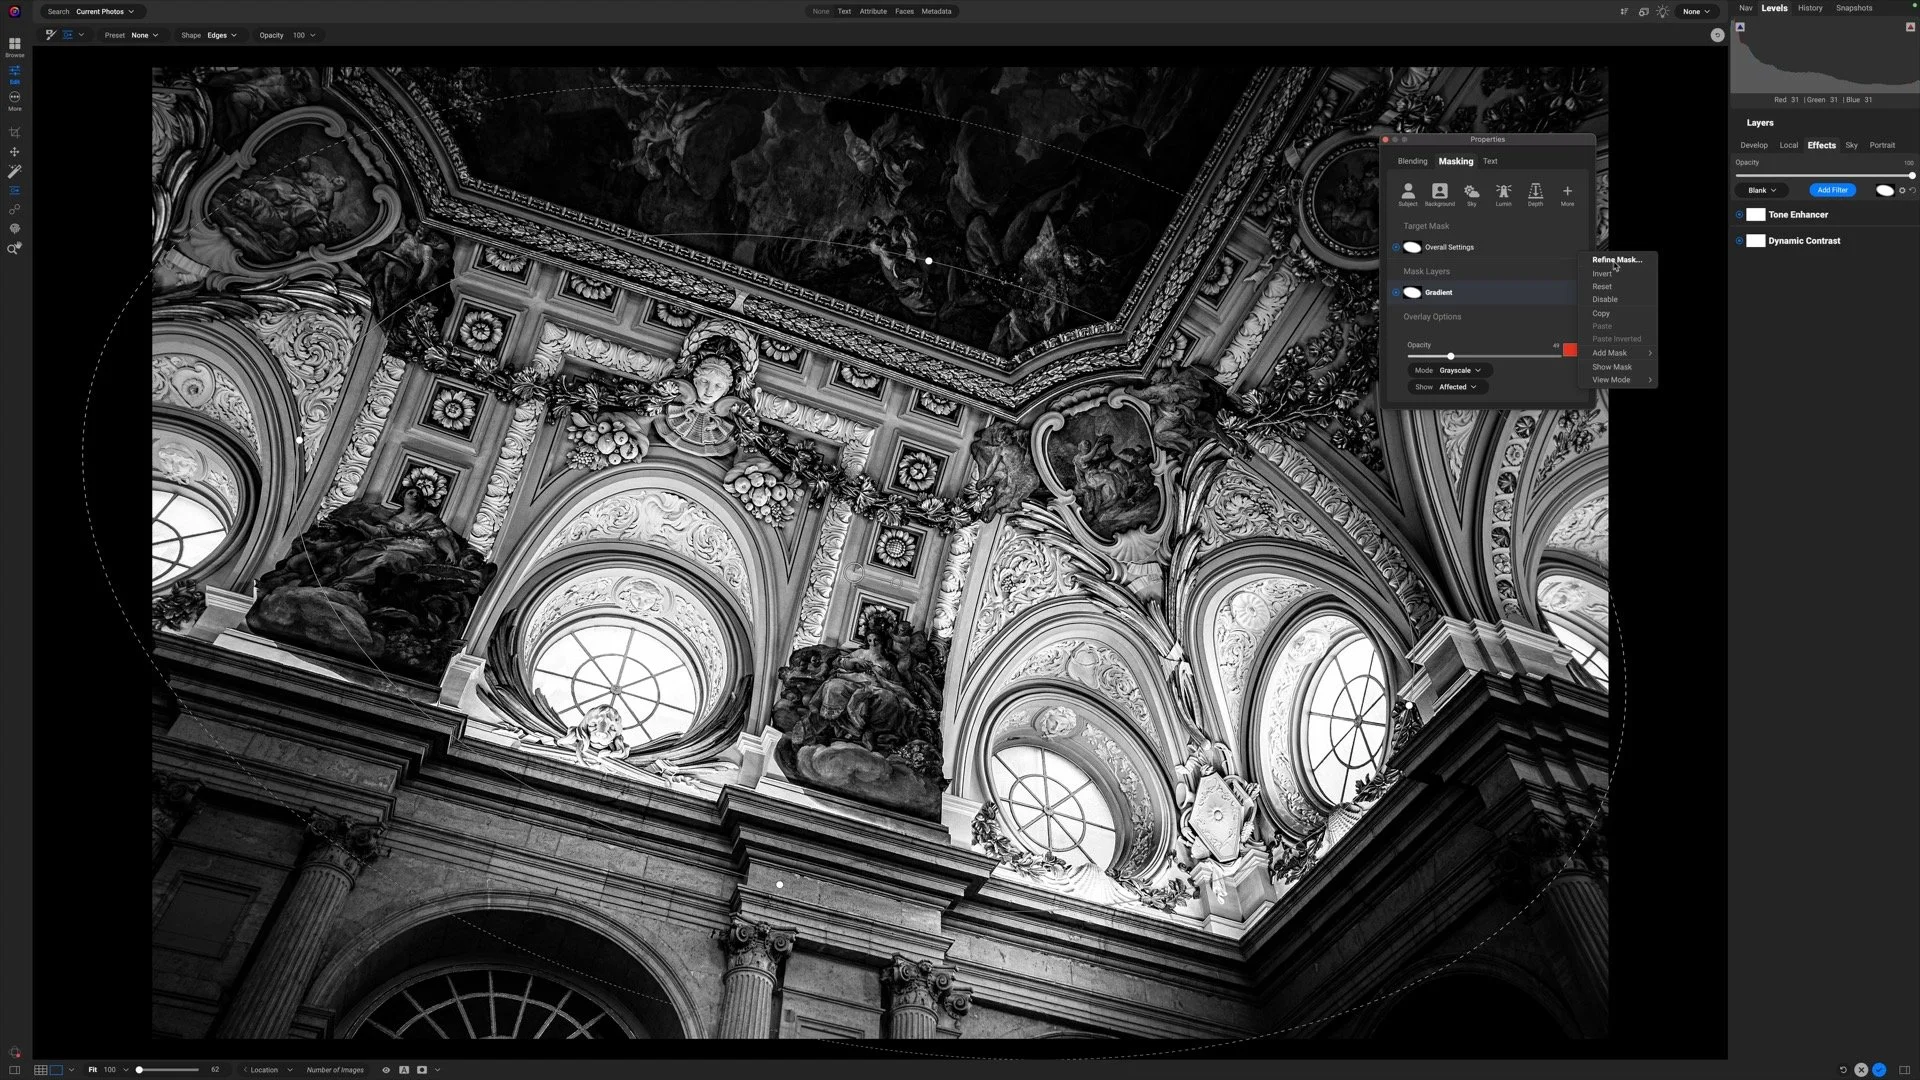
Use More Than One Filter… And Mask!
The filter stack in ON1 Effects is completely customizable. You can also add the same filter multiple times when your photo calls for it. In this photo of Al Capone’s jail cell in the Eastern State Penitentiary in Philadelphia, I used two Dynamic Contrast filters. The first filter has the default Natural look and adds an excellent contrast pop to the entire photo. The texture in the walls really jumps out.
I wanted more micro-contrast for the table, desk, and bed - that’s the story of the photo. Every filter in ON1 Effects puts powerful masking tools at your fingertips. Use them! I added a second Dynamic Contrast filter and using a masking bug, selectively applied it to the lower center part of the image. Use the masks to add crispness and detail to important subjects and draws your viewer’s eye to them.
Al Capone’s Cell
Contact Scott to commission a print or license this image.


Landscape Photos, Luminosity Masks, And Dynamic Contrast
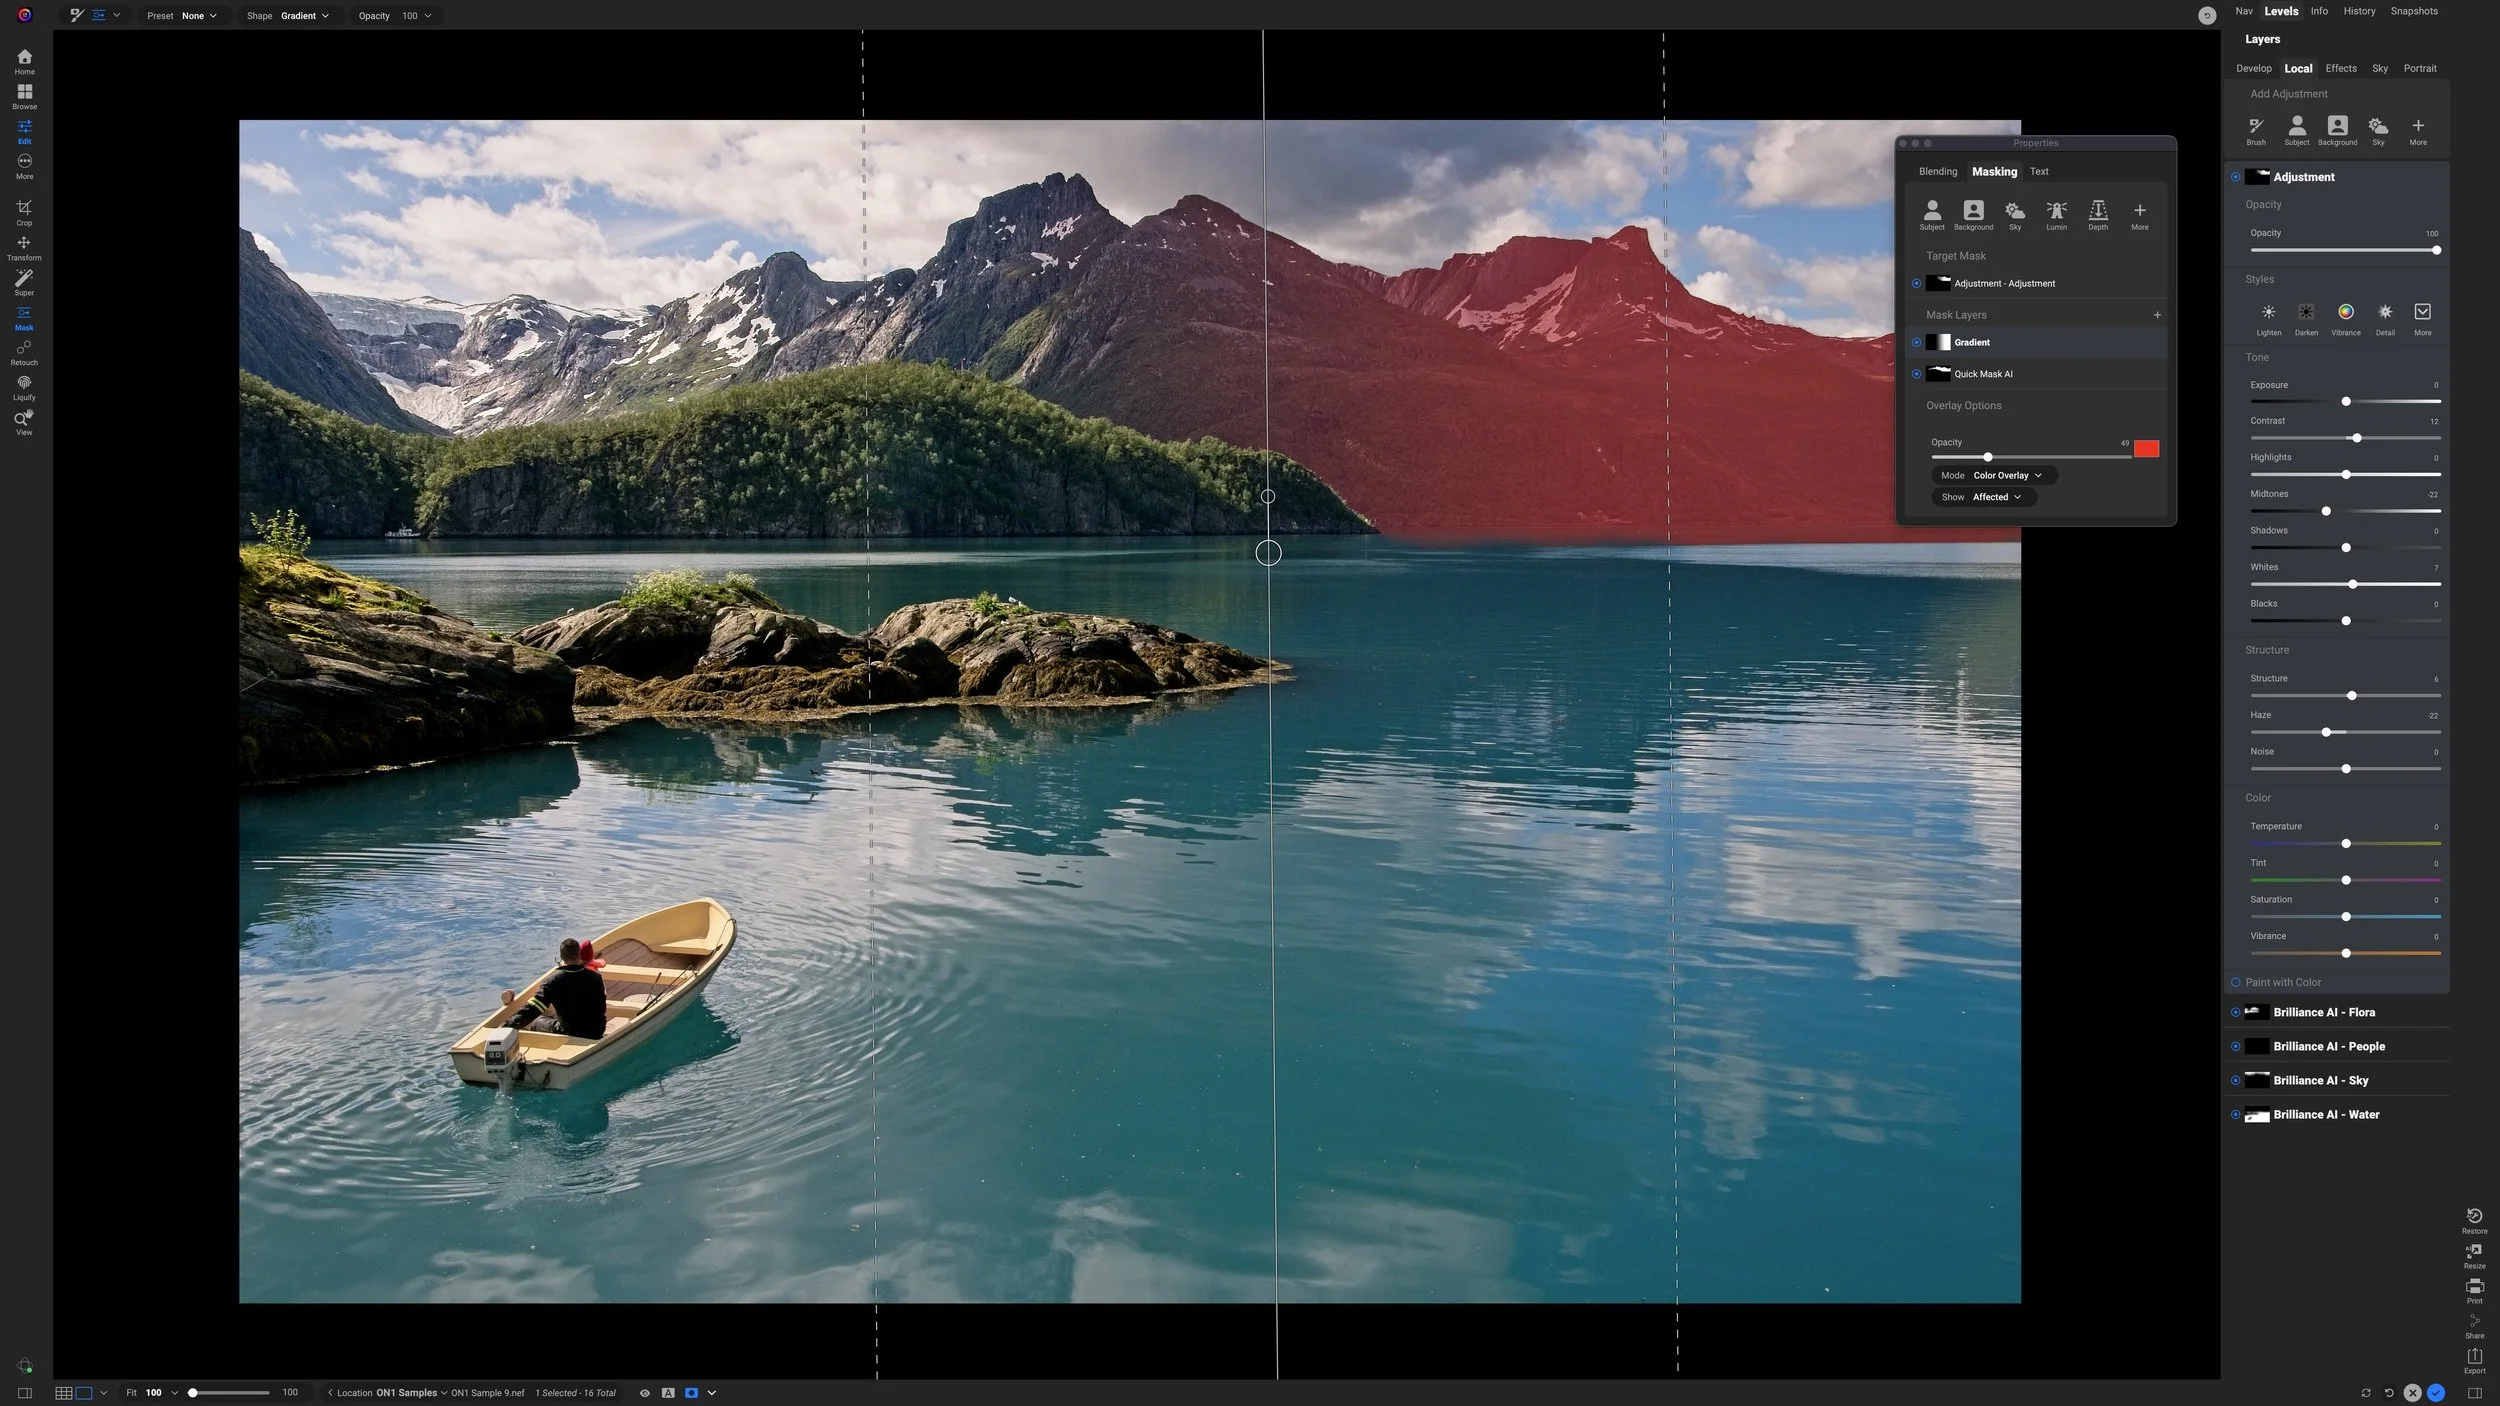
A favorite technique of mine for my landscape photos is to use Dynamic Contrast with a luminosity mask. Often with a landscape image, there are areas we want to have crisp, like rocks and trees. Other areas we want soft, like the sky or water. Equally often, the elements we want to be crisp are darker in tone, in the shadows or low midtones. Easily target Dynamic Contrast to the darker areas of the photos like this:
Add a Dynamic Contrast filter
Open the masking area of the filter.
Click the Lumen button.
Click the Invert button.
That’s it. The Lumen adds a luminosity mask which, by default, adds Dynamic Contrast to the brighter parts of the scene. Inverting the mask does the opposite, and the rocks, trees, and other dark elements in your photo get a nice pop of contrast.
La Jolla Stones & Surf
Contact Scott to commission a print or license this image