The Motion Filter - ON1 Photo RAW 2026
If you are trying ON1 Photo RAW, the ON1 plug-ins like ON1 Effects or ON1 HDR, or upgrading your ON1 software to a newer version, please consider using my affiliate link. There is no extra cost to you and it helps support my work and this website.
When you want to inject energy, drama, or a sense of movement into a static image, the Motion filter is your friend. Whether you're simulating the blur from panning a camera, zooming in or out while exposing, or twisting around a central point, the Motion filter in ON1 gives you control over the kinetic aspect of your shot in post. In the right dose, it can help your subject feel alive — or help your background recede into velocity.
One caveat: like all strong stylistic tools, it’s easy to overdo. But when used with restraint, and often in conjunction with masking or the Protect controls, it can add that extra spark.
The Pan mode of the Motion filter makes it easy to create panning shots from still frames.
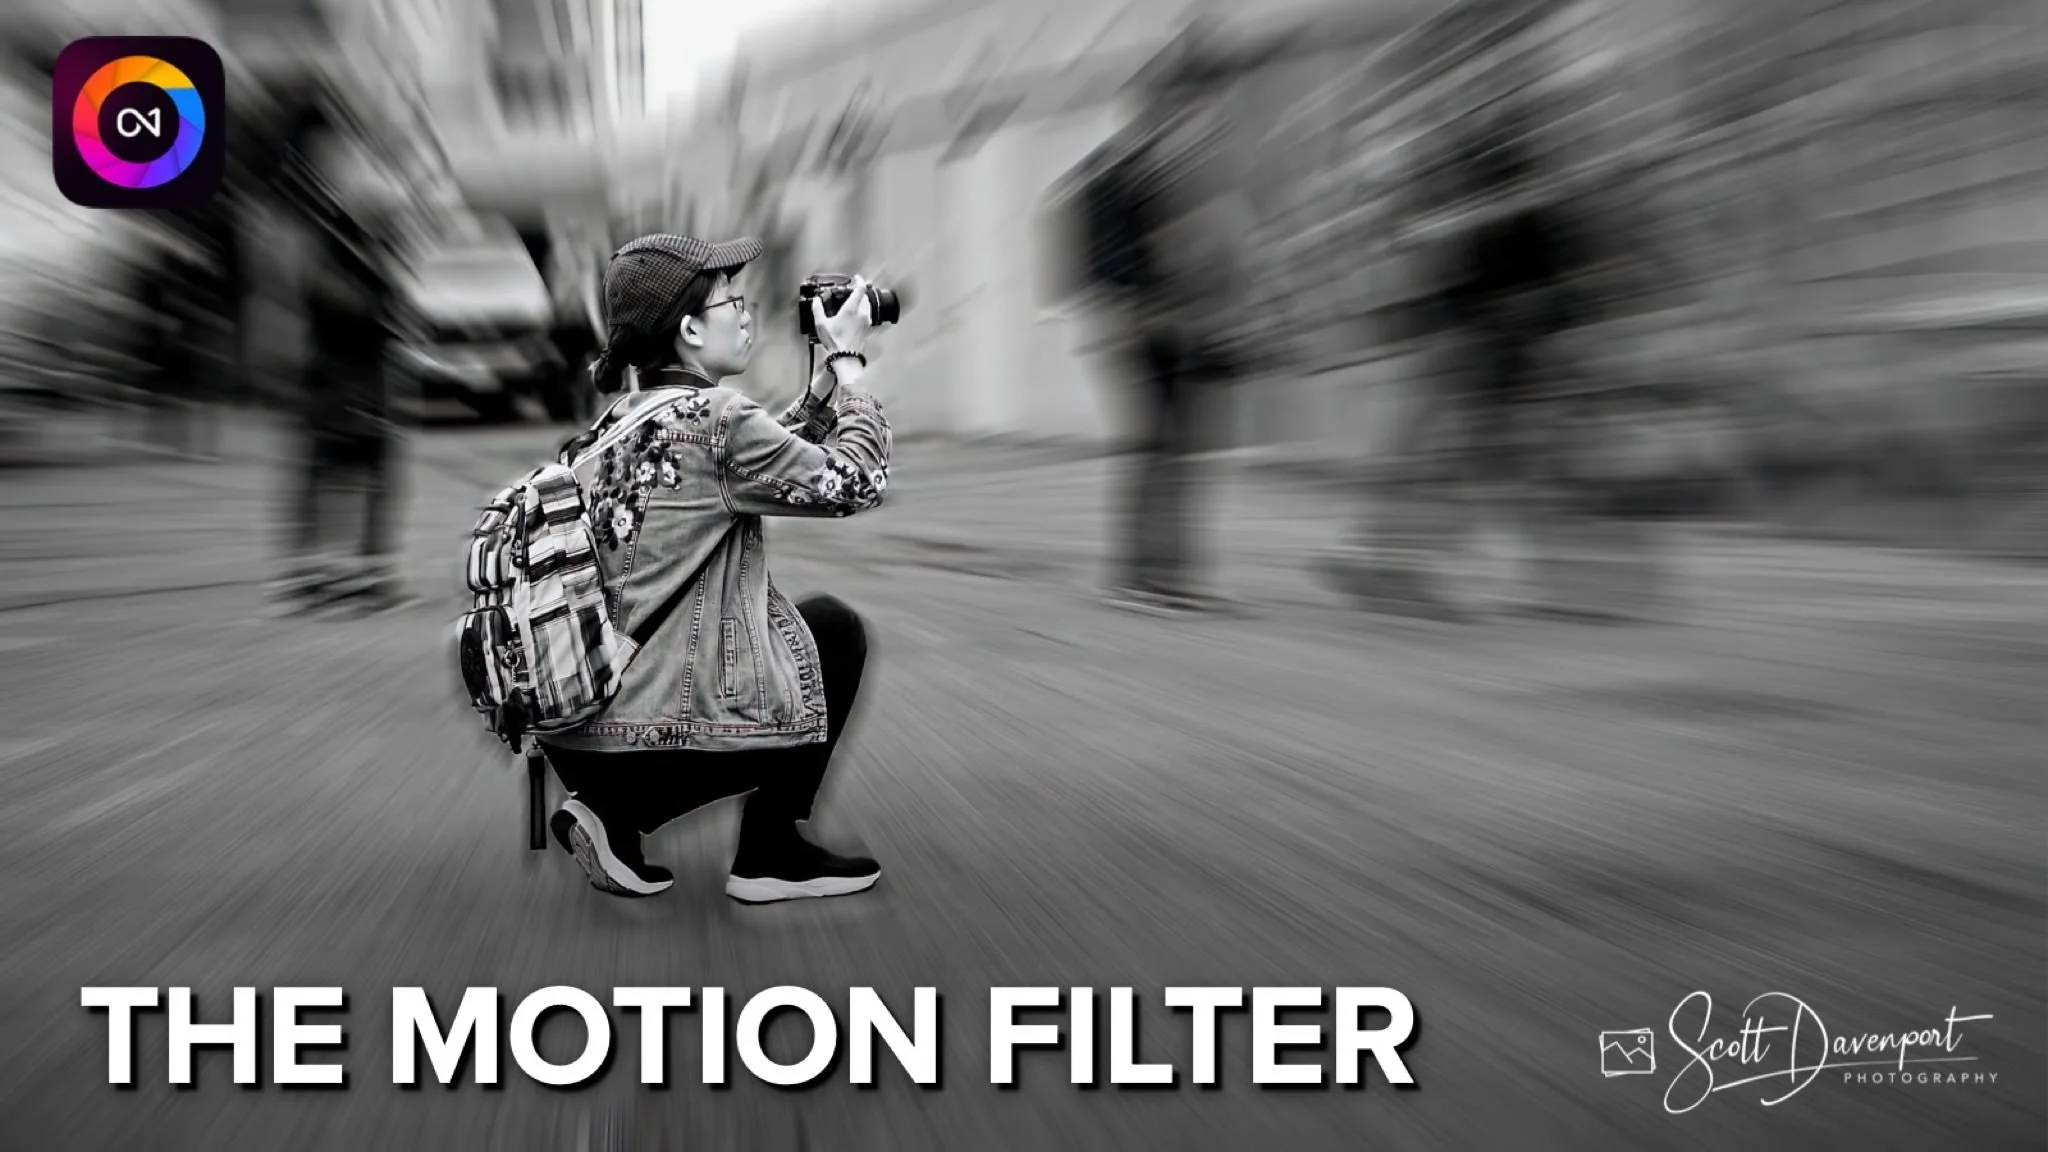
Add a dynamic feel to photos with the Zoom and Twist modes of the Motion filter
The Motion Controls
There are three modes in the Motion filter: Pan, Zoom, and Twist. Each gives a different flavor of motion blur, and each has its own set of controls (sliders) to finesse the effect.
Pan simulates angular motion — think sweeping the camera sideways across the frame. It gives you a “swish” effect across the frame in a given direction. The sliders for the Pan mode are:
Amount: The strength or intensity of the motion blur.
Angle: The orientation of the blur..
Smoothing: How soft or crisp the motion lines are — higher smoothing softens artifacts or jagged edges.
Zoom simulates a zoom-in or zoom-out blur with a central focal point. Imagine you are zooming your lens while holding the shutter open: things closer to the center stretch outward or inward. The sliders for the Zoom mode are:
Amount: How aggressive the zoom blur is.
Smoothing: How soft or crisp the motion lines are
Twist simulates swirling motion, as if the camera is being rotated (yaw) around a central point mid-exposure. You get motion that radiates, kind of spiraling out. The sliders for the Twist mode are:
Zoom: The amount of radial expansion or contraction (a zoom component combined with the twist).
Angle: The rotation angle (how much twist, and in which direction).
Smoothing: How soft or crisp the motion lines are.
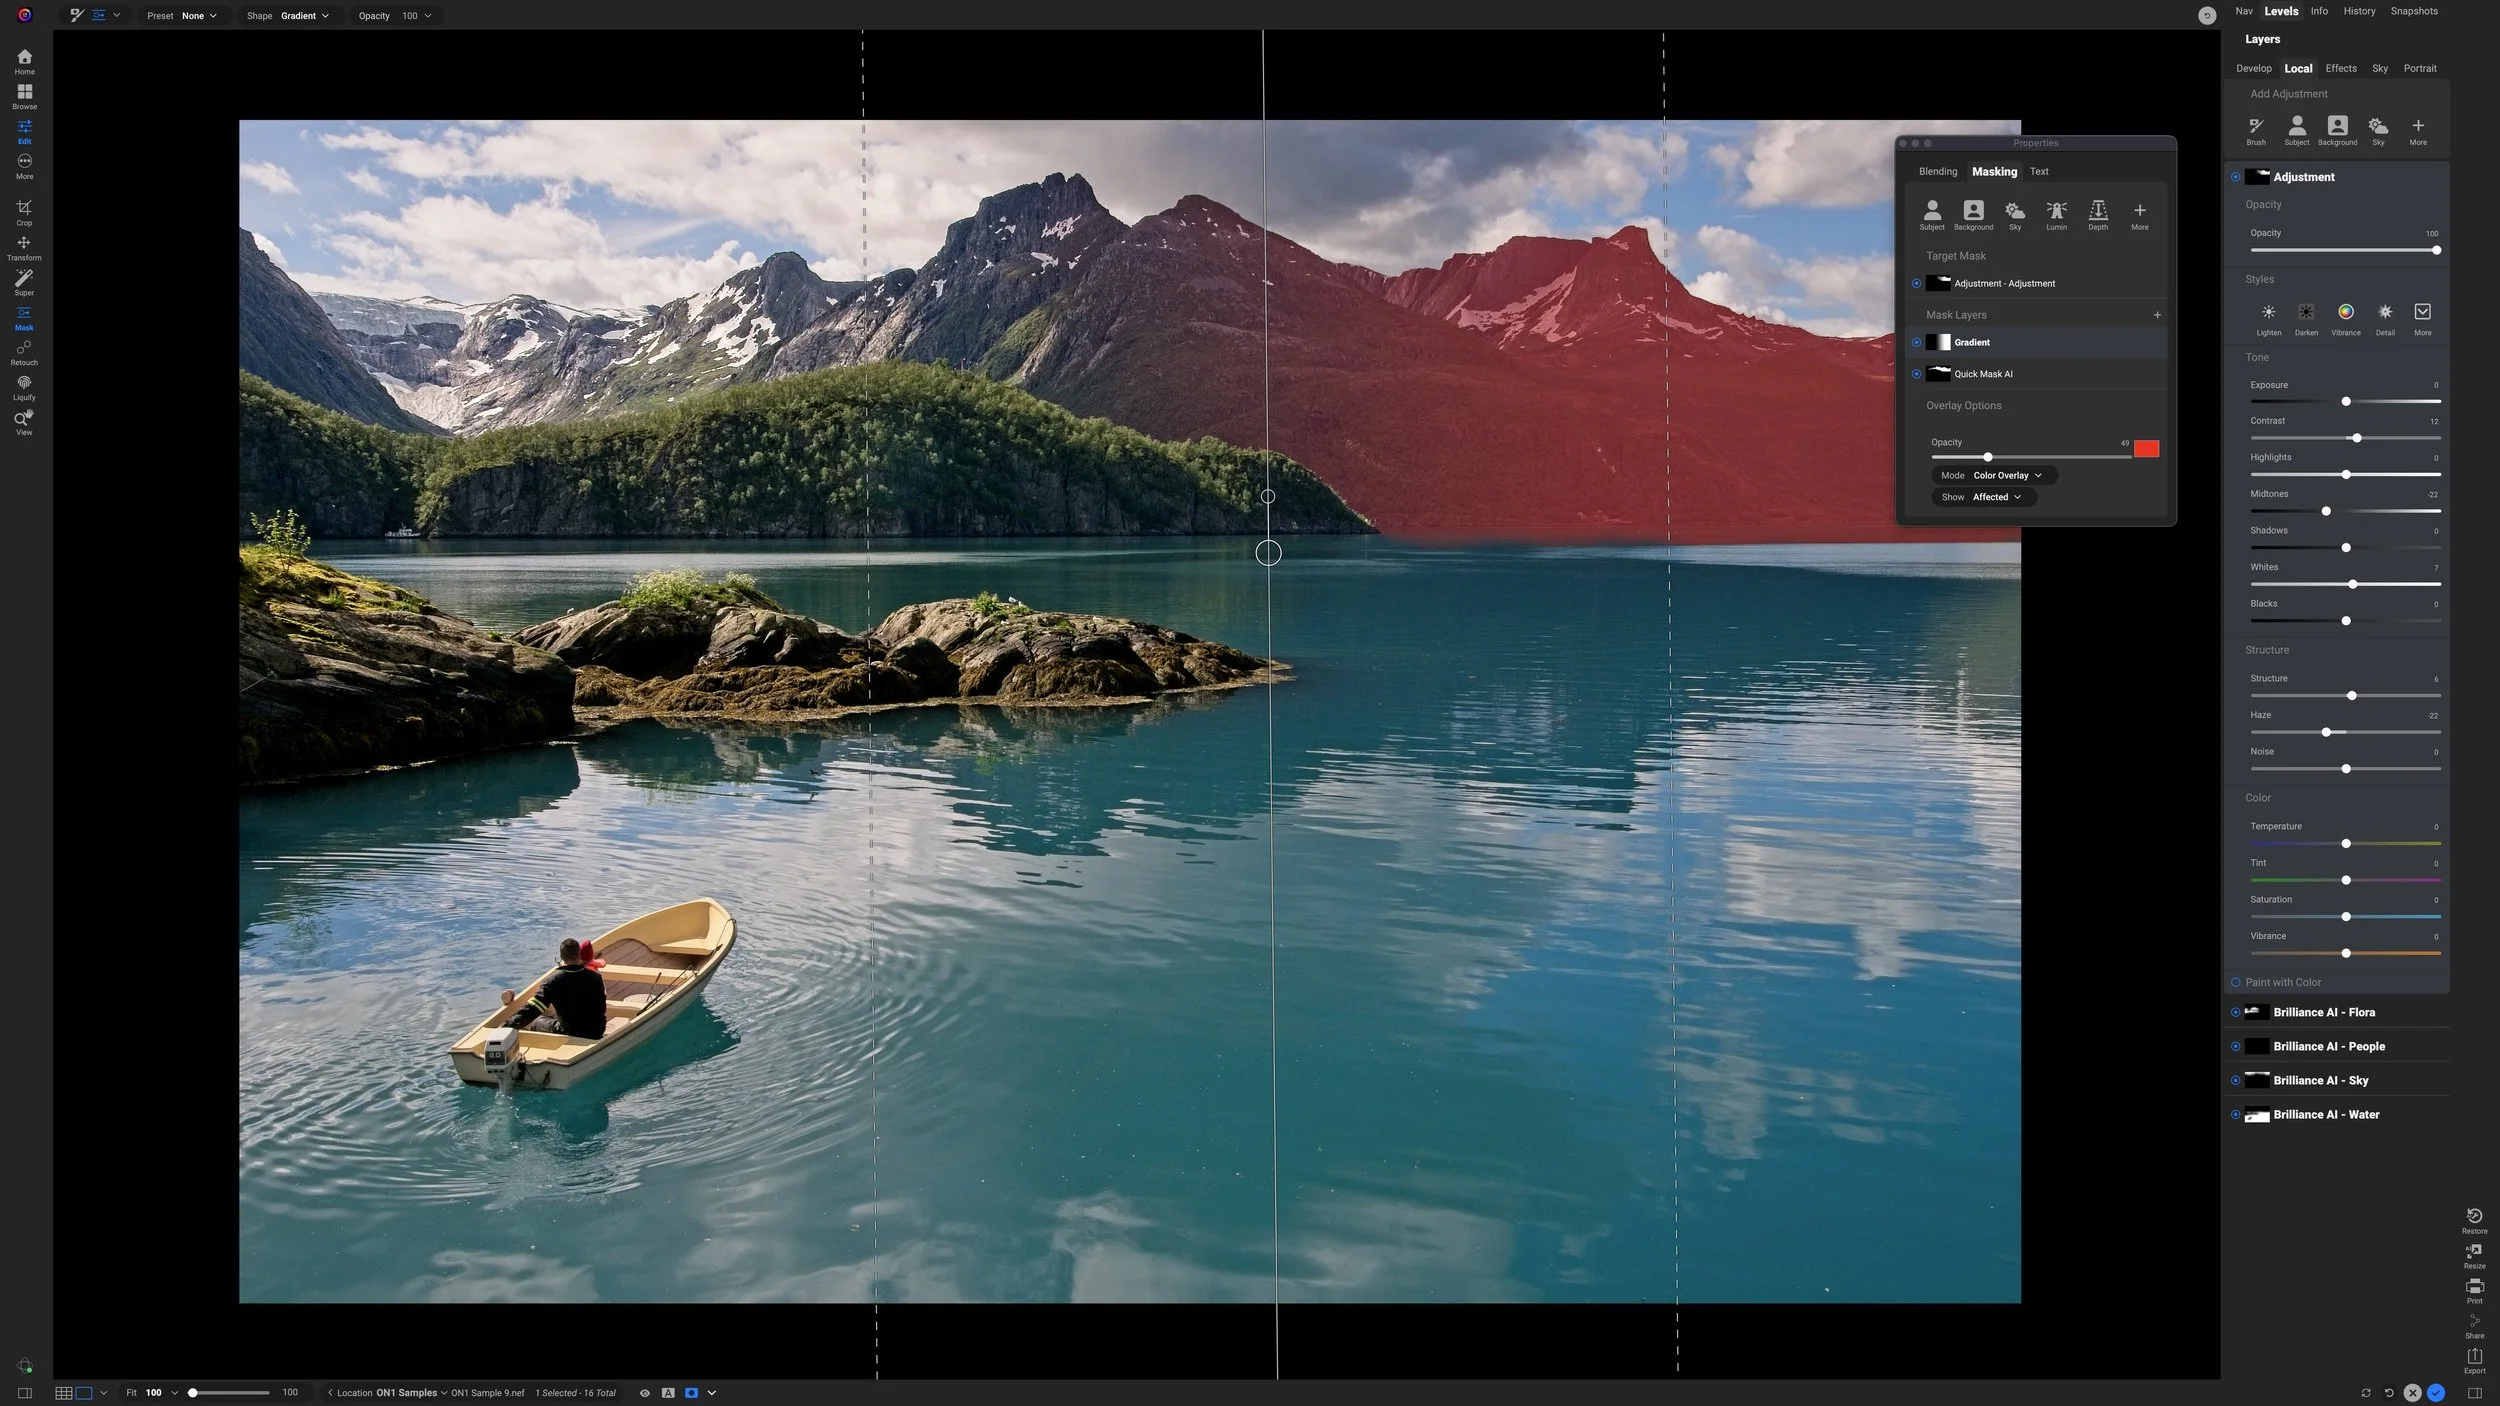
For the Zoom and Twist mode, you can also set the center point for the effect. Click the Set Center crosshairs icon and then click and drag on the preview area to reposition the convergence point for the motion look.
Feeling lucky? For any of the modes, click the Random button and Photo RAW will randomly set the sliders to new values.


The Protect Controls
One of the most useful parts of the Motion filter is the Protect section, which lets you prevent the motion effect from changing either your subject or the background. It’s a one-click option that for many photos removes the need for masking.
However, subject detection is not flawless. If the results from turning on Protect are not to your liking, or a subject cannot be determined, turn off this option and use traditional masking tools to add motion to just the areas of your photo you want. Remember - the masking tools have the same AI smarts and can quickly select subject, objects, and more.