The Sharpening Filter - ON1 Photo RAW 2021
If you are trying ON1 Photo RAW 2021, the ON1 plug-ins, or upgrading from an older version, please consider using my affiliate link. There is no extra cost to you and it helps support ON1 tutorials like this one. Ready to buy? Use the offer code SDP20 at checkout and SAVE 20%!
The Sharpening filter in ON1 Effects adds visual sharpening to your images. This is not a filter I reach for often. However, like all filters, it has its time and place in our workflow.
The Three Sharpening Types
The Sharpening filter in ON1 Effects has three different sharpening types. Each behaves a little differently than its counterparts.
High Pass: Designed for photos that were captured slightly out of focus or soft, sharpening the largest, contrasty edges in a photo.
Progressive: Adds more sharpening to smaller elements with more details and less sharpening to larger elements. The sharpening is not applied uniformly, progressing in sharpness from low levels on large things to higher levels on small things. Hence the name ‘progressive’.
Unsharp Mask: Exaggerates differences of a pixel compared to its neighboring pixels. Sharpening is applied to your entire photo uniformly. It is a good choice for general, overall sharpening.
The default sharpening type is High Pass. Change the type using the popup menu in the filter controls. The built-in styles, like Fix Focus or Screen, are associated with specific sharpening types. Selecting different styles will change the type of sharpening applied.
High Pass and Unsharp Mask tend to adjust the color in a photo as well. Progressive only affects the luminosity, protecting from color shifts.
High Pass is best for photos that are slightly soft.
Progressive adds more sharpening to smaller details and less to larger details.
Unsharp Mask enhances details uniformly throughout the image.
Sharpening Filter Sliders
Like all filters in ON1 Effects, the Sharpening filter has a master Opacity control, blending options, and masking. The sliders unique to the Sharpening filter vary depending on the sharpening type selected.
Amount: All types. Control the overall intensity of the sharpening.
Halo: High Pass and Unsharp Mask. Control the breadth of pixels the Sharpening filter considers when amplifying tones and edges.
Threshold: Progressive and Unsharp Mask. Control how different a pixel must be from its neighbors before it will be considered for sharpening. In practice, increasing this value lessens sharpening in tonally uniform areas.
Detail: Progressive only. Increase the sharpening at the edges of detailed objects.
Understanding in practice how these sliders affect your image is best seen by example. Watch the video to see how each Sharpening filter type and slider changes the effect.
The Protection Sliders
In the bottom half of the Sharpening filter are Protect sliders for Shadows, Highlights and Skin (midtones). These sliders work the same as their counterparts in the Blending Options. The are part of the main body of the Sharpening filter as a convenience. For example, sharpening can accentuate noise and noise is often more pronounced in shadow areas. You can increase the Shadows slider to gently reduce the sharpening in only the shadow areas, without having to dial back the overall strength of the effect itself.


Sharpening Cannot Magically Fix Out Of Focus Photos
Despite the name Fix Focus, which uses the High Pass sharpening type, this style cannot magically fix out of focus photos. Edges will be exaggerated and local contrast will get a boost, giving the illusion of more focus. However, on closer inspection, blurry photos will remain blurry.
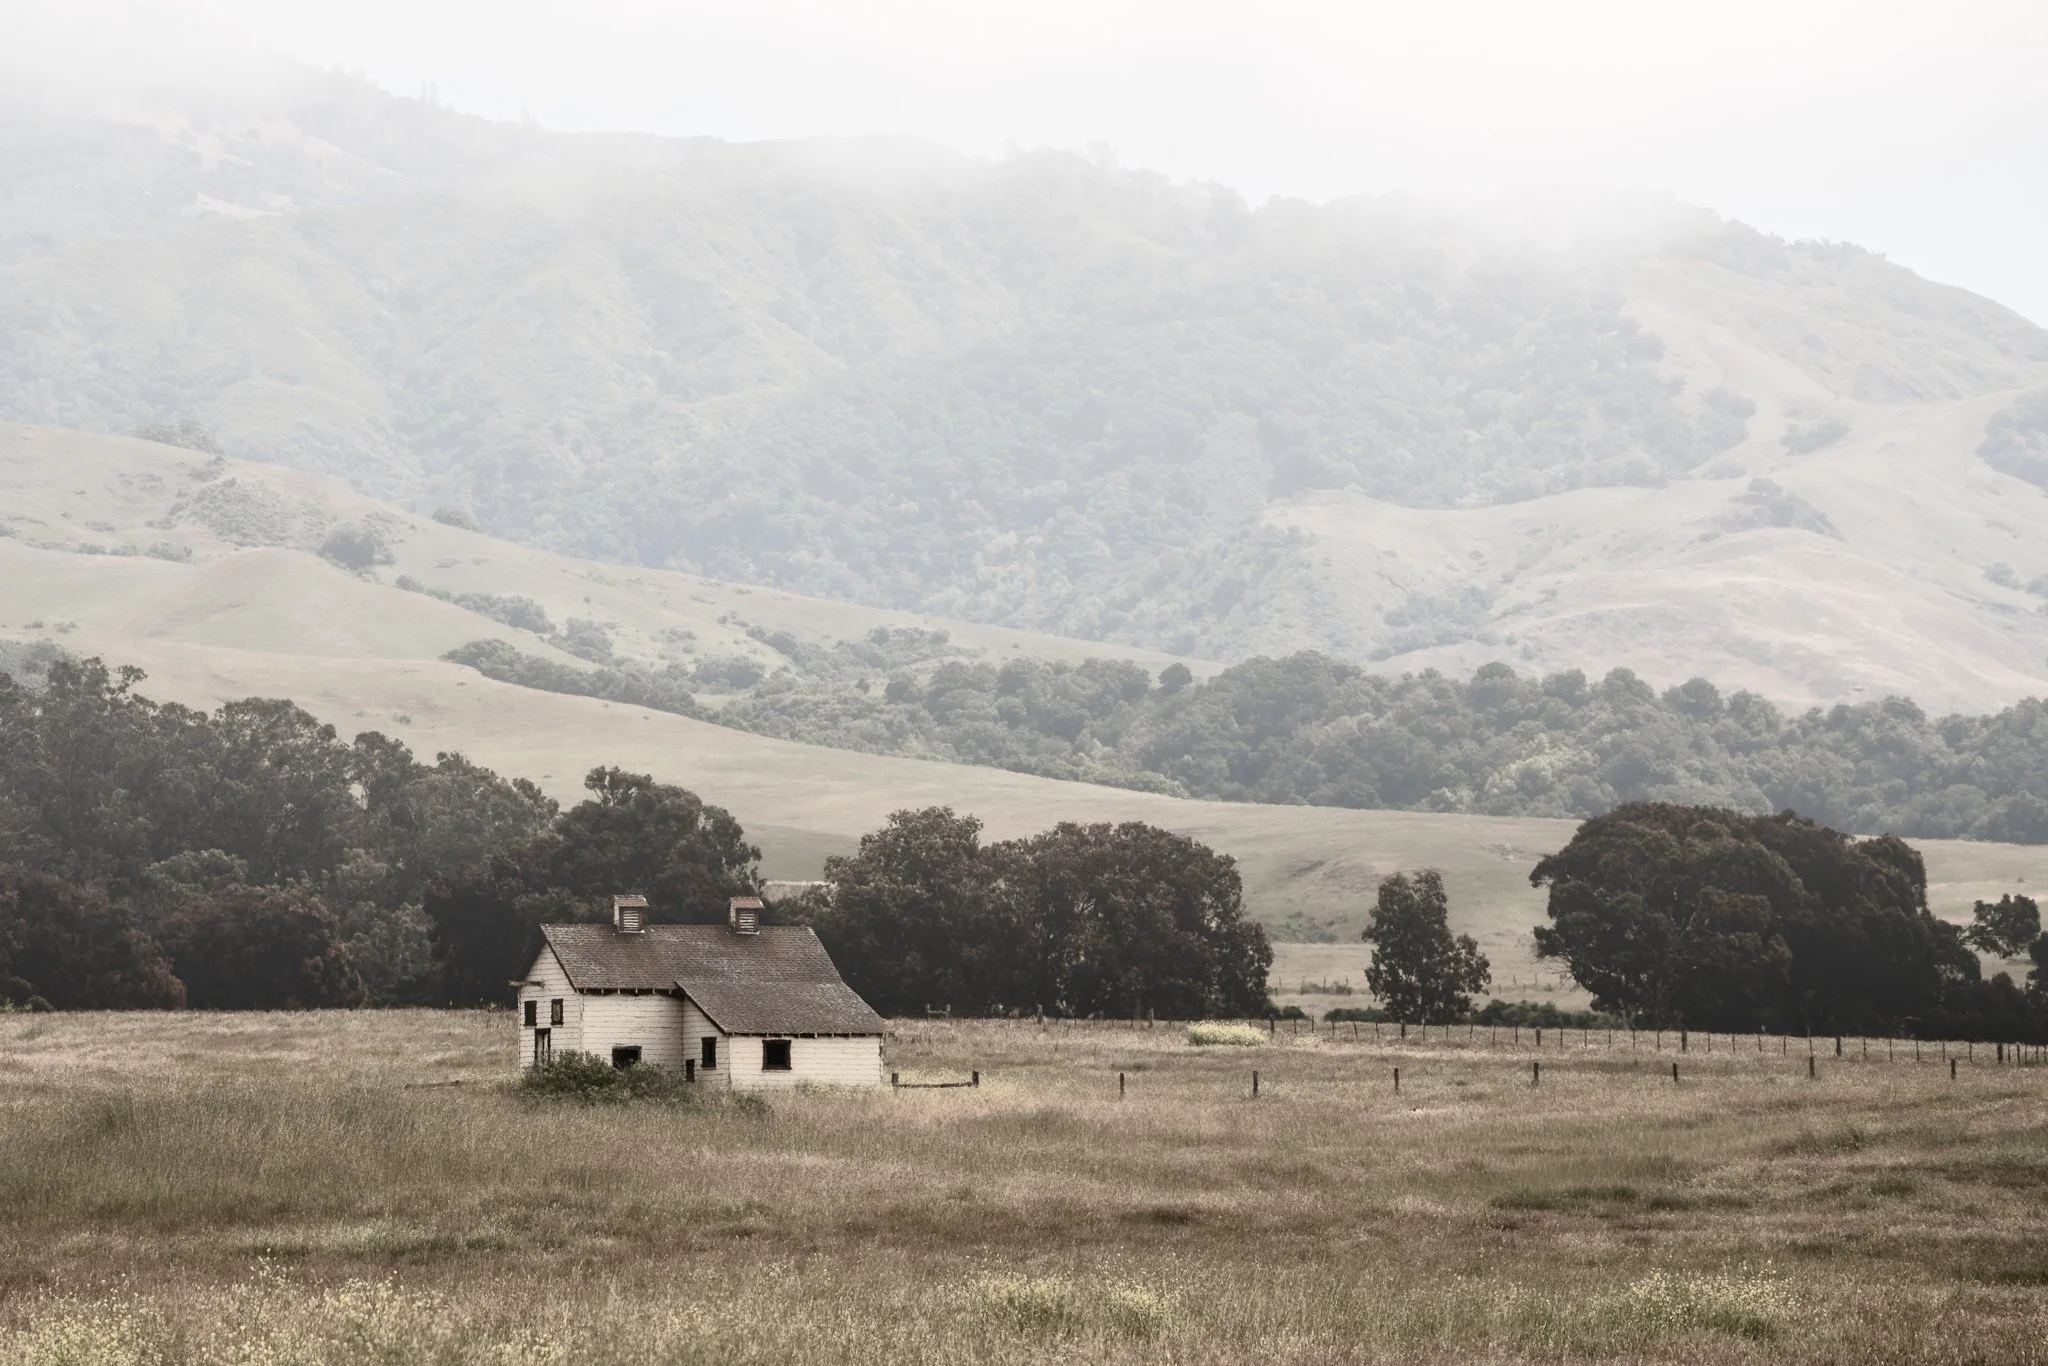
An out of focus photo before adding Sharpening. Notice the boulder-like rocks in the hills are soft.
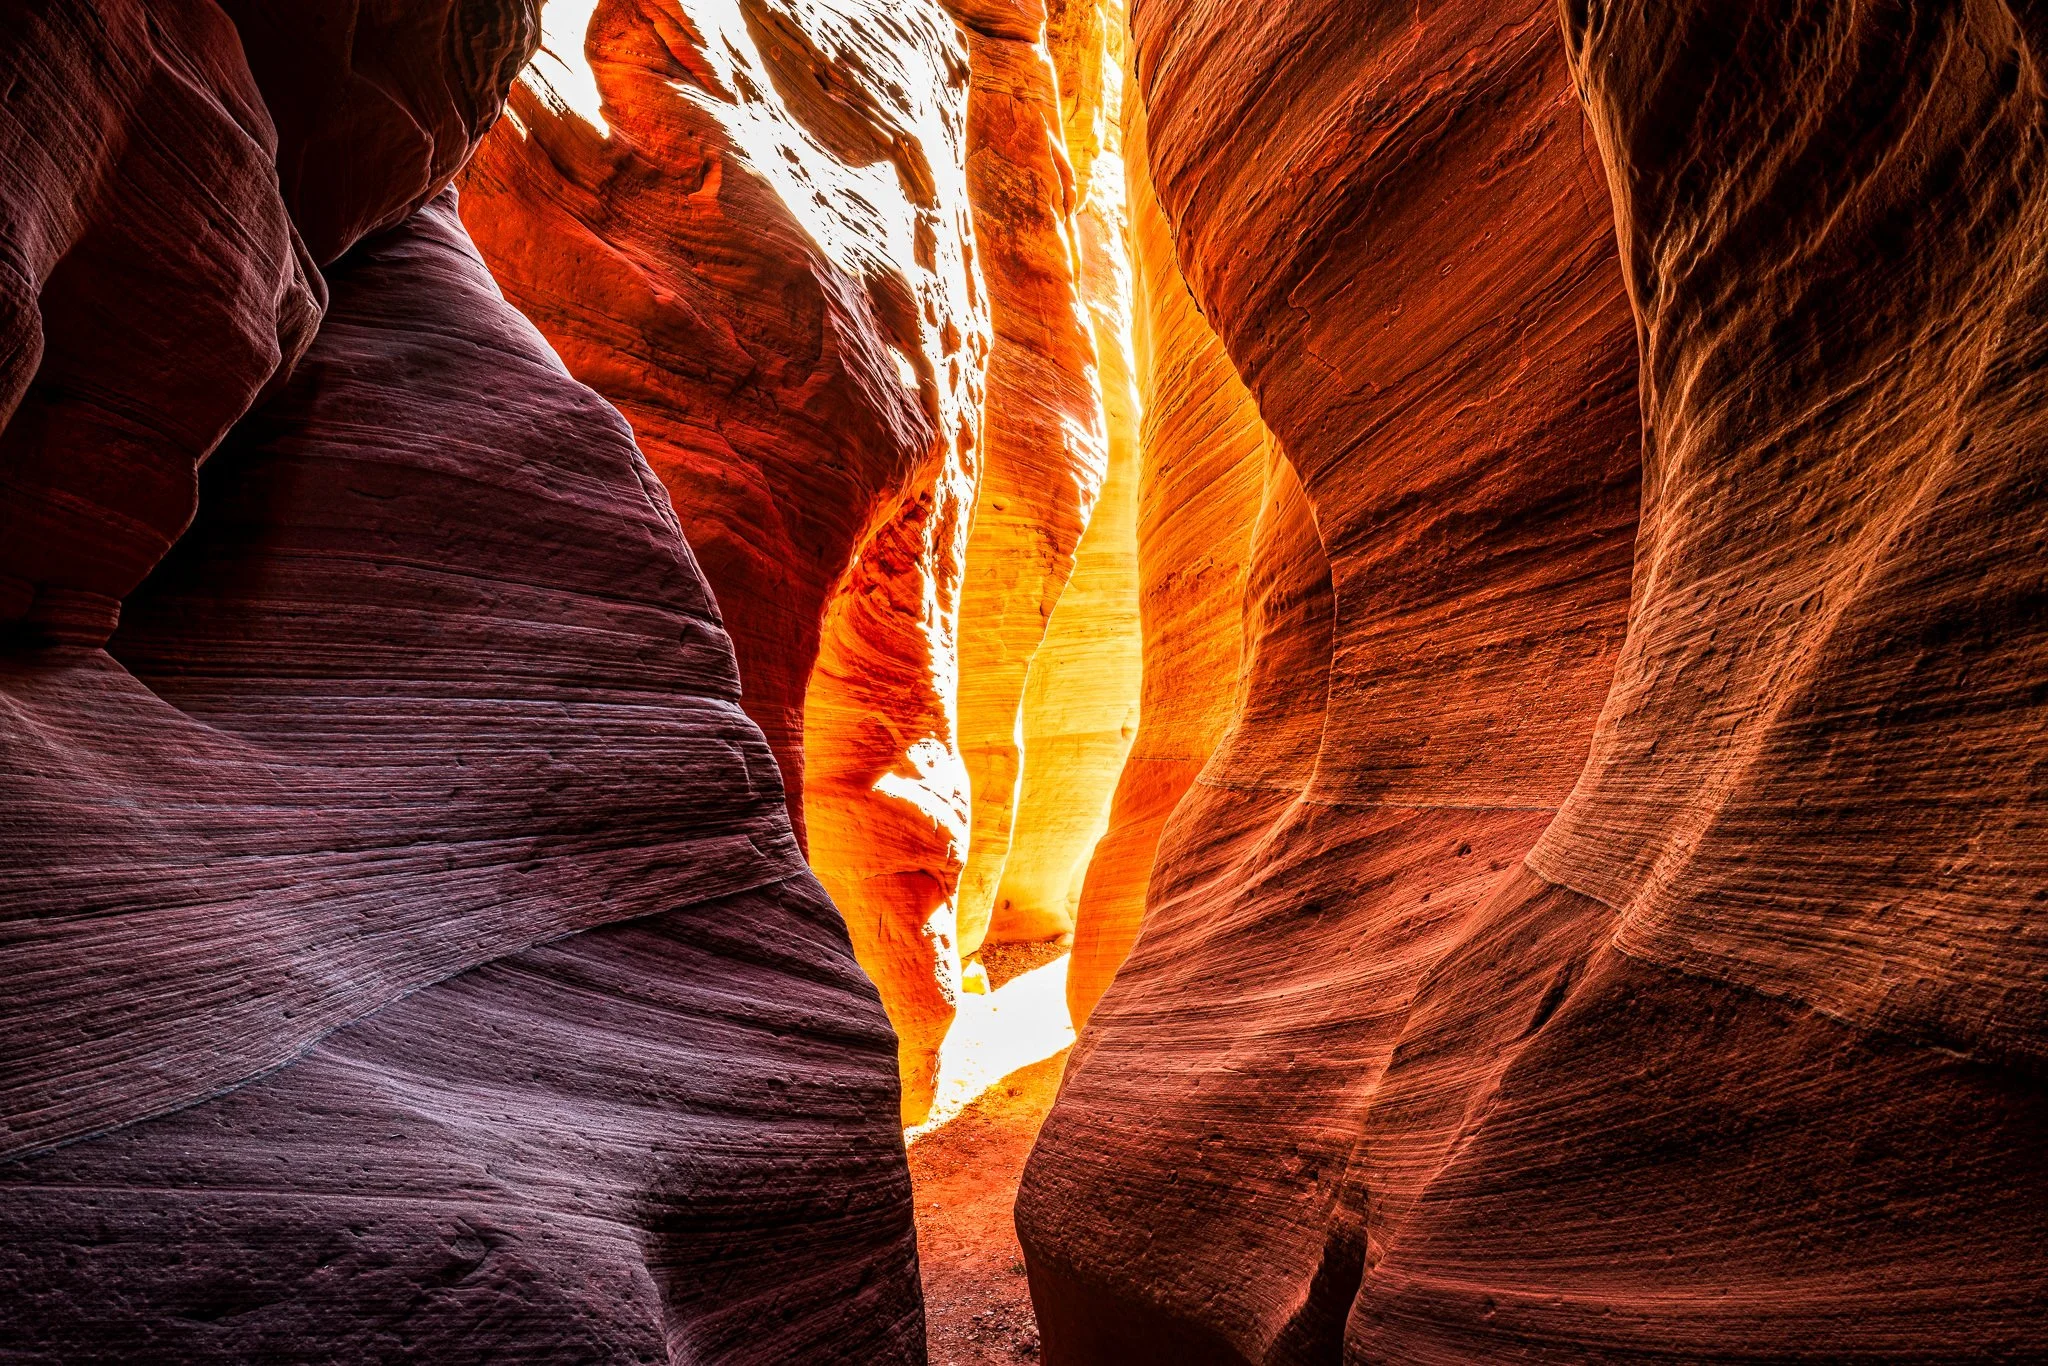
After applying Sharpening, local contrast is boosted. However, the focus issue itself is not addressed.
Notice in this example, the rocks in the deep shadows are soft and blurred. Using Fix Focus and even cranking up the Amount to 100 crispness the edges of those rocks. However, the grasses and more gentler sweeps of the hills - and even the centers of the rocks themselves - are still blurry. Tools can only take us so far when the capture is not sharp to begin with.
Also remember, the Sharpening filter adds visual sharpening. This is not the same as output sharpening added as part of print preparation. Use the Print module to add output sharpening. For more printing tips and free printing tutorials, see my Printing Your Photos page.
Building Reflections In Tokyo
Contact Scott to commission a print or license this image.