Blending Textures In ON1 With The Textures Filter
If you are trying ON1 Photo RAW, the ON1 plug-ins like ON1 Effects or ON1 HDR, or upgrading your ON1 software to a newer version, please consider using my affiliate link. There is no extra cost to you and it helps support ON1 tutorials like this one. Ready to buy? Use the offer code SDP20 at checkout and SAVE 20%!
Textures are a fun way to get creative with your photos. Ordinary photos can take on an entirely new look after blending a texture or two. The Textures filter in ON1 Photo RAW is the gateway to blending textures with your images.
Texture Blending Workflow
Working with textures is very easy and the Textures filter makes it approachable. The basic texture blending workflow is simple:
Choose an overlay with the Texture controls
Set a blending mode.
Adjust the texture opacity.
Everything else is optional. You can adjust the tonality and color of the texture if desired or rotate and flip the texture for a better blend with your image. Textures can also be masked to accentuate the texture in some areas over others.
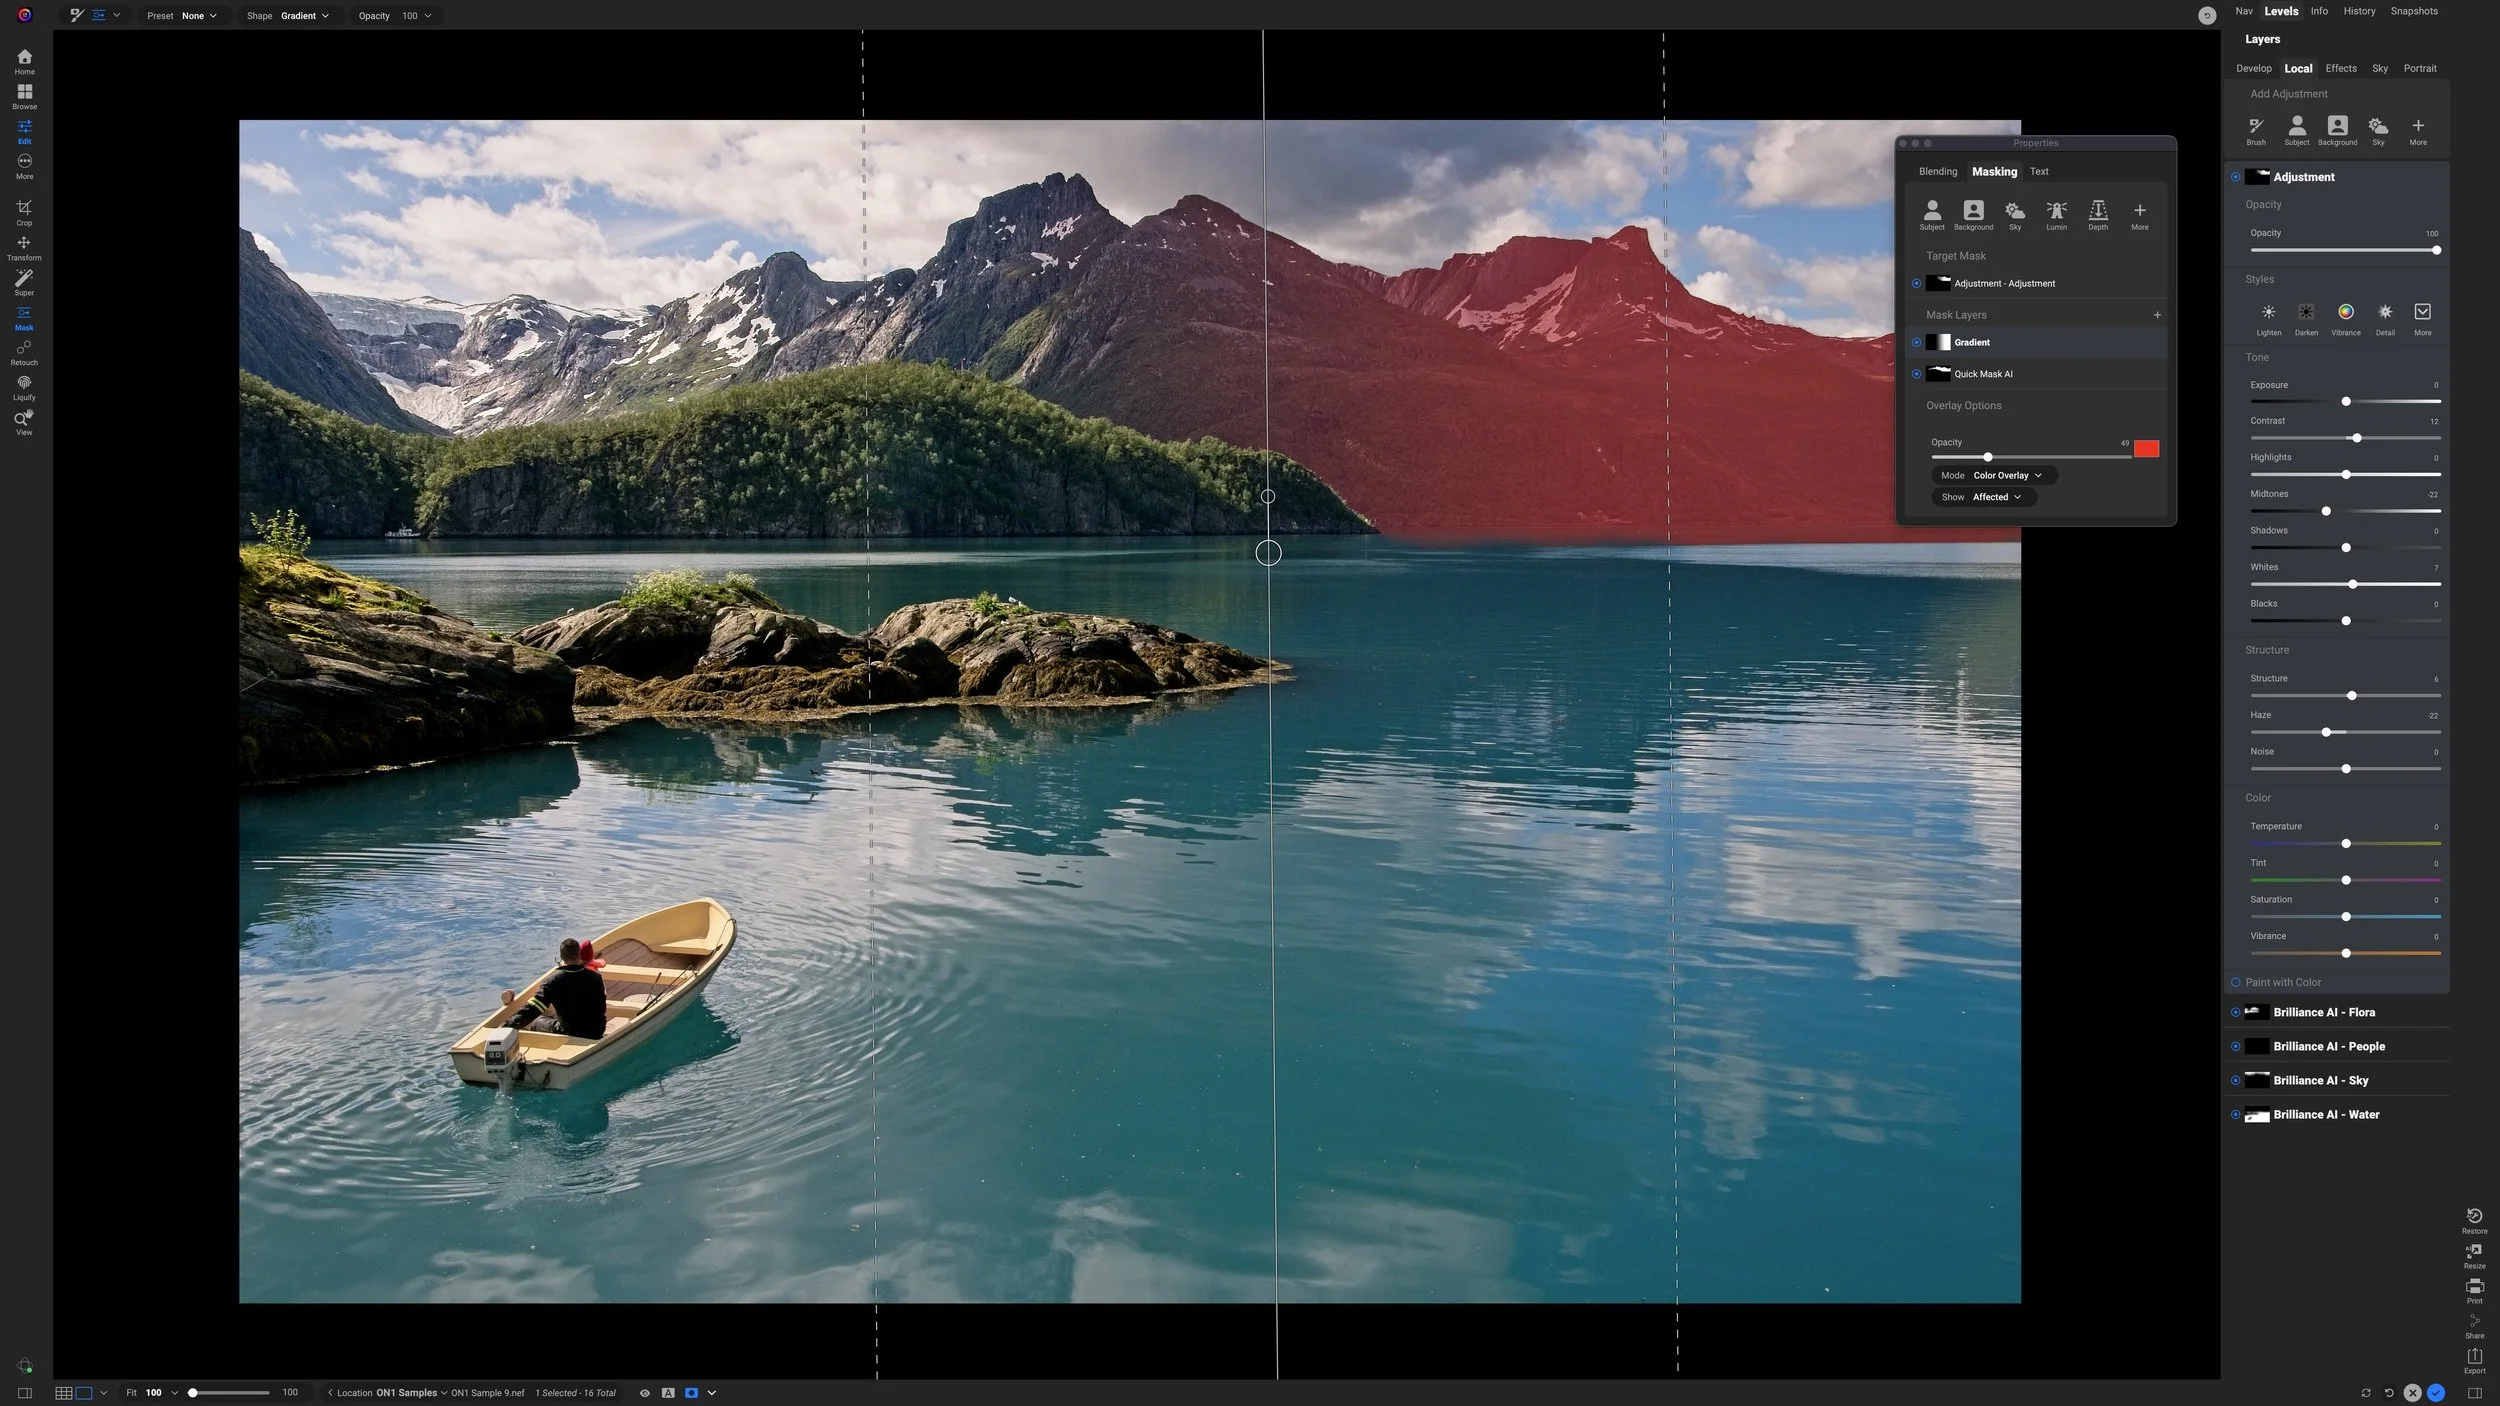
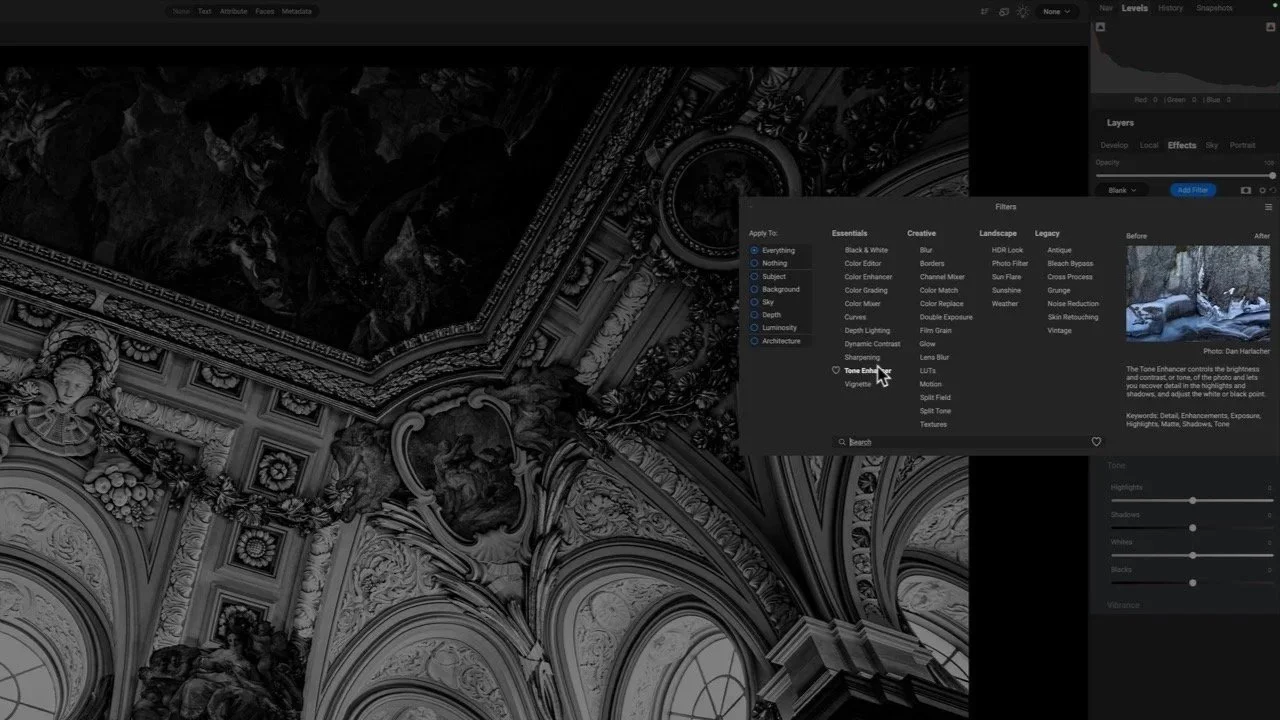
Select a texture and control the blending mode in the Texture section. Try auditioning the blending options by hovering over the choices in the popup menu.
Textures Filter Controls
There are several sections to the Textures filter. The Texture section is where you select a texture and how it blends with your image.
Category: Choose a texture category. ON1 includes many textures in the application. You can also add your own textures with the Import button.
Texture: The actual texture overlay to blend with your image.
Mode: Set how the texture blends with your image. The options in this popup are a subset of the blending options in the gear menu. Hover over the different modes and see how they change the look of the blend.
Opacity: Set the transparency of the texture
In the Tone & Color section, adjust the tonality of the texture itself:
Brightness: Lighten or darken the texture overlay.
Saturation: Enrich or mute colors in the texture.
Hue Shift: Push the color of the texture toward another hue.
Invert: Swap the bright and dark pixels of the texture.
If the Colorize option is selected, you can add a color tint to the texture:
Eyedropper/Swatch: Choose a color for the tint.
Hue Fill: Same as the eyedropper. Choose the color of the tint, using a slider instead of a picker.
Amount: Set the strength of the tint
Adjust the brightness and color of the texture in the Tone & Color section.
Add a tint to the texture by turning on Colorize.
Finally, use the controls in the Transform area to scale, flip and rotate the texture for the best blend with your subjects.
Scale: Increase the size of the texture. The texture scales proportionally from the center outward.
Rotate icon: Rotate the texture in 90 degree increments.
Vertical double-arrow: Flip the texture vertically
Horizontal double-arrow: Flip the texture horizontally.
The Fit To Canvas option ensures the texture covers your entire photo. This ensures a smaller texture covers a large megapixel image from edge to edge.
Scale and rotate the texture to best suit your photo. The Fit To Canvas ensures the texture covers your entire photo.
Limits With The Textures Filter
There are two limits with the Textures filter.
You cannot scale down or shrink a texture smaller than its original size. The Scale slider does not allow negative values.
You cannot pan a texture. You can flip and rotate it, but cannot shift it vertically or horizontally.
For some composite work, these limits are not a problem. For others, it is. The good news is you can also add textures as layers to a multi-layer document. Layers do not have these limitations. Layers also allow you to apply editing filters to the texture itself and blend that with your image. I have a full video course called Texture Blending In ON1 Layers. It’s an “oldie but goodie” and teaches you everything you need to know about texture blending in ON1 for less than $10.


Mask Your Textures And Add Multiple Textures
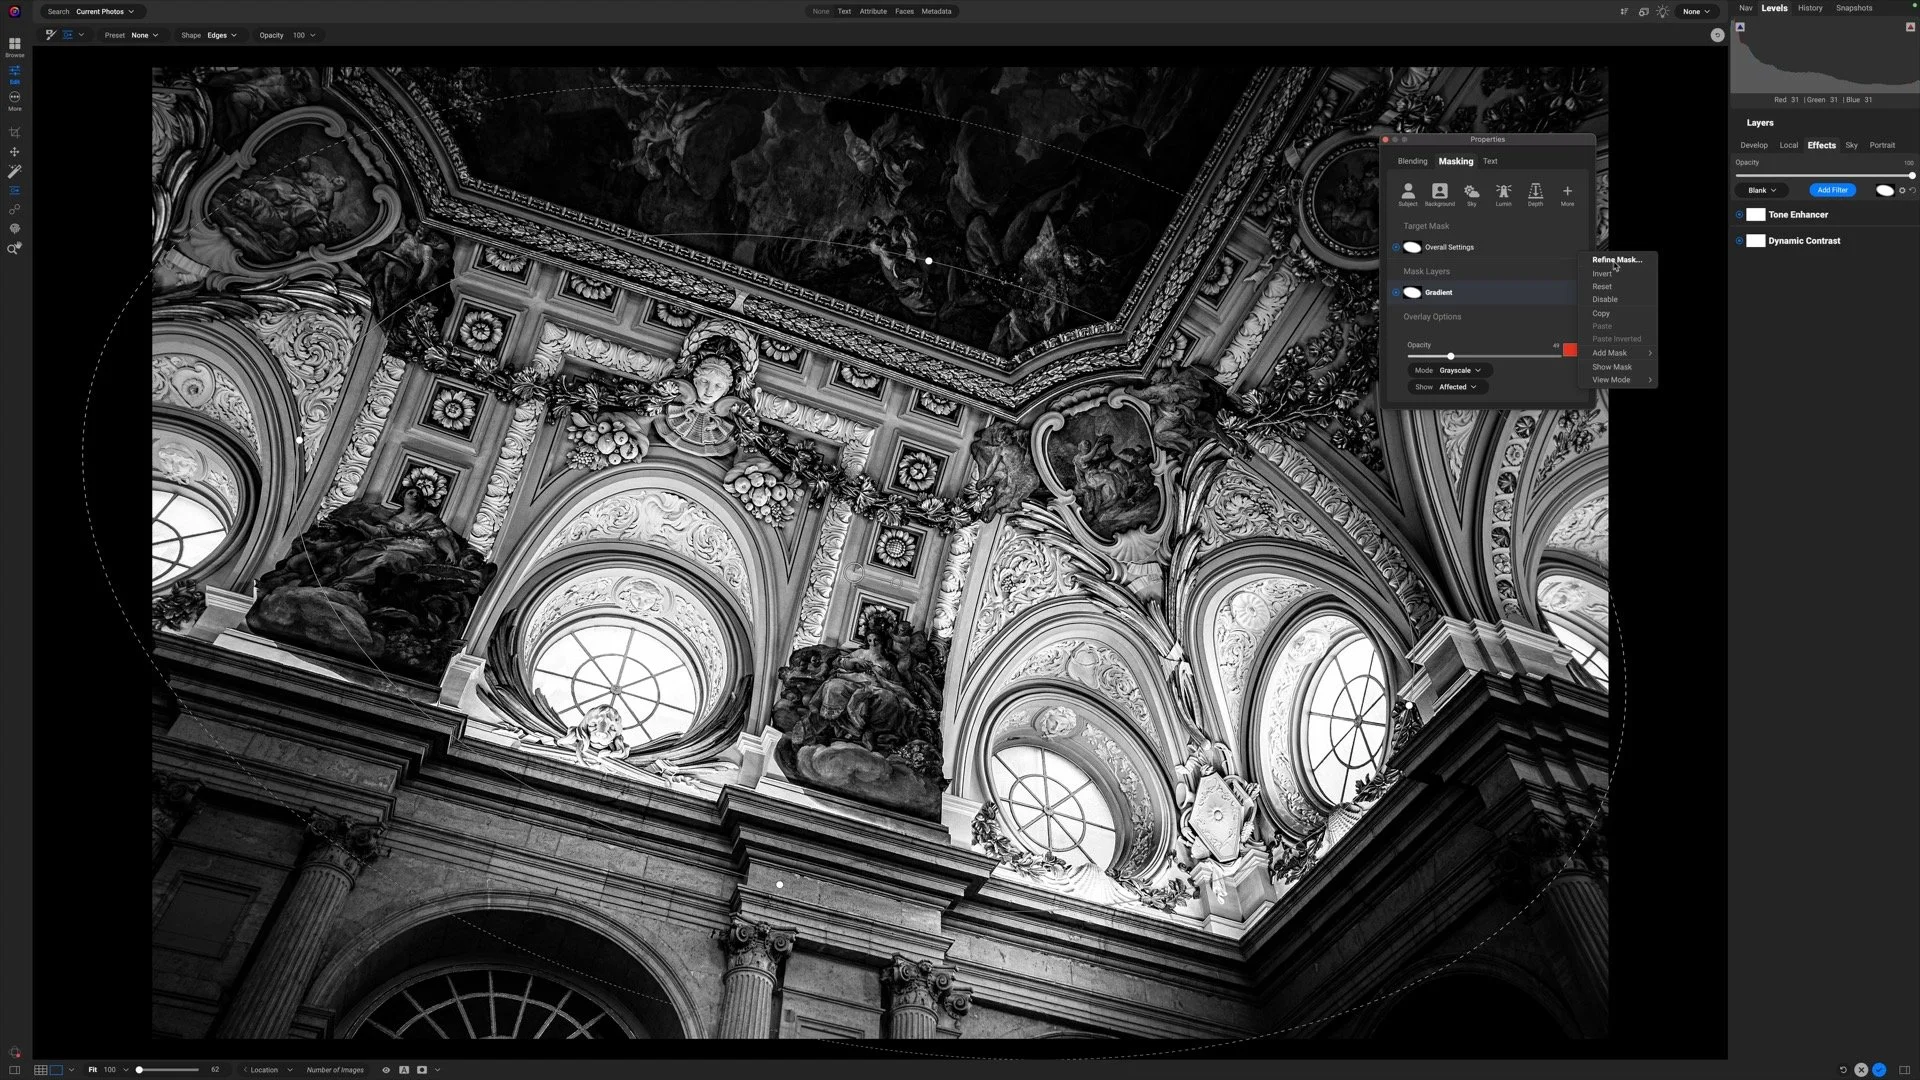
Textures are just like all filters in Photo RAW. You can add masks to a texture filter so it applies only to the areas you want. In the example photo in this article, I added a mask to the paper texture to partially remove it from the foreground.
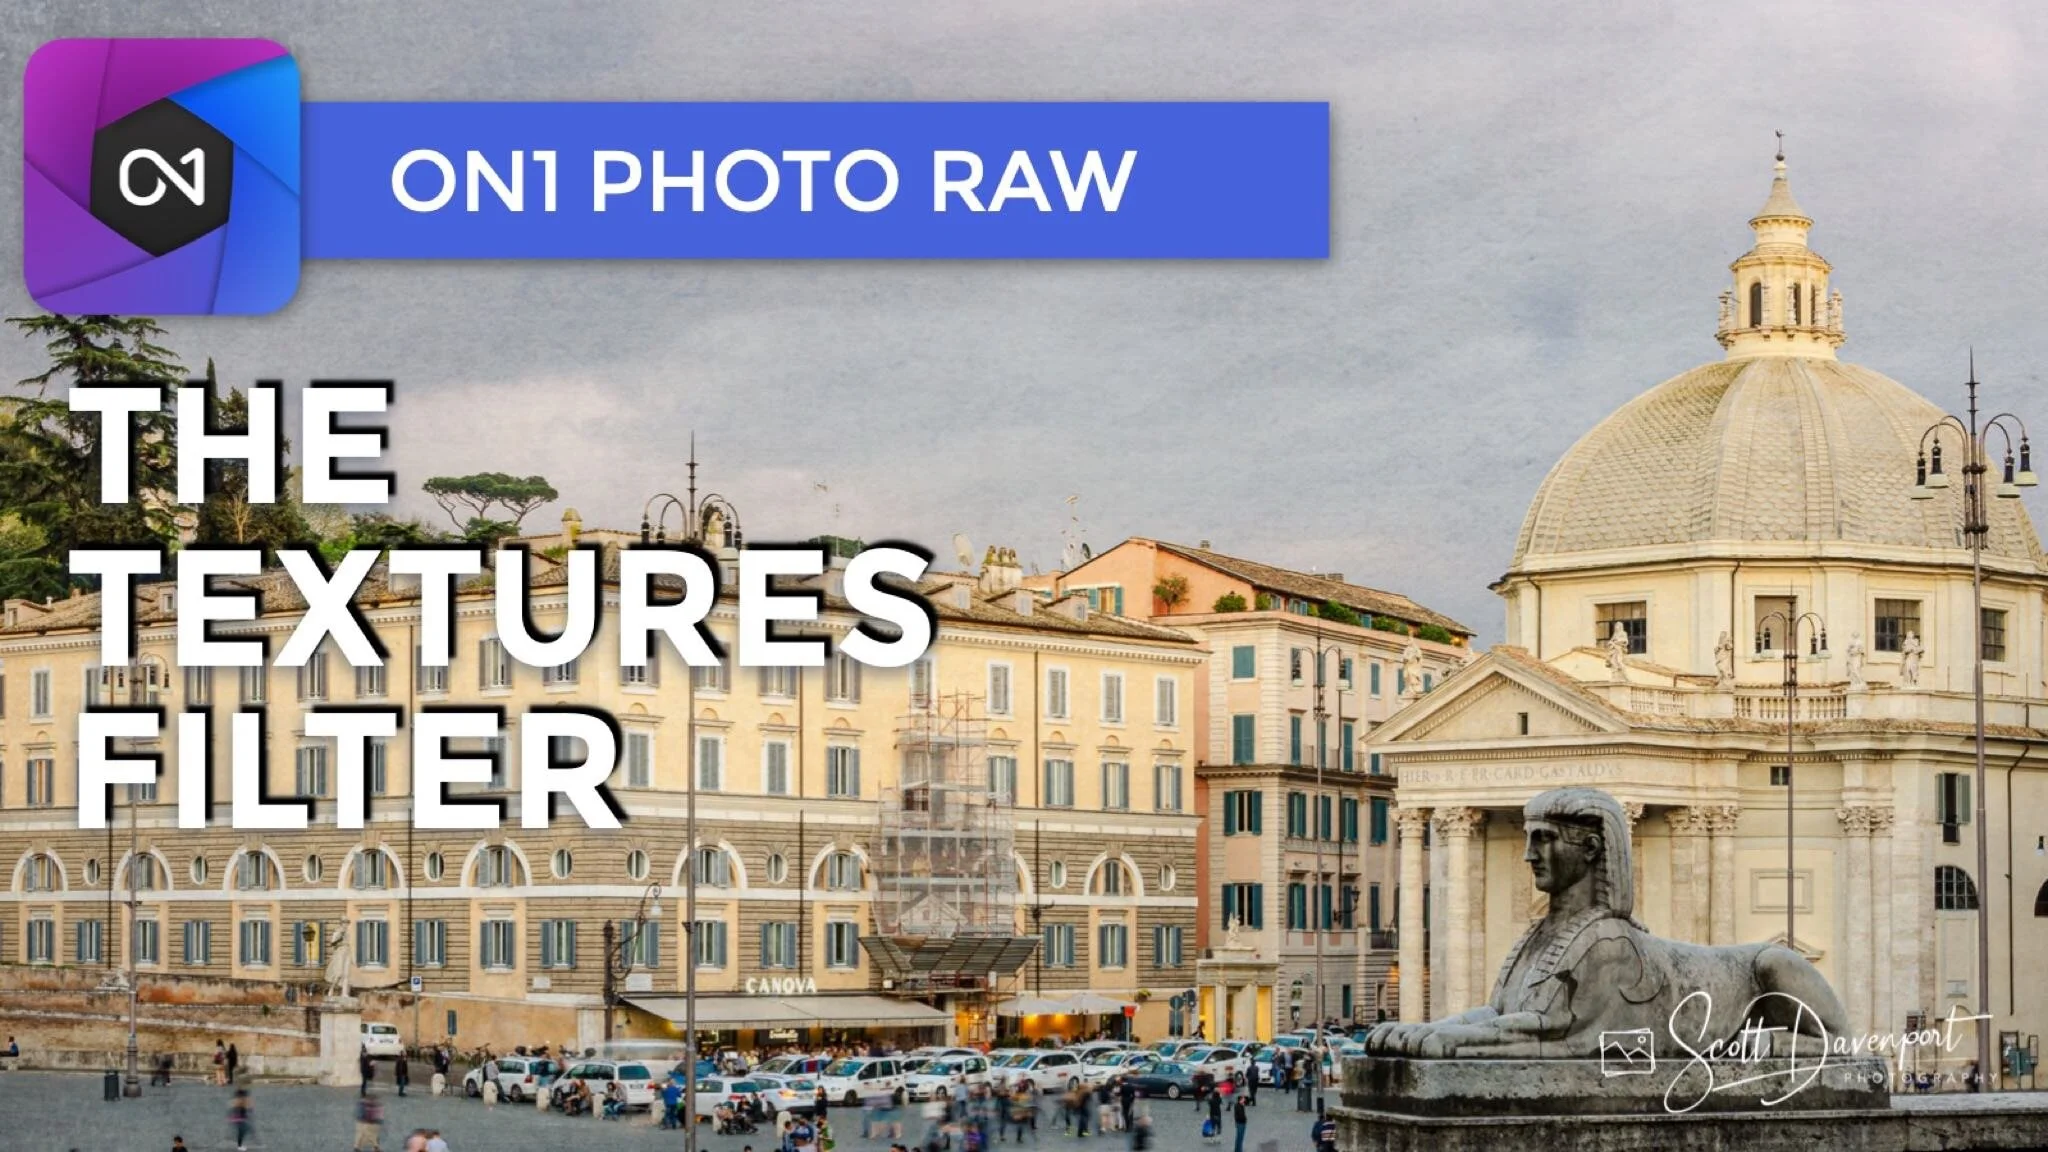
You are not limited to a single texture either. Want to blend more textures? Add another Textures filter. A personal favorite is the Grunge Vignette texture for a darkening of the corners. I added a second texture to my “Rome postcard” style here to add a weathered, handled feel to the corners of the image.
Postcard From Rome
Contact Scott to commission a print or license this image.