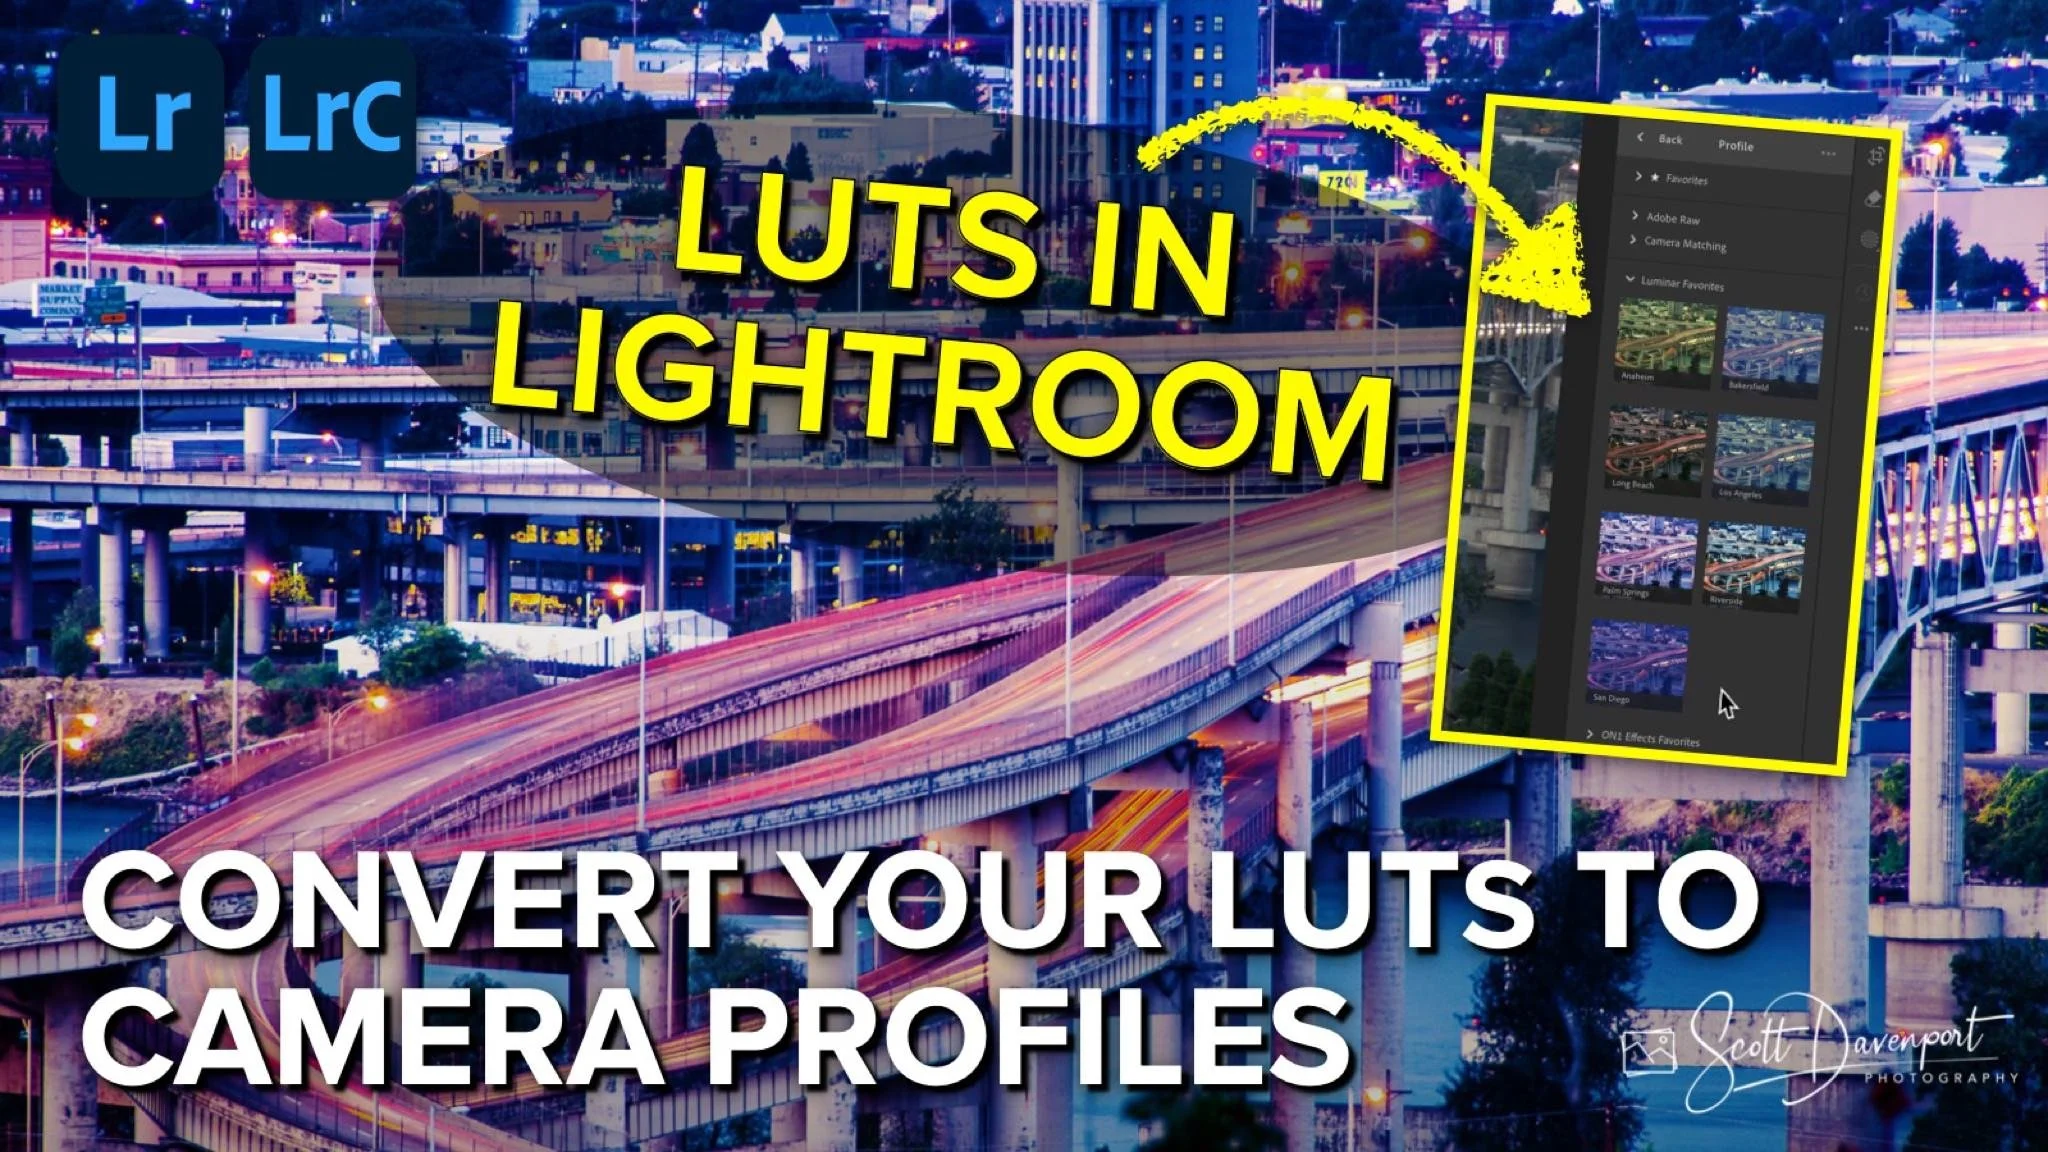
How To Convert A LUT To A Lightroom Camera Profile
LUTs can subtly or dramatically change the look of your photo. I’ve used LUTs for years in my processing to evoke a particular mood or feed. Historically, I’ve used LUTs in plug-in programs like Luminar or ON1 Effects. However, I like using LUTs early in my workflow.
Well… did you know… you can convert a LUT into a Lightroom camera profile? Yes! I’ve been converting some of my favorite LUTs into camera profiles so I have ready access to them right in Lightroom. It’s easy to do and in this article I’ll explain how you convert a LUT into a Lightroom or Camera Raw camera file.
What You Need
Here’s what you need to convert a LUT into a Lightroom or Camera Raw camera profile.
A LUT file in the CUBE format. You might get your LUTs from a photo or video "looks” pack or as bonuses from photo software companies. Your favorite photo editors might even have a few hidden away within the app itself.
Photoshop. You’ve probably got this, since Lightroom or Camera Raw is your target.
Lightroom or Lightroom Classic. Of course! You wouldn’t be here to learn how to convert a LUT into a Lightroom profile if you didn’t have Lightroom :)
Convert The LUT To A Camera Profile In Photoshop
The first step is to convert the LUT into a camera profile. Photoshop offers a way to do this, although it’s not the most obvious thing in the world. Here is what you do:
Open any image in Photoshop. It doesn’t matter what one because you’re not going to do any edits to it.
Choose Filter > Camera Raw Filter from the menu.
Press and hold the Option (macOS) or the Alt key (Windows)
Click the triple-dot icon on the far right edge of Camera Raw and choose Create Proifle.
In the popup window, click the Color Lookup Table option at the bottom.
Choose your LUT file in the CUBE format
Add a Name for the camera profile. The name of the LUT is a good choice.
Choose a Group for the camera profile. You can use an existing group or create a new one.
Click OK
You’re done! The LUT is converted into an XMP camera profile that Lightroom, Lightroom Classic and Camera Raw can recognize. Photoshop automatically stores the camera profile in a standard Camera Raw settings folder on your computer. Where? You’ll only care if you are using Lightroom. Lightroom Classic already knows where to look. Read on!
Press the Option (macOS) or Alt (Windows) key and choose the Create Profile option.
Load the LUT in a CUBE format, choose a profile group, and create the camera profile.
Lightroom Classic - Restart To Use The Camera Profile
Restart Lightroom Classic and camera profiles are read in from the Camera Raw settings folder. Your converted LUTs are included.
If you are a Lightroom Classic user, you need to restart the application for the new camera profiles to be seen. Lightroom Classic already knows where the Camera Raw settings folder is. When the application starts, it will read in the camera profiles from that folder
To access your newly converted LUT:
In Develop, open the Basic panel
Click the Profile browser grid icon.
Find the Group used when you converted the LUT and you’ll find the camera profile there.
Lightroom - Import The Camera Profile
For Lightroom, you have to expressly import the converted camera profile. So you need to know where on your computer that Camera Raw settings folder is located.
On macOS: ~/Library/Application Support/Adobe/CameraRaw/Settings
On Windows: C:\Users\%userprofile%\AppData\Roaming\Adobe\CameraRaw\Settings
Alternate Windows location: C:\ProgramData\Adobe\CameraRaw\Settings
With that folder in mind, fire up Lightroom and import your camera profiles as follows:
Go into the Edit mode.
Click the Profile browser grid icon.
From the triple-dot menu in the Profiles area, choose Import Profiles.
Navigate to the Camera Raw Settings profile using the appropriate path above.
Select the XMP file with the name you used when you converted the LUT
The profile appears in the Profile browser in the Group you set when you converted the LUT to a camera profile.
Camera profiles must be imported into Lightroom. Open the importer and use the Camera Raw Settings folder appropriate for your computer.

The camera profile is available to be used immediately after import. The Group set when the LUT was converted into a profile is used for organization.
Conclusion
So there you go! Simplify your workflow and get your favorite LUTs at your fingertips in Lightroom. You can convert a bunch of LUTs at once in Photoshop. Keep that Camera Raw filter open and repeat the Create Profile cycle to convert your LUTs.
Marquam Bridge, Portland
Contact Scott to commission a print or license this image.