5 Reasons I'm Thrilled With ON1 Photo RAW 2018
What a week this is shaping up to be! I'm about to hit the road for the Oregon Coastal Adventure workshop. And ON1 Photo RAW 2018 officially released, too! I've been using the beta version for the last several weeks and it is excellent. ON1 has packed a lot into this new release. Among the features and improvements, there are 5 that bubble to the top for me. Let's run them down.
1. Luminosity & Color Range Masking
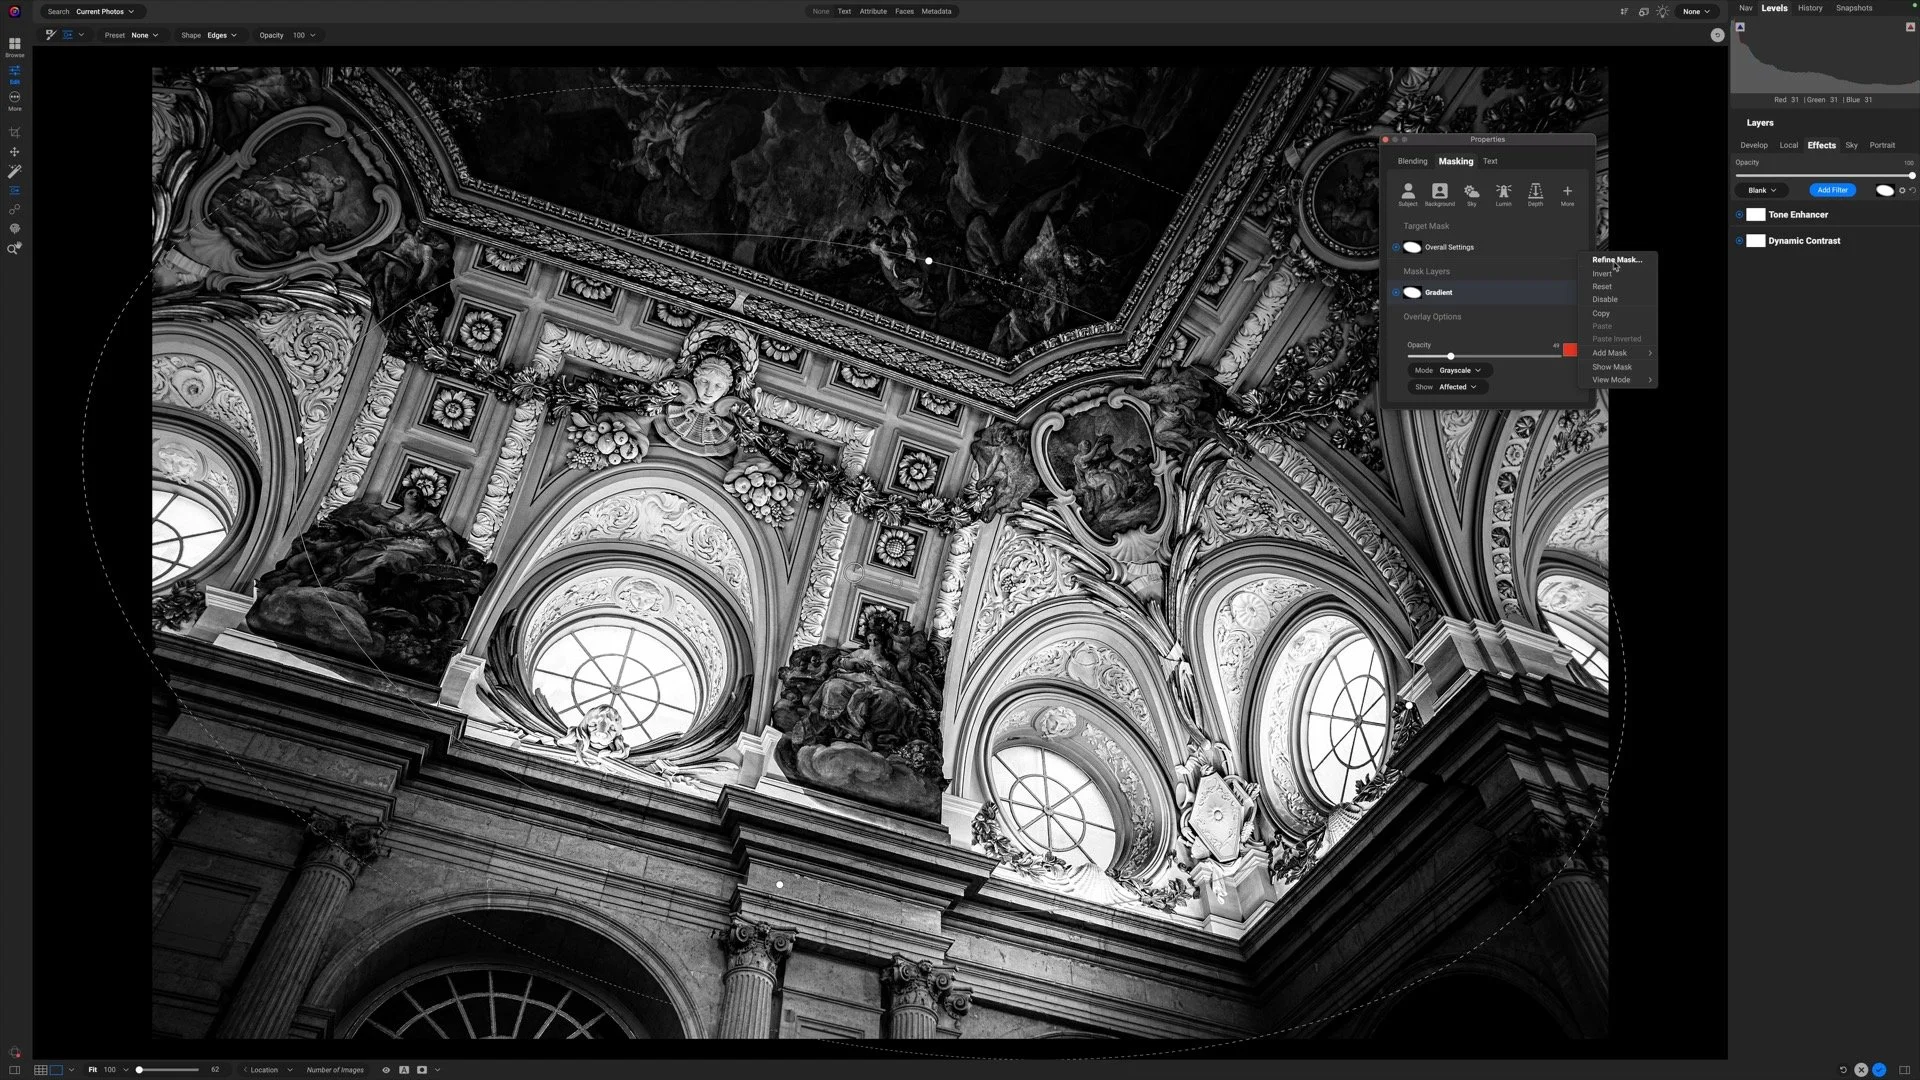
Amazing new masking controls for Effects and Local Adjustments
Luminosity masks are easier than ever to create. The masking area for the Effects filters and Local Adjustments now has a Lumen button. The knockout punch is the new slider controls to fine tune the masks:
- Density: The overall strength of the mask. If you want to mask a complex area at partial strength, do it at 100% with the Perfect Brush. Then, dial back the density.
- Feather: Soften the transition of all your masking brush strokes with a single slider.
- Levels: Like an old-school levels control, but for the mask. You can define what's considered deep shadows, bright highlights, and the transition between them. It's great for fine tuning luminosity masks.
- Window: Fine tune the tonal range of a mask by shrinking the tonal "window" the mask effects. This is another control perfect for luminosity masks. If you've been waiting for controls to home in on very specific tonal zones, here ya go.
Complex luminosity masks made easy with the Levels and Window sliders.
The Levels and Window sliders give results similar to the blending options - and those still work, too, by the way! I think the Window control makes it easier because you can visualize the adjusted luminosity mask with the mask overlays.
Oh... and if that wasn't enough, you can mask based on color tones, too! Effects filters and Local Adjustments now have a color picker. Select a color tone from your photo, dial in the range, and quickly generate color-based masks.
I have already been putting these features to use. I have also added several videos to my Mastering Light And Shadow In ON1 Photo video course explaining these features in detail.
Quickly preview panoramas and add panning metadata
2. Panoramic Merge
I am shooting more panoramas since investing in a leveling base. Panoramic merges is a welcome addition to ON1 Photo RAW. The preview image takes just a few seconds to render. The screenshot here is a merge of 7 photos. Each frame is a 36MP RAW file from a Sony A7R. The preview took about 3 seconds to appear. That fast preview lets me quickly decide whether or not to proceed with stitching. After all, stitching together monster panos will take time.
The merge preview offers controls to crop or warp fill the edges (or do nothing). I like the option of sending the resulting merge to Develop or Effects for further processing. You can also use the Add Panoramic Metadata so shared to sites like Facebook let a user pan around the scene.
3. Photo Versions
I think we all try out various treatments and styles on our photos. Versions make this easier - and it saves storage space. Versions in ON1 Photo RAW 2018 work like virtual copies in Lightroom or Versions in Aperture. In a non-destructive workflow, changes to your photo are tracked as instructions against your original image. When you view a photo in Browse, Photo RAW replays those instructions against your unmodified original photo and displays the results.
Versions allow you to have multiple sets of instructions for the same, single original photo. Creating versions is very fast - you are only copying the settings, not duplicating the original photo. That also means you're not eating up megabytes of disk space with each variation of your photo. As a photo educator, I find this especially useful. When teaching in workshops and private lessons, it is much easier to play "what-if" games and explore ideas with a minimal impact to workflow.
4. Blur And Chisel Are Non-Destructive!
The return of old favorites! Long time ON1 users know the Blur Tool and Chisel Tool from the Layers module. Now these tools are full members of a RAW, non-destructive workflow.
What do these tools do? The Chisel Tool shaves pixels at the edges of masks. It is excellent for fine tuning the mask at hard edges. It's the tool you grab to help tone down halos. The Blur Tool softens the edge transition of a mask. I use the Blur Tool to selectively feather areas of a mask, or where my brush strokes overlap.
5. User Interface Refinements
These are the spit-and-polish improvements. Honestly, these are the features that set apart good software from great software. You might spend a lot of time in your photo editing software, and the better the interface, the more time you spend thinking about your photo. That's what photography is all about, really.
ON1 Photo RAW has made subtle changes to the UI that might go unnoticed at first. For example, the longer slider controls in Develop, Effects and Local Adjustments allow for finely controlled changes. Also, customizing the accent color of selected photos and filters is nice. Why? You can choose a cooler, subtler color that doesn't draw away from the photo you are working on. I also appreciate that the tool controls are centered in the toolbar above my photo. Almost always it means less "mousing around" to change a tool setting - and that's more time I'm working on my imagery.
UI improvements may not jump off the Photo RAW 2018 feature list. However, when you spend healthy amounts of time in any piece of software, thistype of attention to detail matters.
Of course, there are many more features in ON1 Photo RAW 2018. HDR merging, new camera support, new lens support, selective noise reduction and mobile photo sync - just to name a few. And I've only talked about the processing features. Photo RAW is also an asset manager with excellent metadata support, curated albums, metadata-driven albums and fast indexing of your favorite sets of images. ON1 has put forth a very well featured and very compelling piece of photo software.
ON1 Photo RAW 2018 is more than worth a test drive. You can learn more about how Photo RAW works on my ON1 Learning Center.


