3 Pro Tips For A Natural Sunshine Effect In ON1
If you are trying ON1 Photo RAW, the ON1 plug-ins like ON1 Effects or ON1 HDR, or upgrading your ON1 software to a newer version, please consider using my affiliate link. There is no extra cost to you and it helps support ON1 tutorials like this one. Ready to buy? Use the offer code SDP20 at checkout and SAVE 20%!
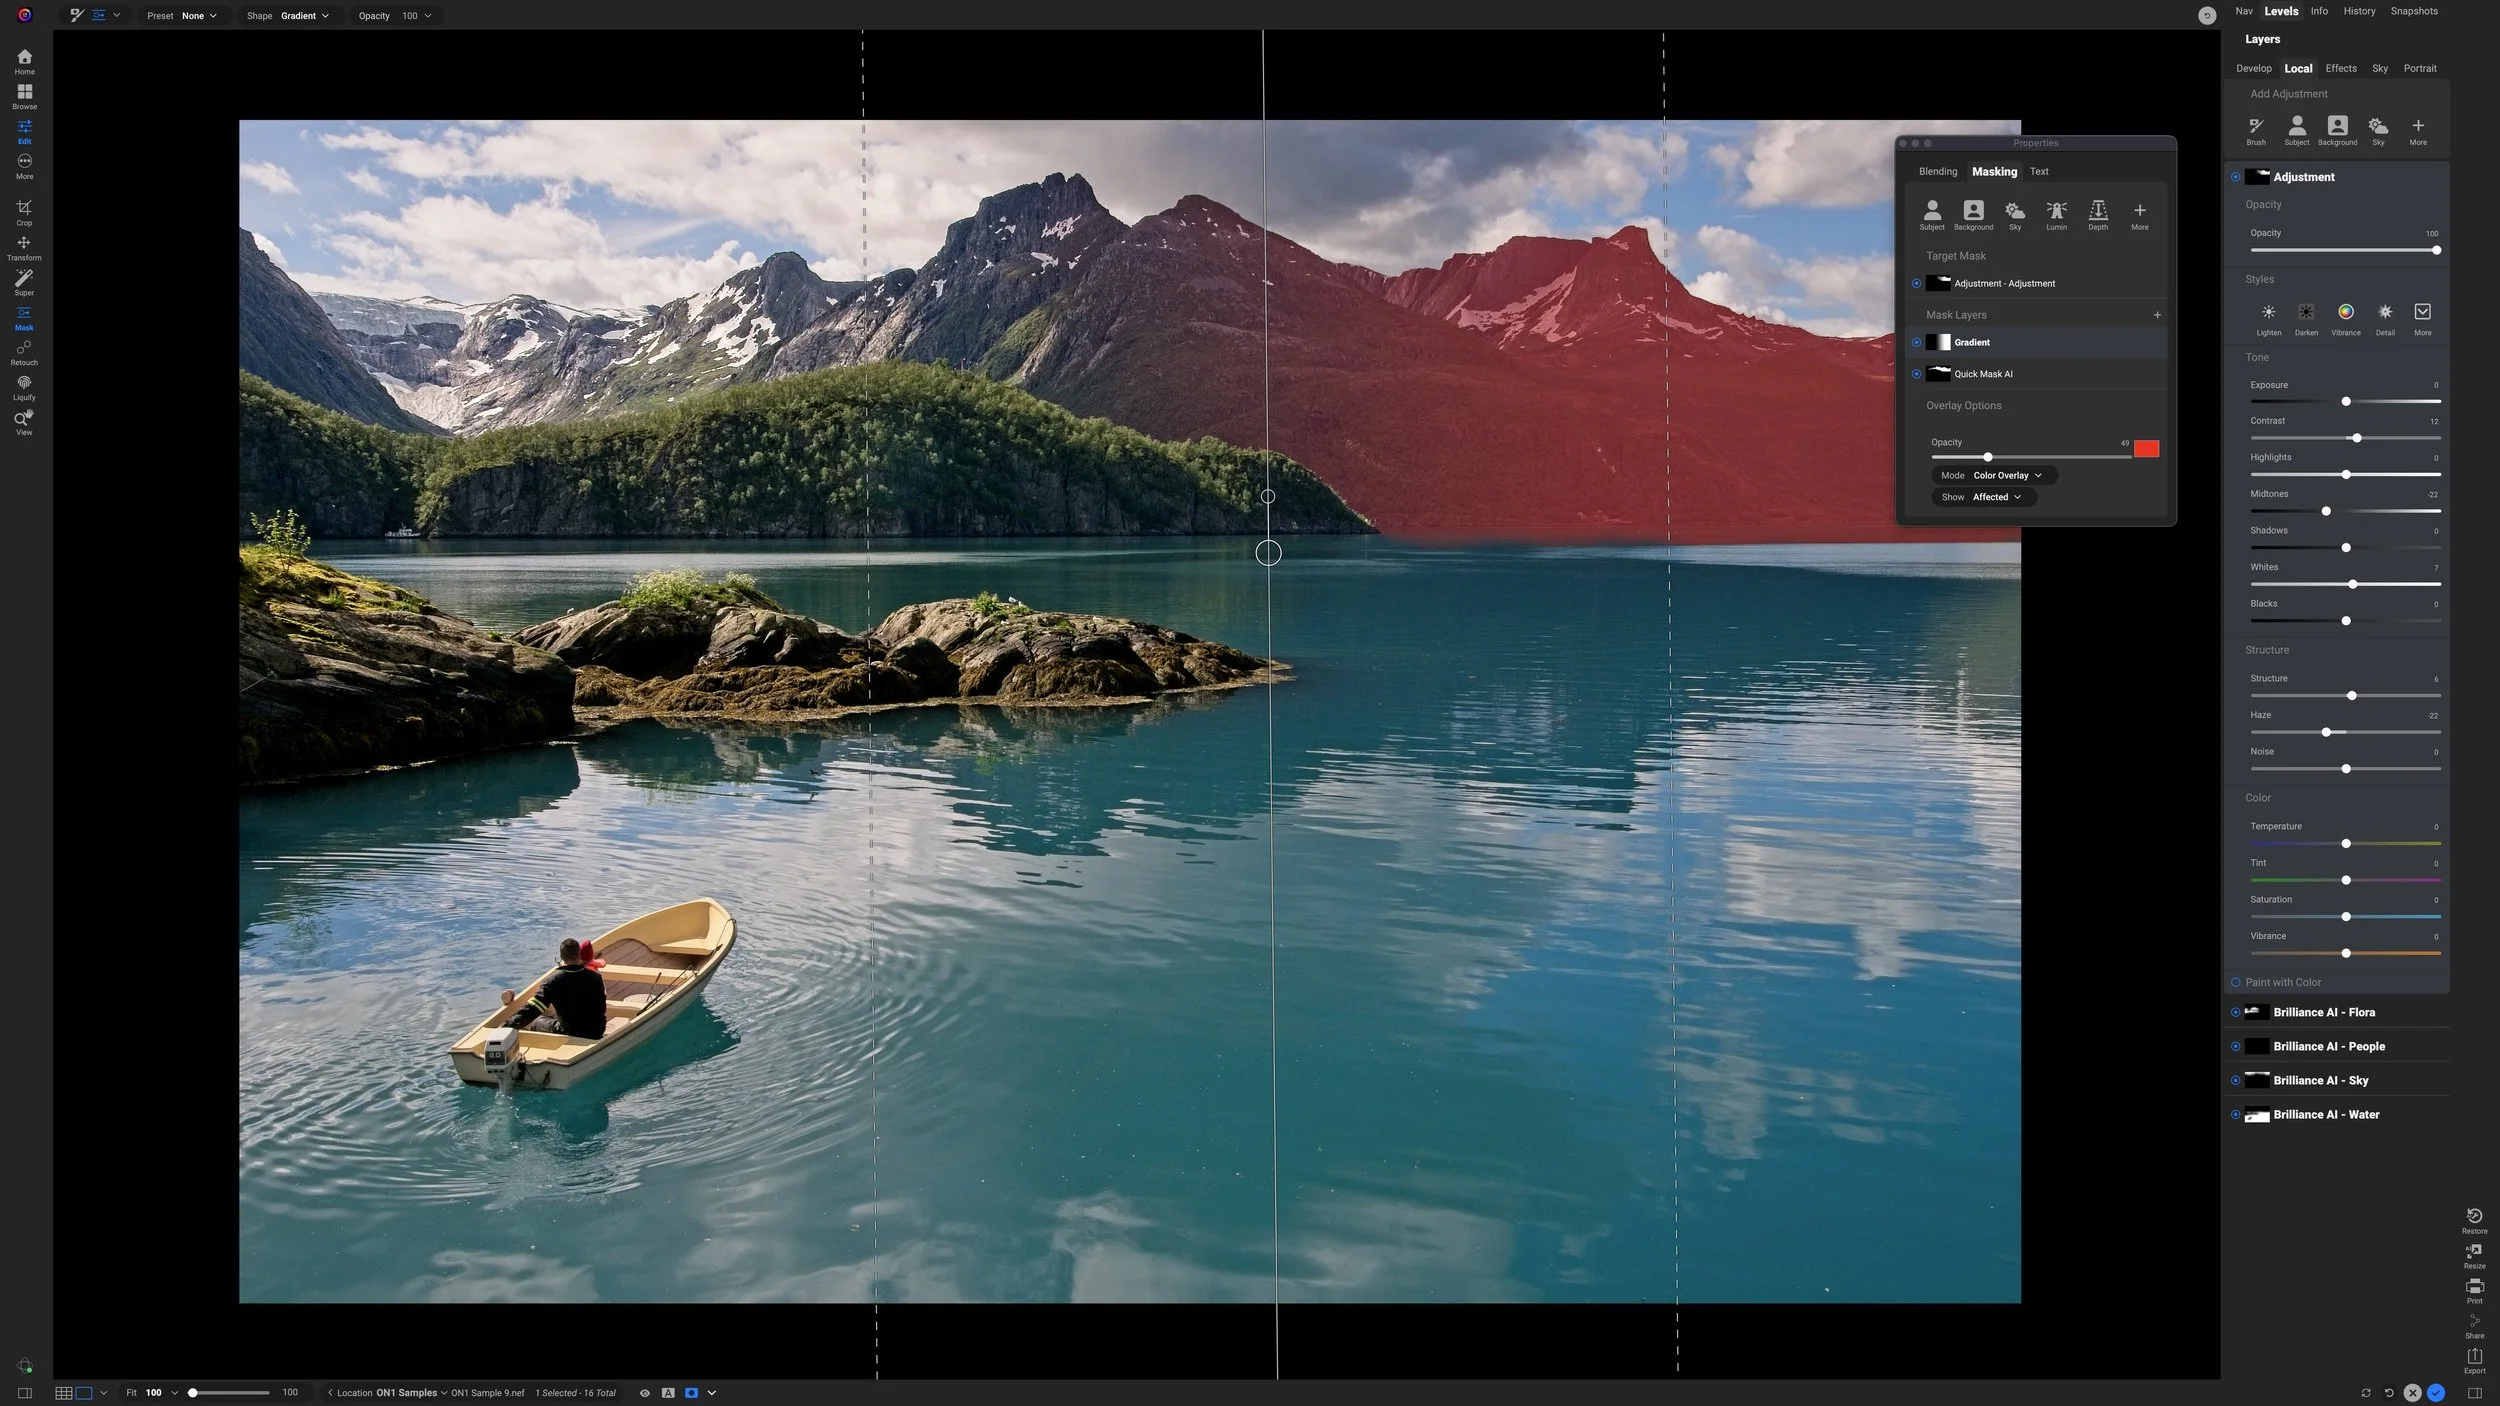
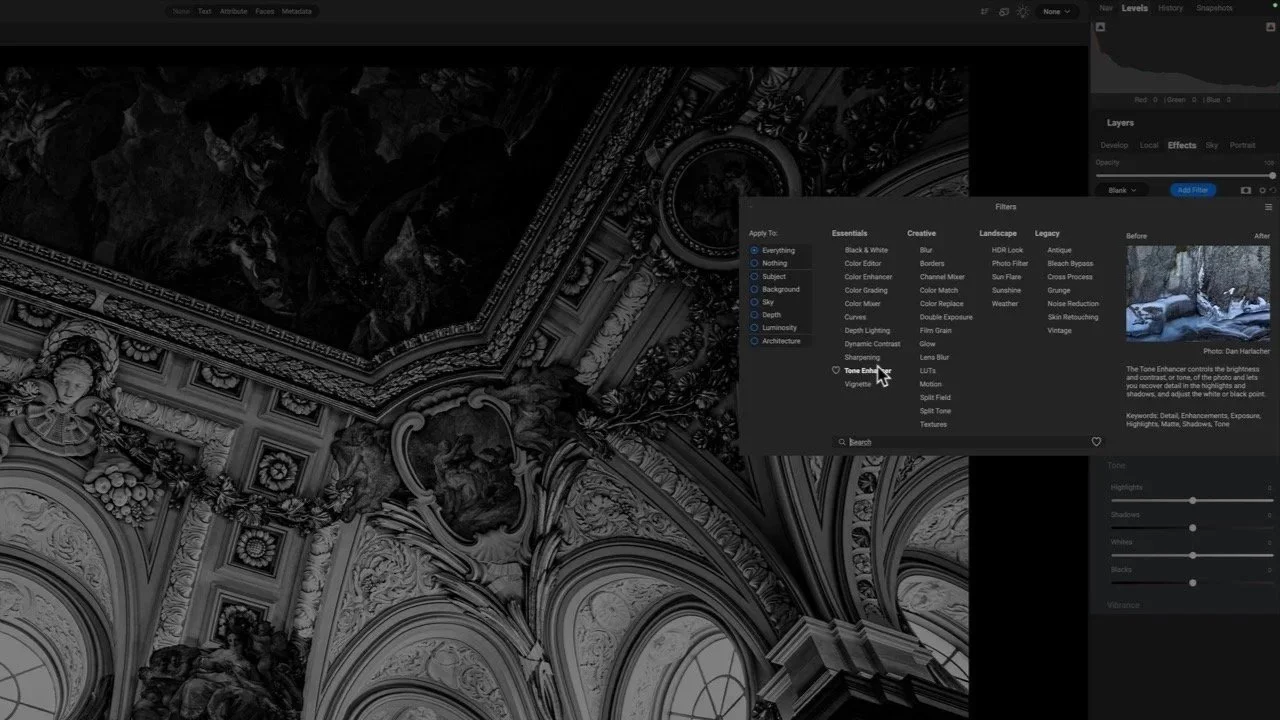
When applying a sunshine filter to your photos, adjusting the opacity is crucial for achieving a balanced and realistic effect. The Sunshine filter can sometimes overwhelm an image if it’s too strong, making the scene look overly artificial. Start at full strength so you can clearly see the effect, then gradually lower it until the light blends naturally with the environment. Add just enough to give the image warm and inviting without making it feel edited.
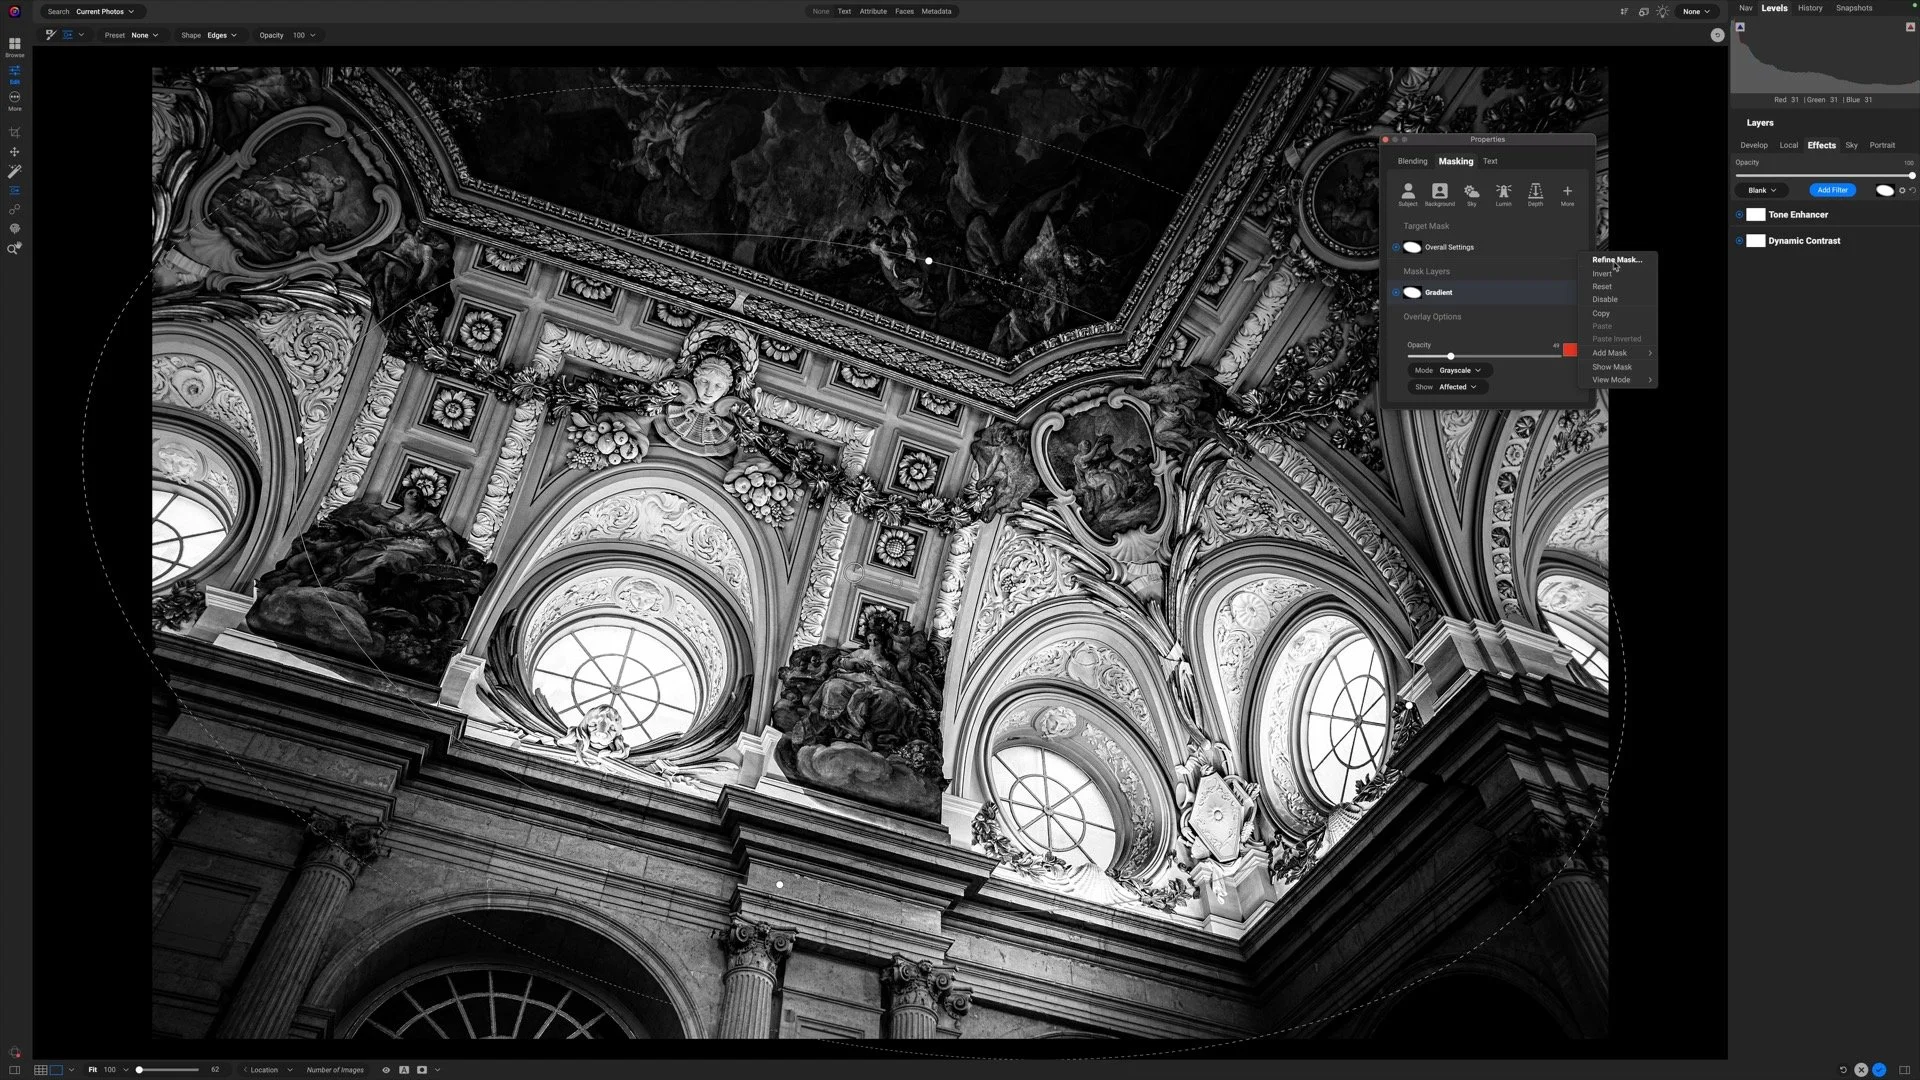
To further refine the look, use a luminosity mask to target the highlights and brighter areas of your photo. A luminosity mask tells the Sunshine effect to interact only with the parts of the image that would realistically catch sunlight, creating a much more natural and convincing result.
Lastly, apply an edges shaped gradient to enhance how off-camera light sources softly feather into a scene. By placing a gradient near the source where light would enter — like where the sun is in a landscape or by a window — you add a gentle, directional glow that enhances depth and dimension, connecting the Sunshine effect seamlessly into the photo's lighting narrative.
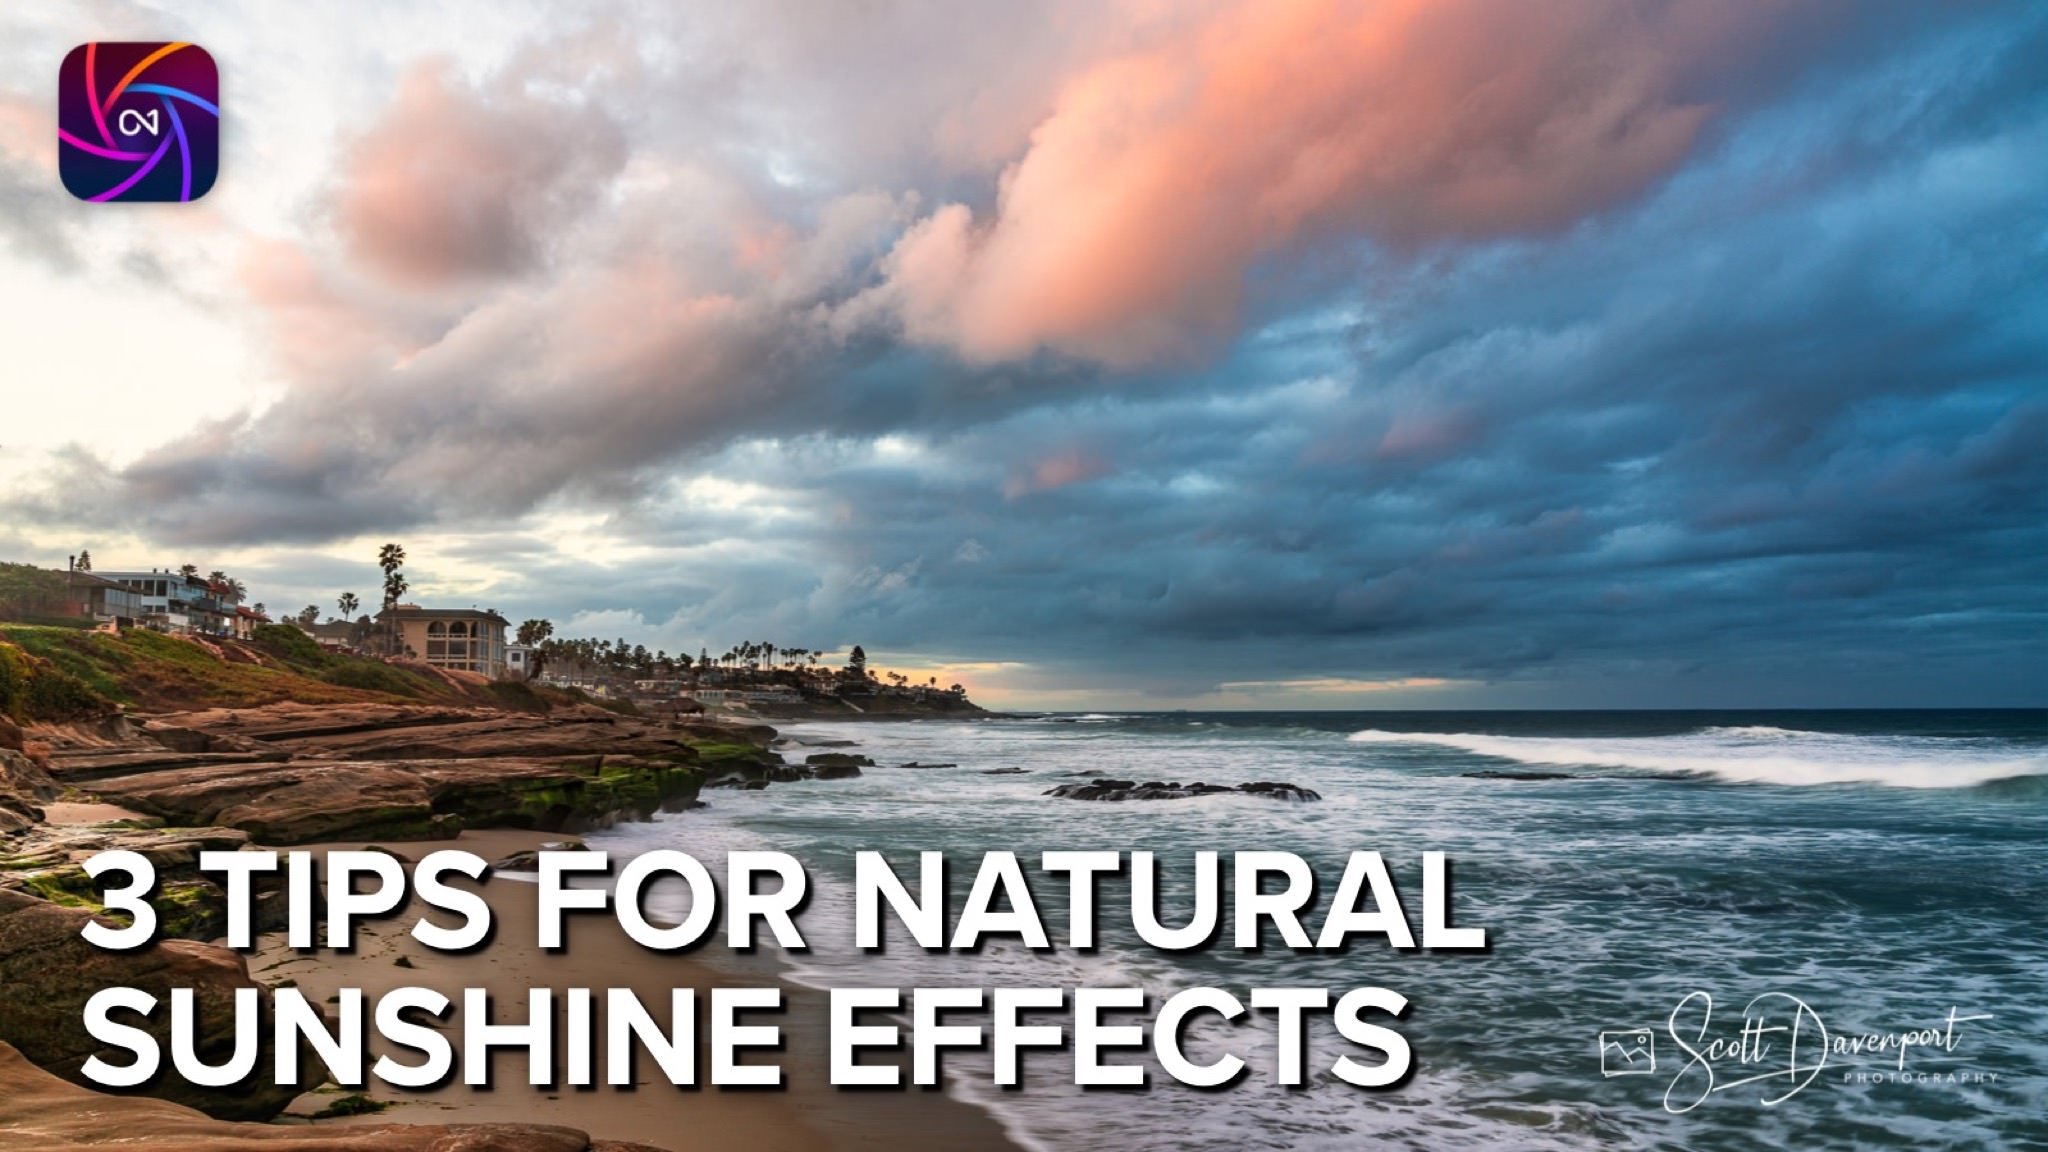
Sunrise, La Jolla, March 2025
Contact Scott to commission a print or license this image.