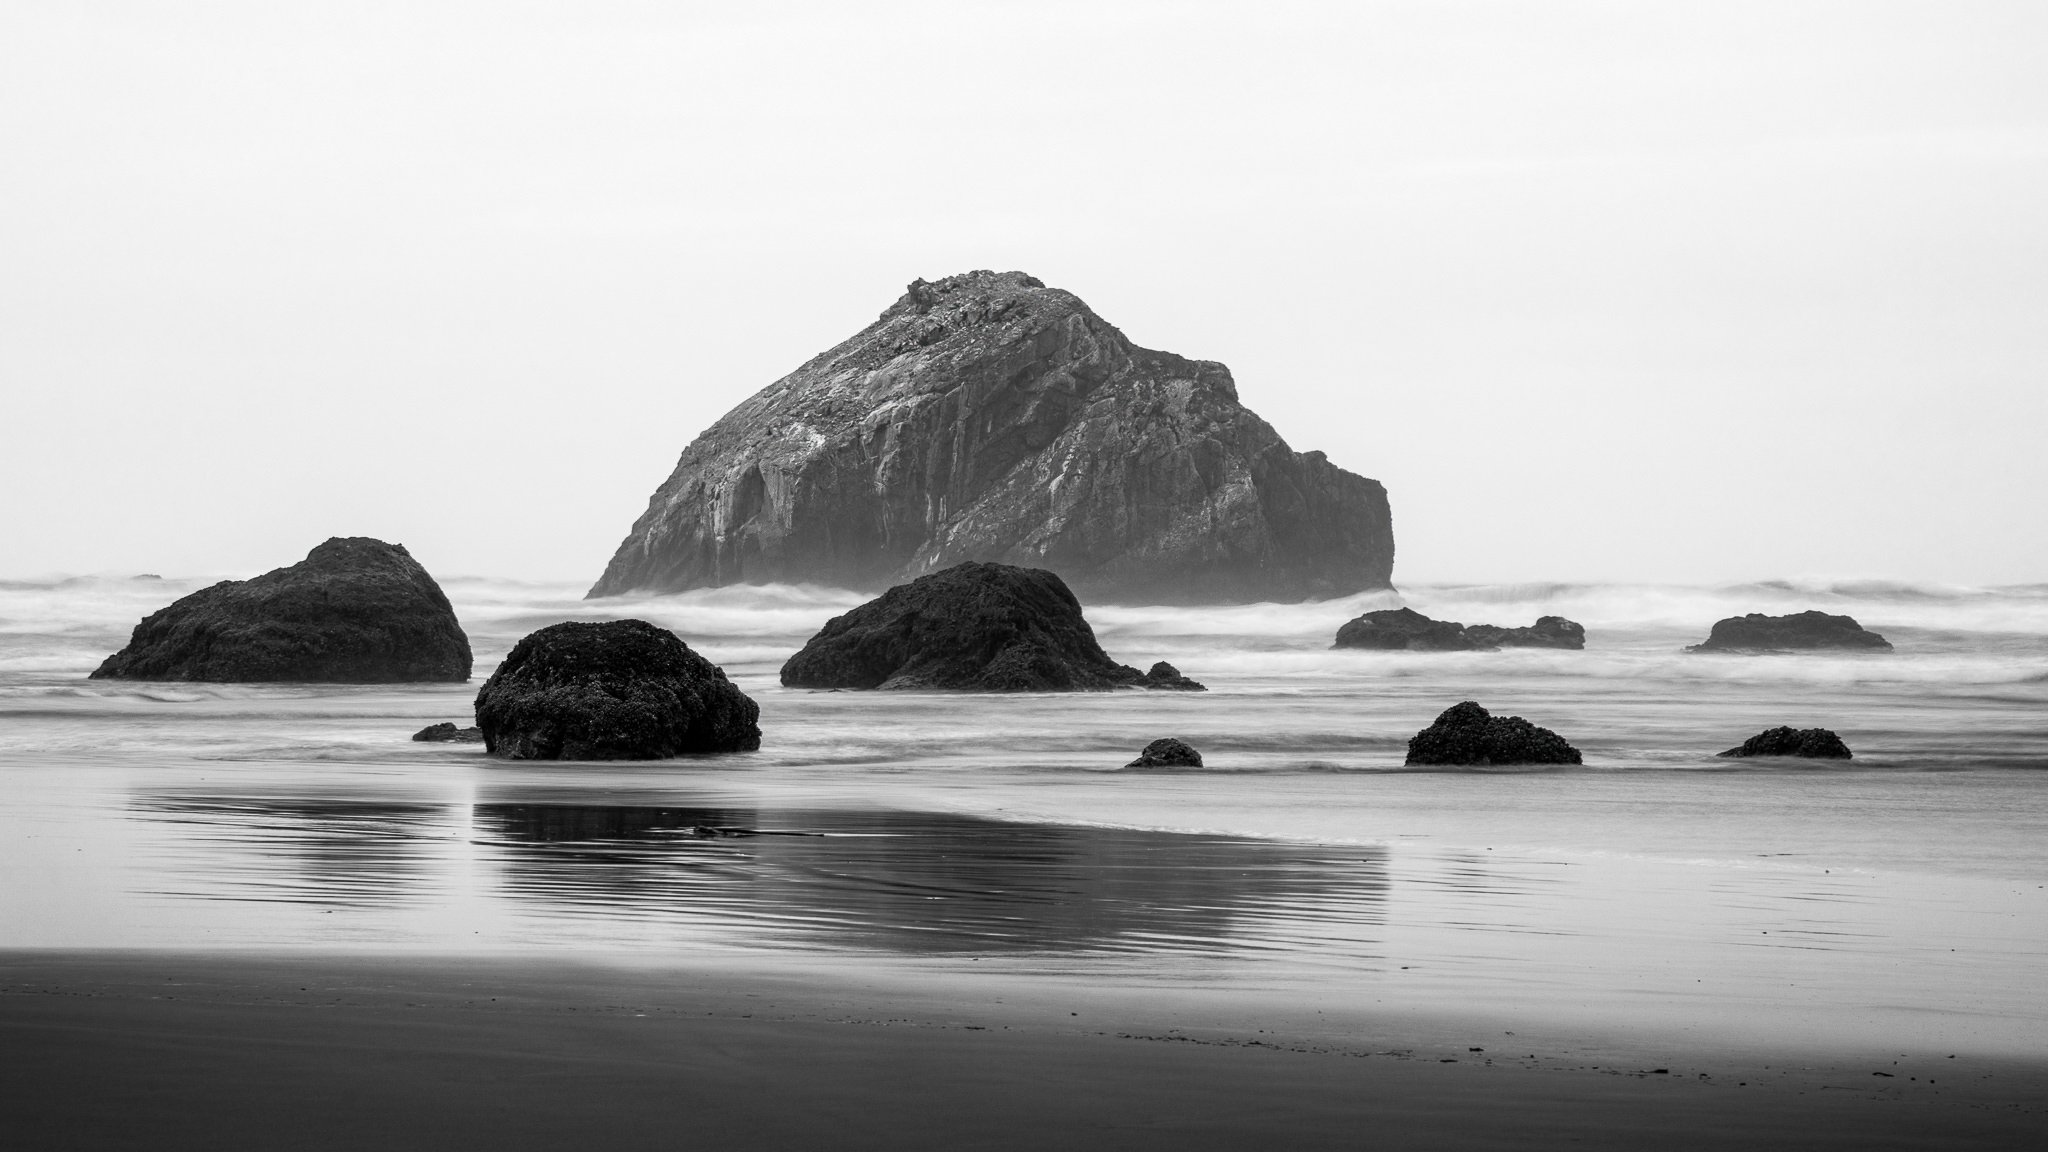
Using Contrast To Create Depth In Your Black & White Photos - In Post #506

Strong black and white images are all about shape, form, and contrast. Use contrast to accentuate key elements and accentuate depth and dimension in your black and white landscape photos. I’m partial to deep contrast in my black and white images. In this video, I’ll show you the series of adjustments I used in Lightroom to build up a deep monochrome landscape photo.
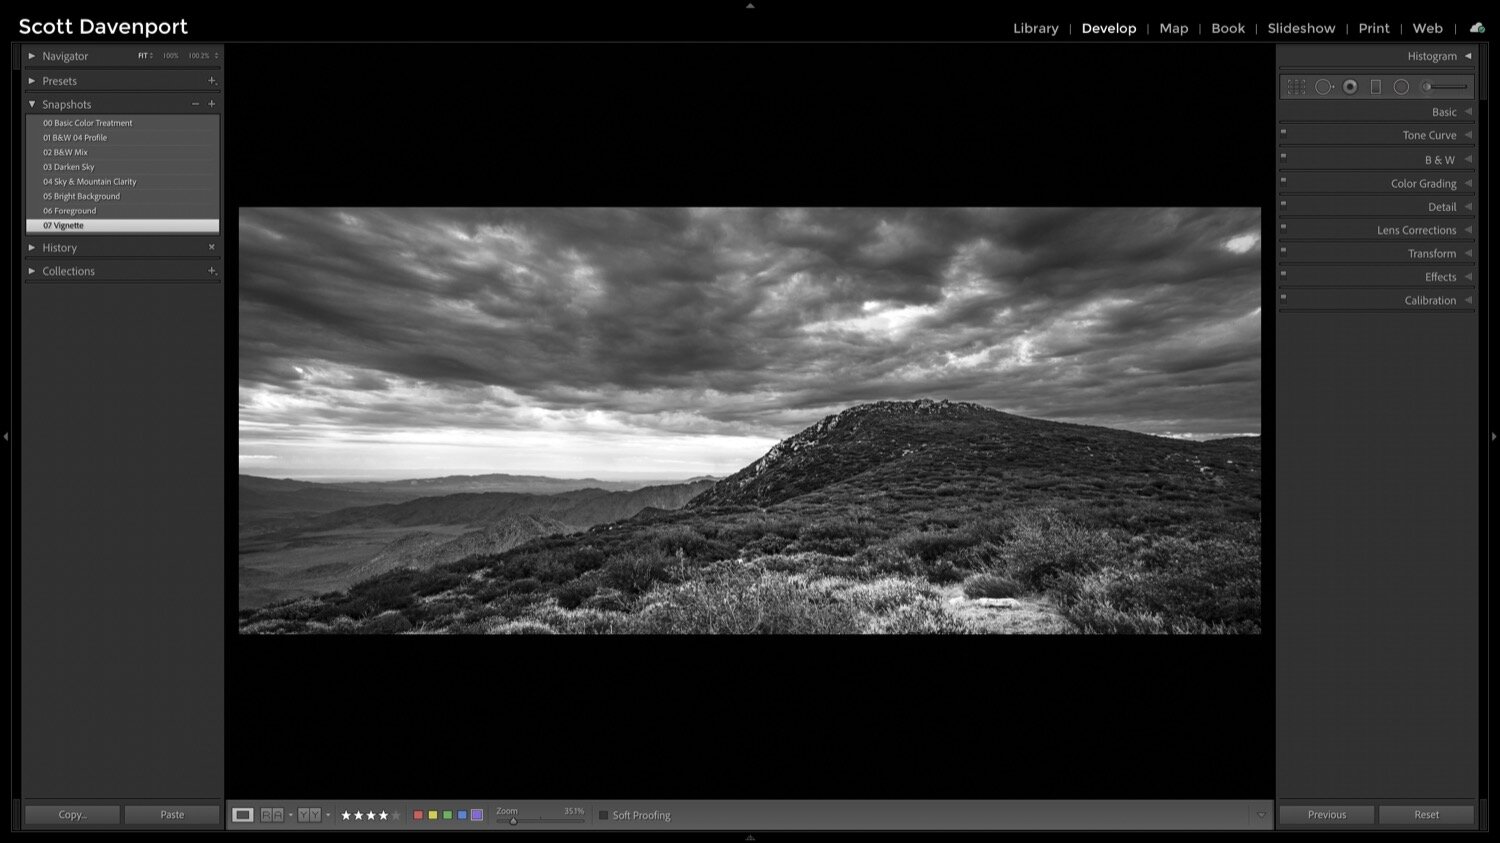
See the slideshow below for a summary of the steps. Each change builds up the story of this image. An ominous sky and a rugged landscape, with a bright glowing background off in the distance. The road ahead poses challenges and will be difficult to traverse, yet there is a bright, hopeful destination to be reached.
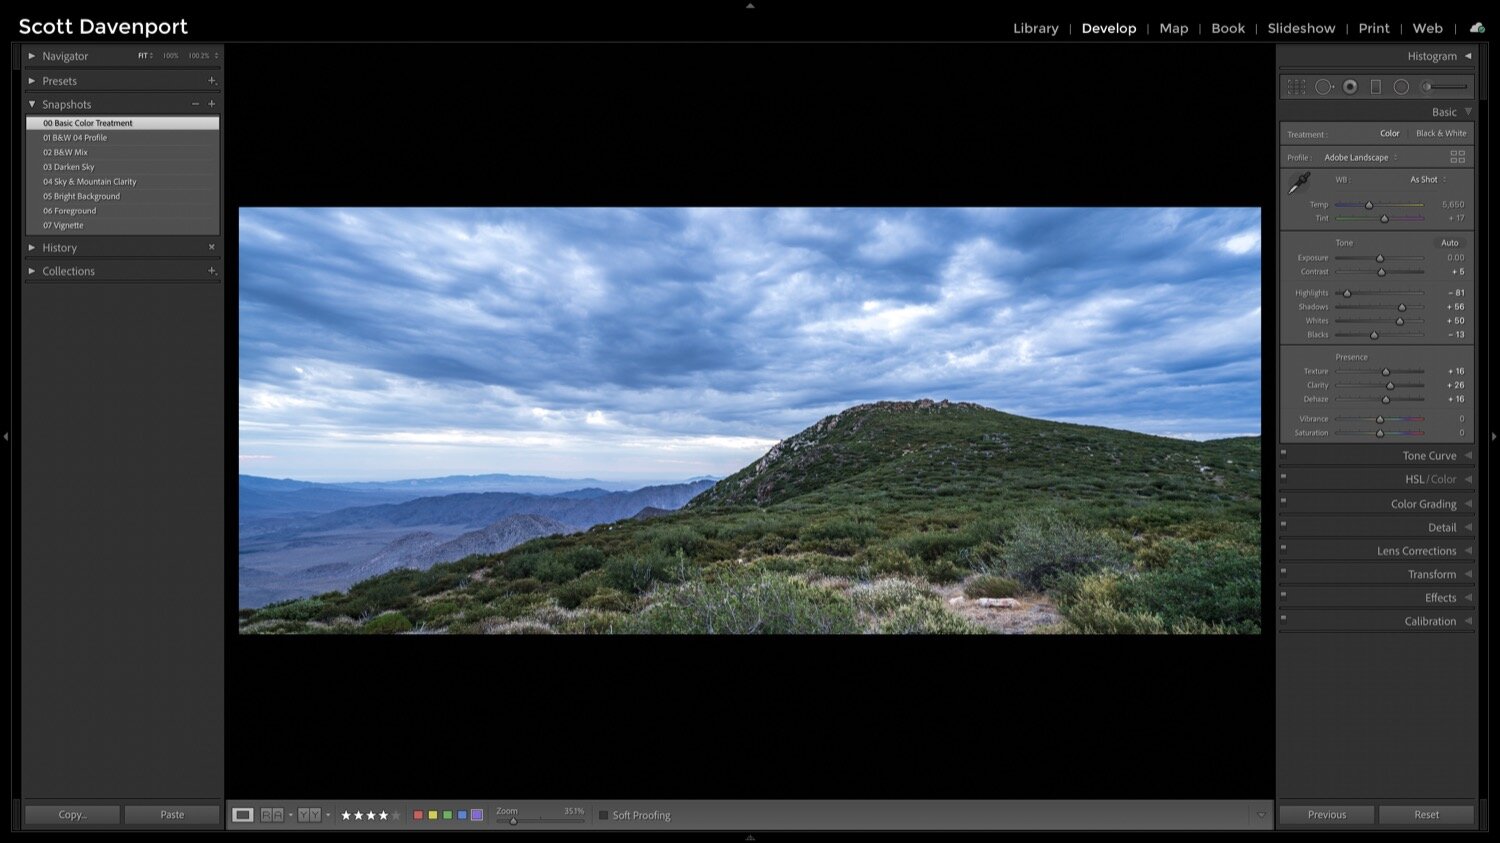
The basic treatment of the color photo.
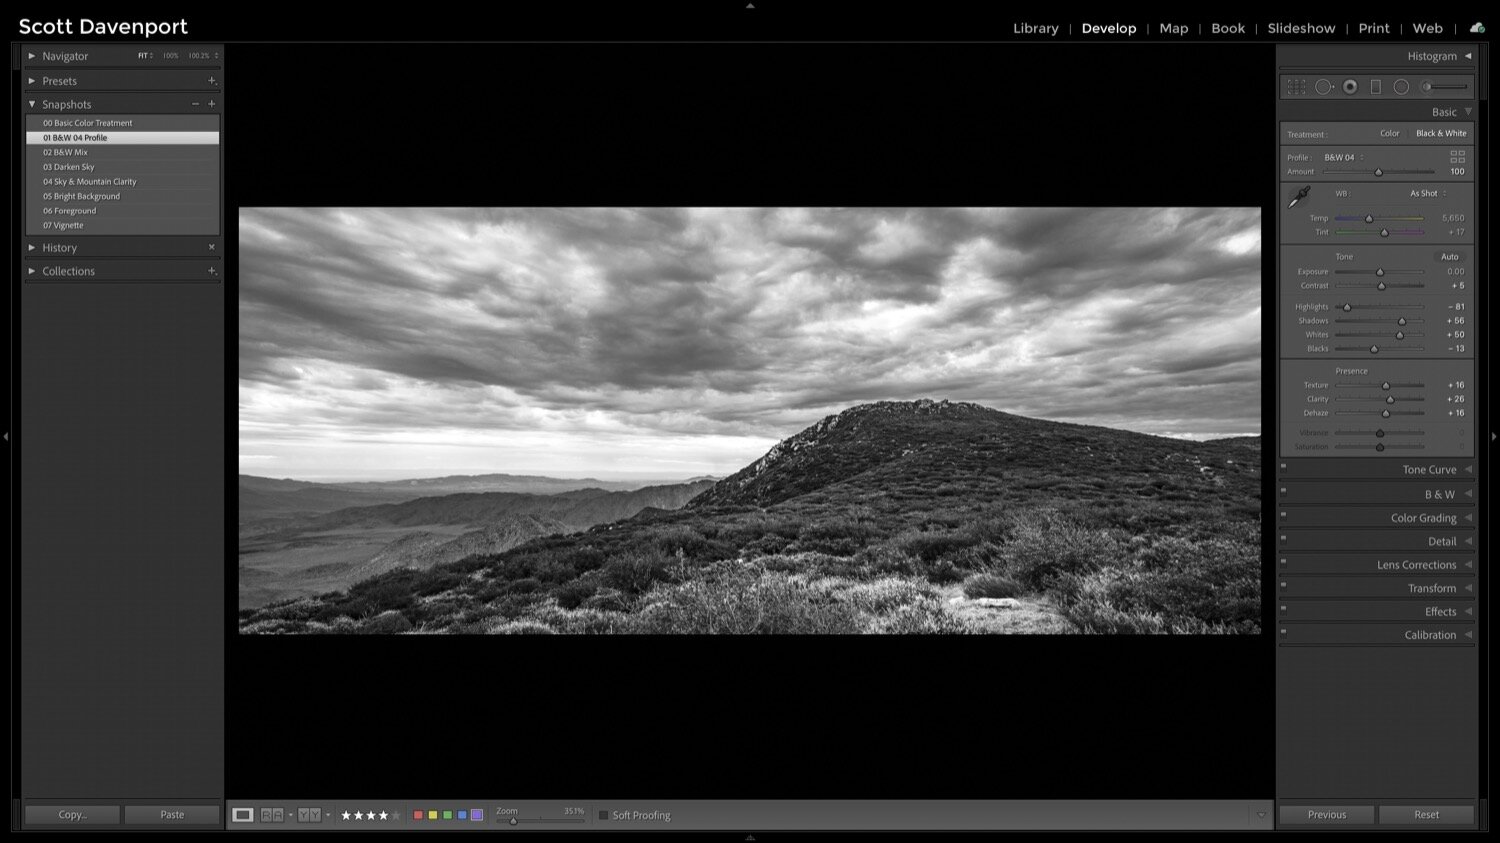
Apply a rich, higher contrast black & white profile. I am partial to BW 04 in Lightroom.
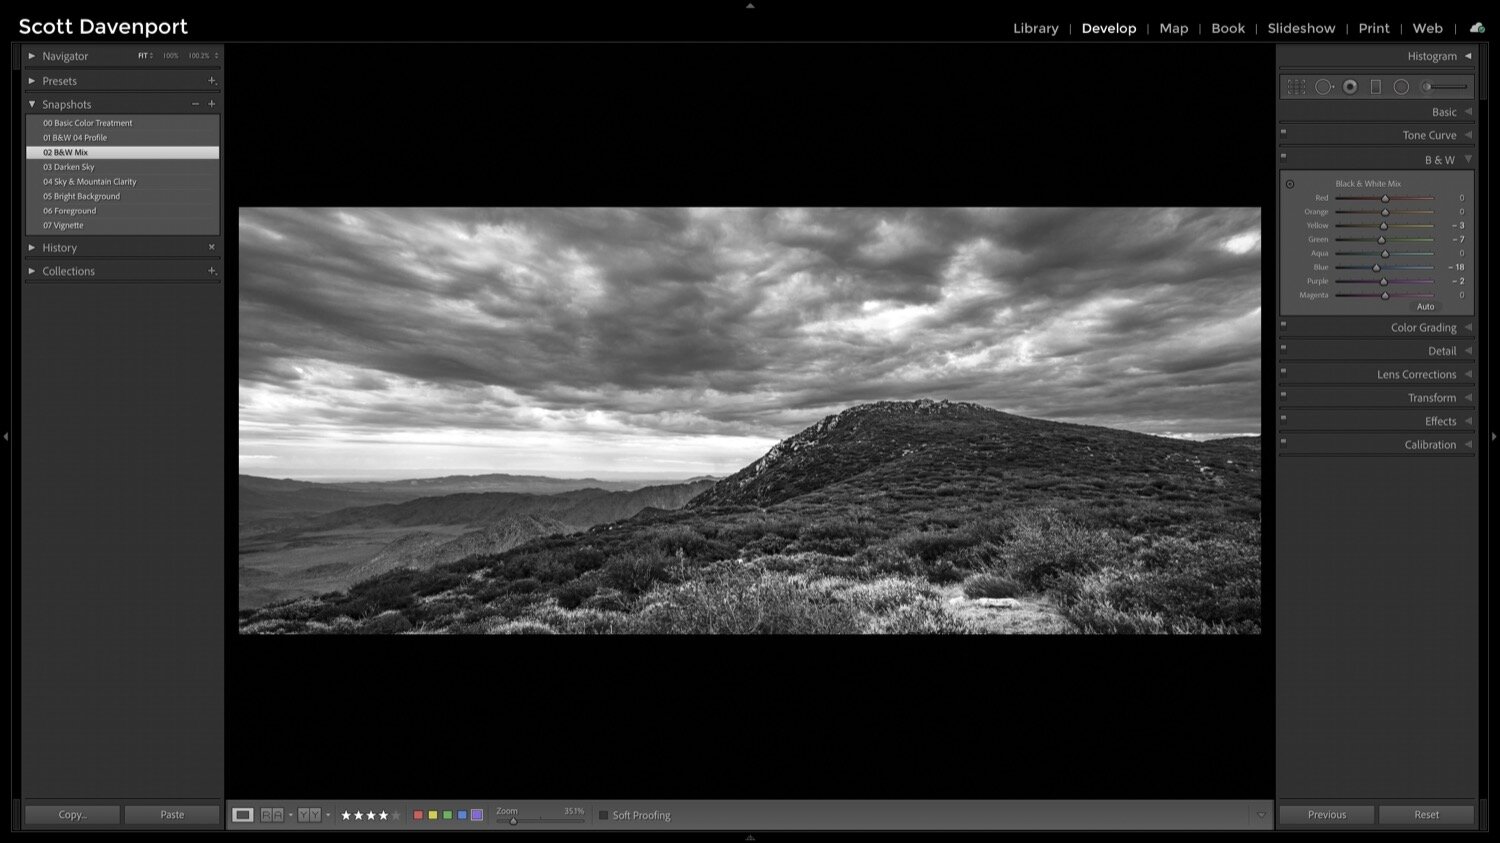
Adjust the luminance of the various color channels for the B&W mix.
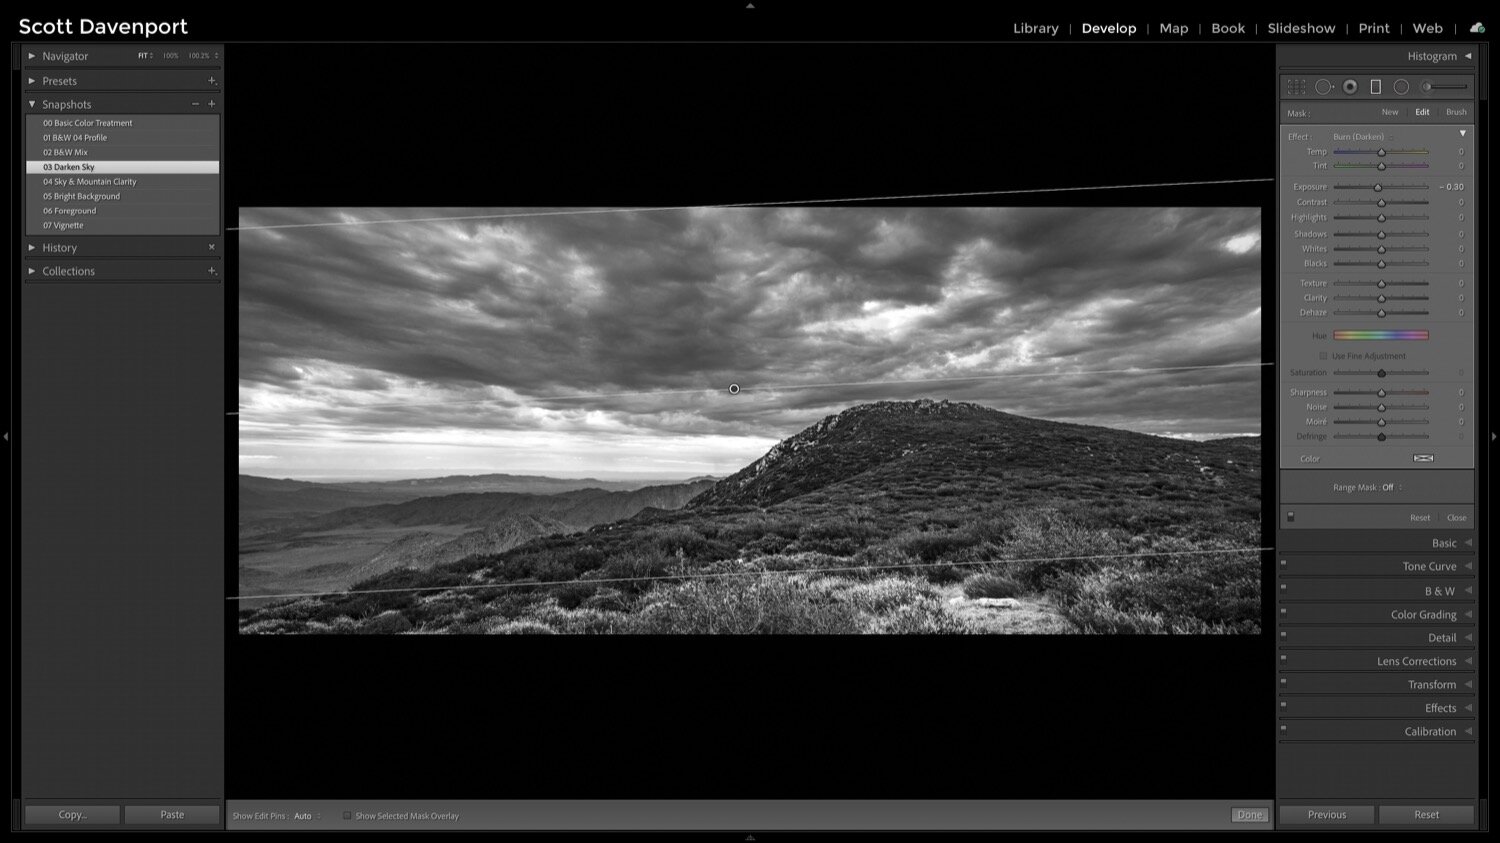
Push the sky further into the background with a classic burn using a gradient filter.
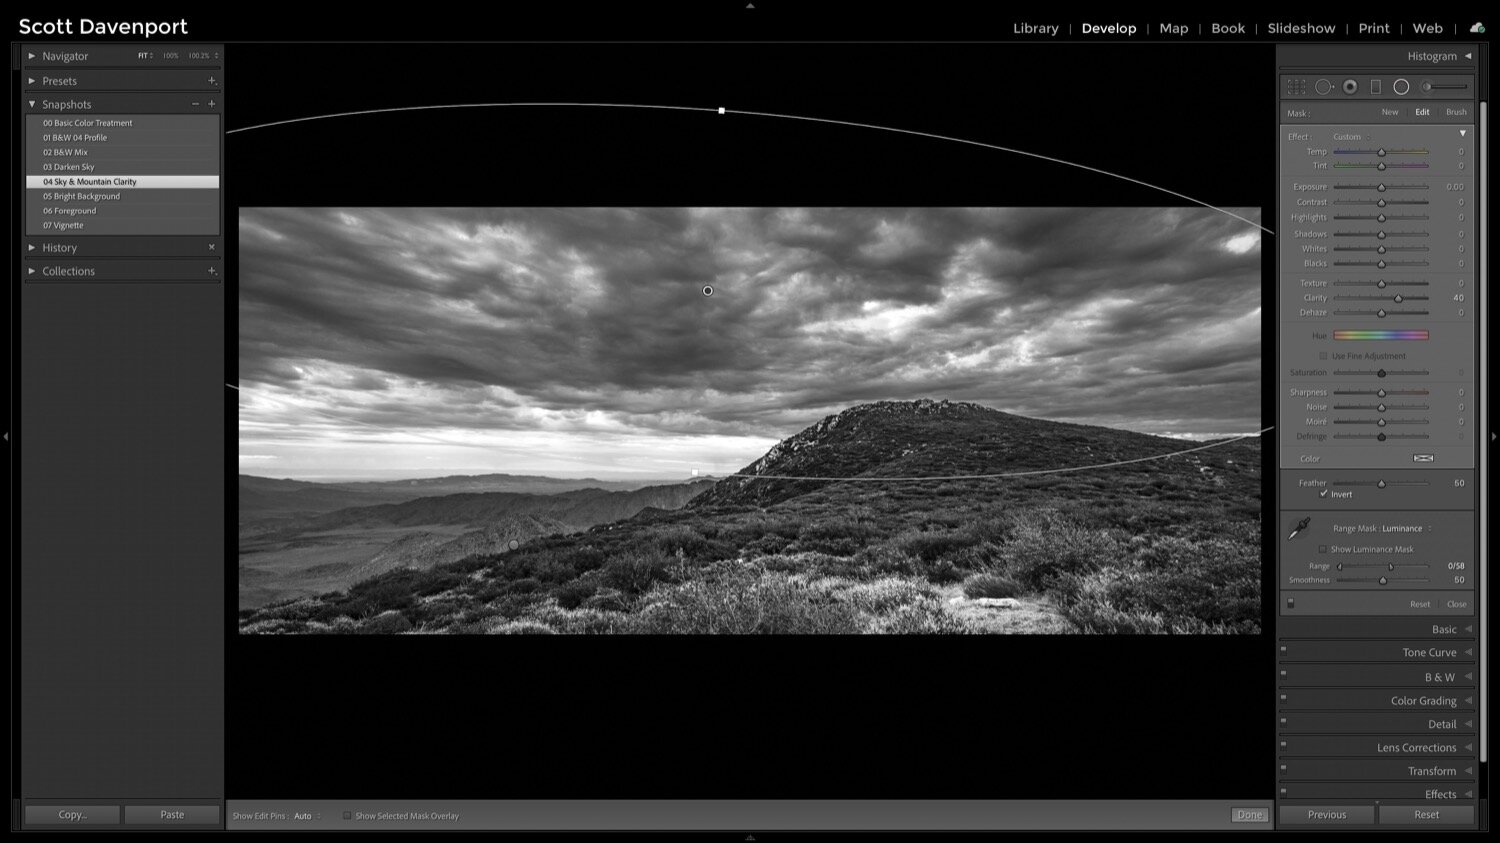
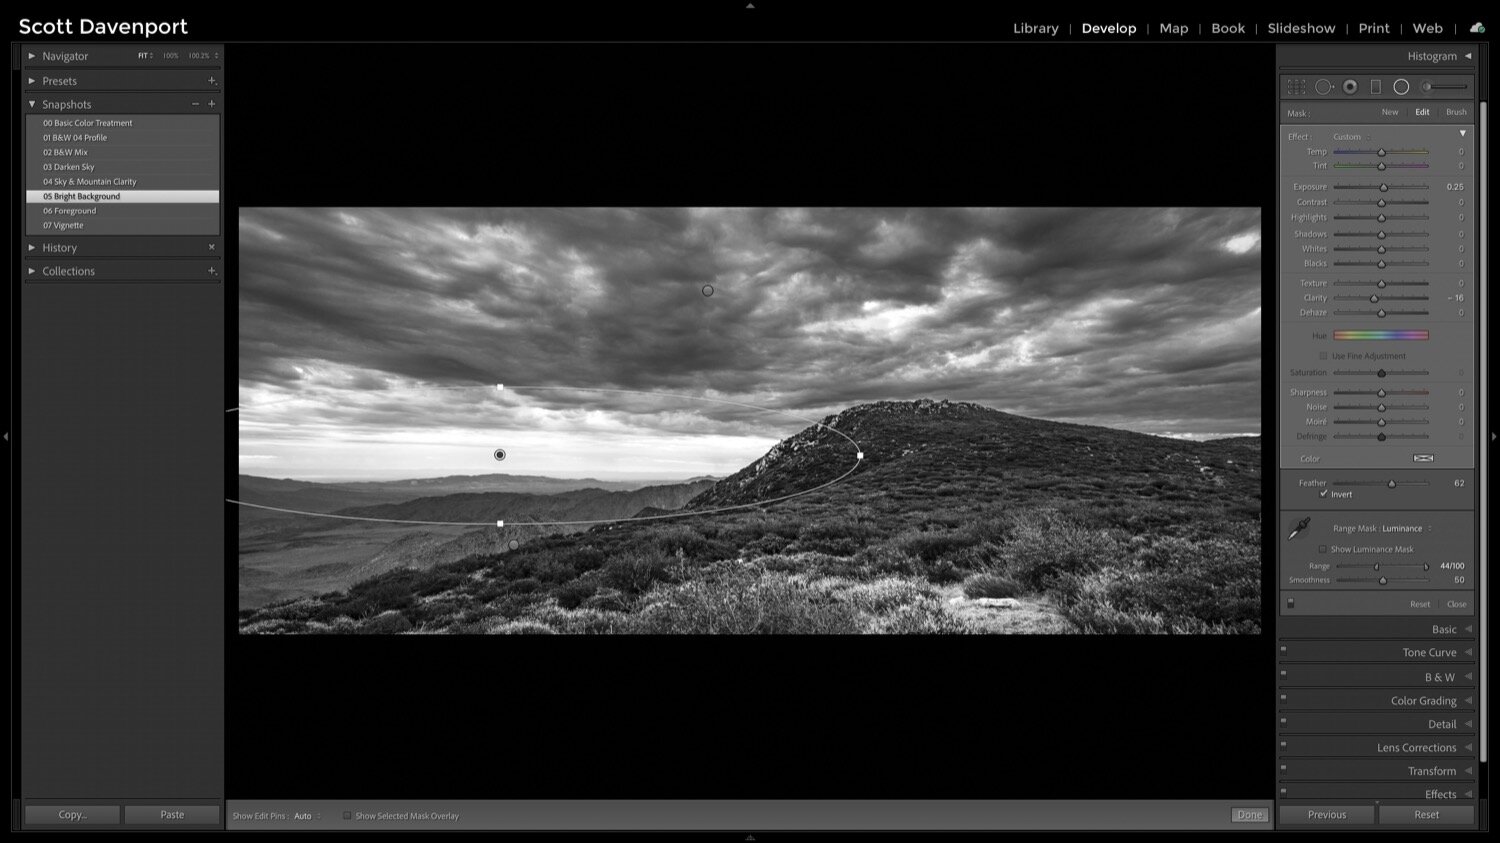
Local contrast in the sky with Clarity amplifies the delta of light and shadow. Notice only the shadow areas are targeted with the range mask.
The background is brightened, providing a visual anchor. Softness adds an air of mystery.
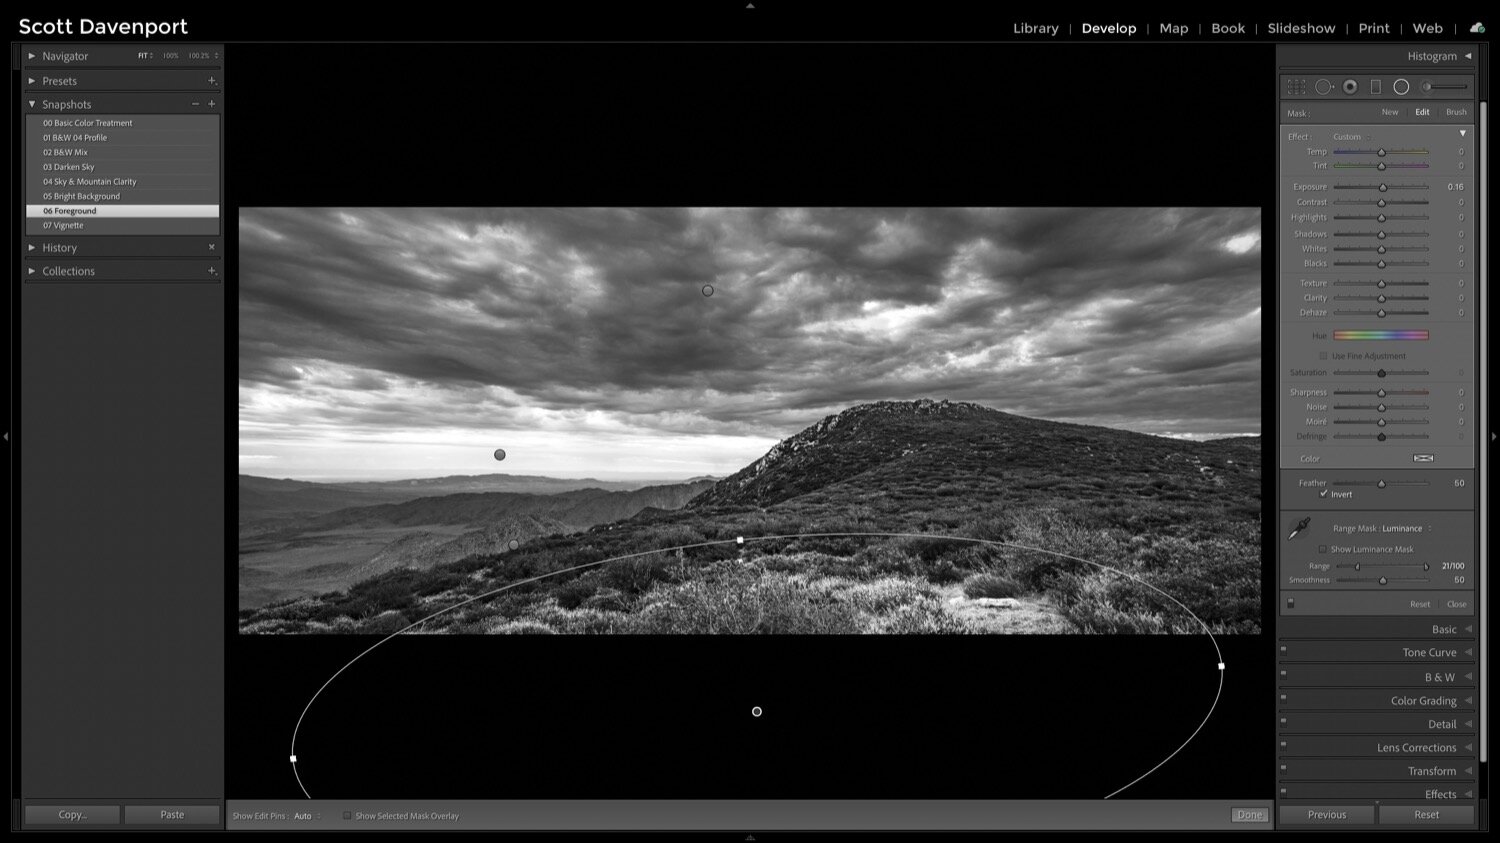
A subtle dodging of the foreground gives the viewer an anchor point. The very deep shadows remain untouched.
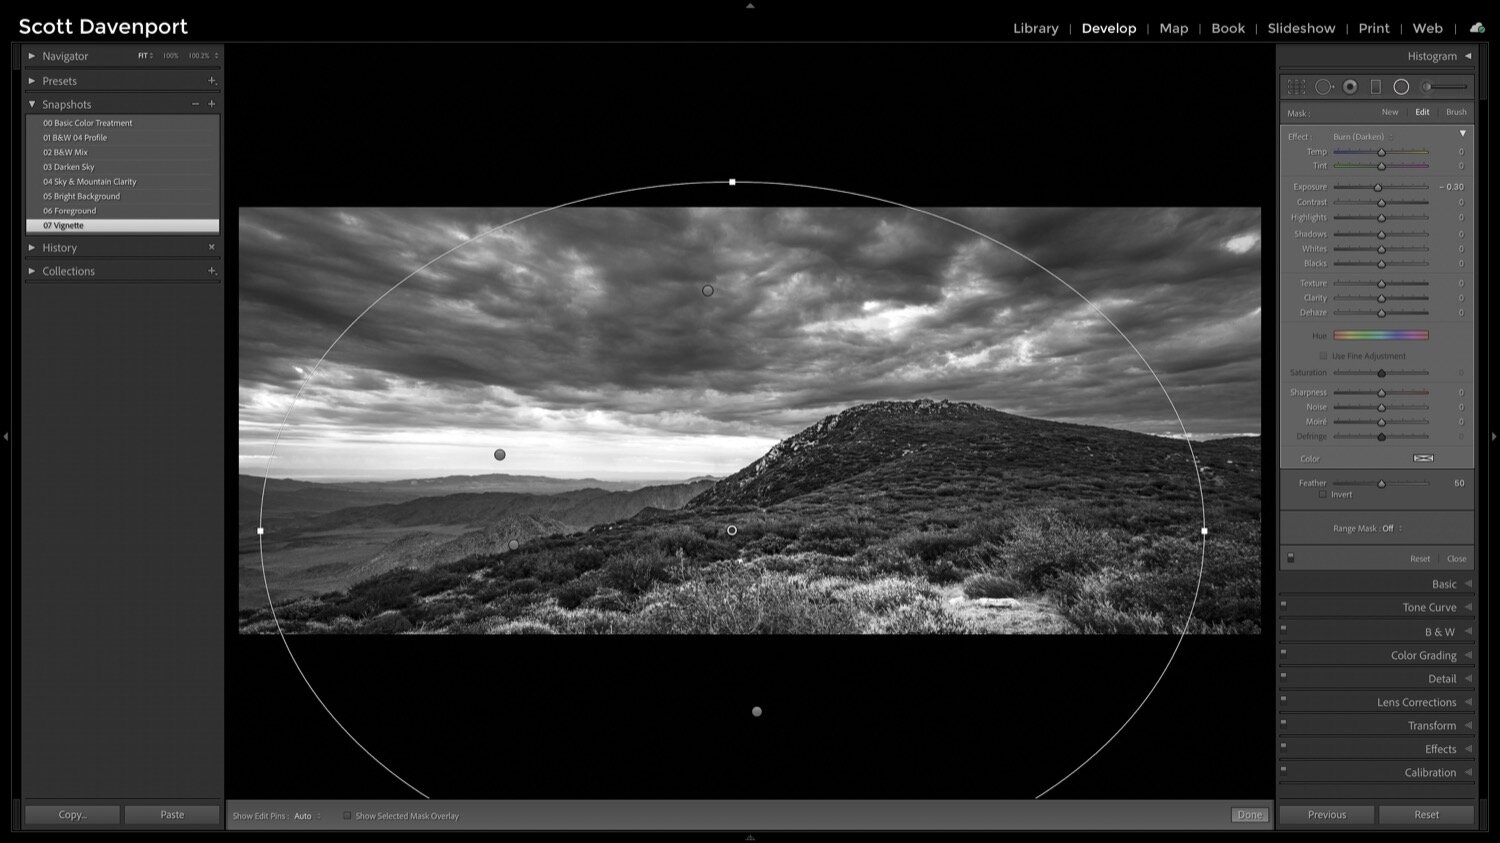
Biased slightly to the lower third, the vignette draws the viewer’s eye to the main story of the photo.
Contrast adds depth and the layers of light and shadow tell a much stronger story.
Sunrise In The Sawtooth Mountain Wilderness Black & White
Contact Scott to commission a print or license this image.
Can’t capture at golden hour? Use Lightroom’s Calibration tool or ON1 Photo RAW’s Channel Mixer to boost vibrance in your mid-day landscape images.
Stuck with harsh, unflattering mid day light? There are some steps you can take in post-processing to draw out color and depth.
Even when the preview on your camera or the unprocessed RAW looks terrible, don’t dismiss the image!
Watch over my shoulder as I work on a new image. In my Live Edit videos, I share my entire start-to-finish workflow using a photo that I’ve never worked on before.
I have a little recipe I’ve used for years with Curves to add a twilight color to my sunset and sunrise photos. It’s simple to do and targeting just the sky in a photo has never been easier.
Many of the photos I captured in Bryce Canyon needed color tweaks and corrections. I put Lightroom’s new Color Mixer through its paces to fix color issues.
Sometimes the ocean doesn’t cooperate with photographers. In one shot, the waves on the left look great. In another, it’s the right side that looks great. The solution? Composite! I’ll share my approach.
In my Live Edit videos, I process an image I’ve never worked on from start to finish, sharing my thought process and reasons behind choices along the way.
Scott Davenport is a landscape photographer and photo educator and based in San Diego, California. He leads photo workshops, writes photo books, hosts podcasts, makes tutorial videos, and feels weird referring to himself in the 3rd person.
He also can't help getting his feet wet photographing at the beach.
Supercharge your dodging and burning by intersecting a luminance range mask with a brush. Get professional-grade results with minimal effort.