How To Make A Classic Luminosity Mask In Lightroom
This post is the result of a viewer question. If you have a photo question, ask me!
A classic luminosity mask affects the highlights the most and the shadows the least, with a smooth gradation of impact through the midtones. The typical use of the Luminance Range Mask tool in Lightroom involves the eyedropper and sampling a tonal region to affect. What do you do if you want to affect the entire photo with a classic luminosity mask? The answer is to use the sliders in the luminance range mask tool - and it’s a very simple recipe.
Step 1 - Add A Luminance Range Mask
First, add a luminance range mask to your photo. By default, there is no impact to your image. Your cursor icon changes to an eyedropper - but you’re not gonna need it.
Add a Luminance Range mask
The default luminance range has no effect on your photo.
Step 2 - Adjust The Luminance Range Directly
A classic luminosity mask builds a mask using the tones in your image. Brighter tones and highlights are masked white and light gray, and darker tones and shadows are masked dark gray and black. Recall the mantra for masks - black conceals and white reveals. So a classic luminosity mask affects the highlights the most and the shadows the least, with a smooth gradation across the midtones.
The operates the same way.
To create a classic luminosity mask with the Lightroom Luminance Range mask tool, skip the eyedropper and work directly with the range mask controls. You do two things:
Pull the left most range control all the way to the right. The range controls are the small rectangular controls at the edges of the range.
Pull the left most feather control all the way to the left. The feather controls are the small triangles along the bottom of the range.
If you switch the mask overlay mode to "White On Black” the preview looks like a black and white version of your photo. But remember - it’s a mask! As you adjust sliders like Exposure or Clarity, the brighter areas (the highlight and upper midtones) are affected more and the darker areas (lower midtones and deep shadows) are affected less.
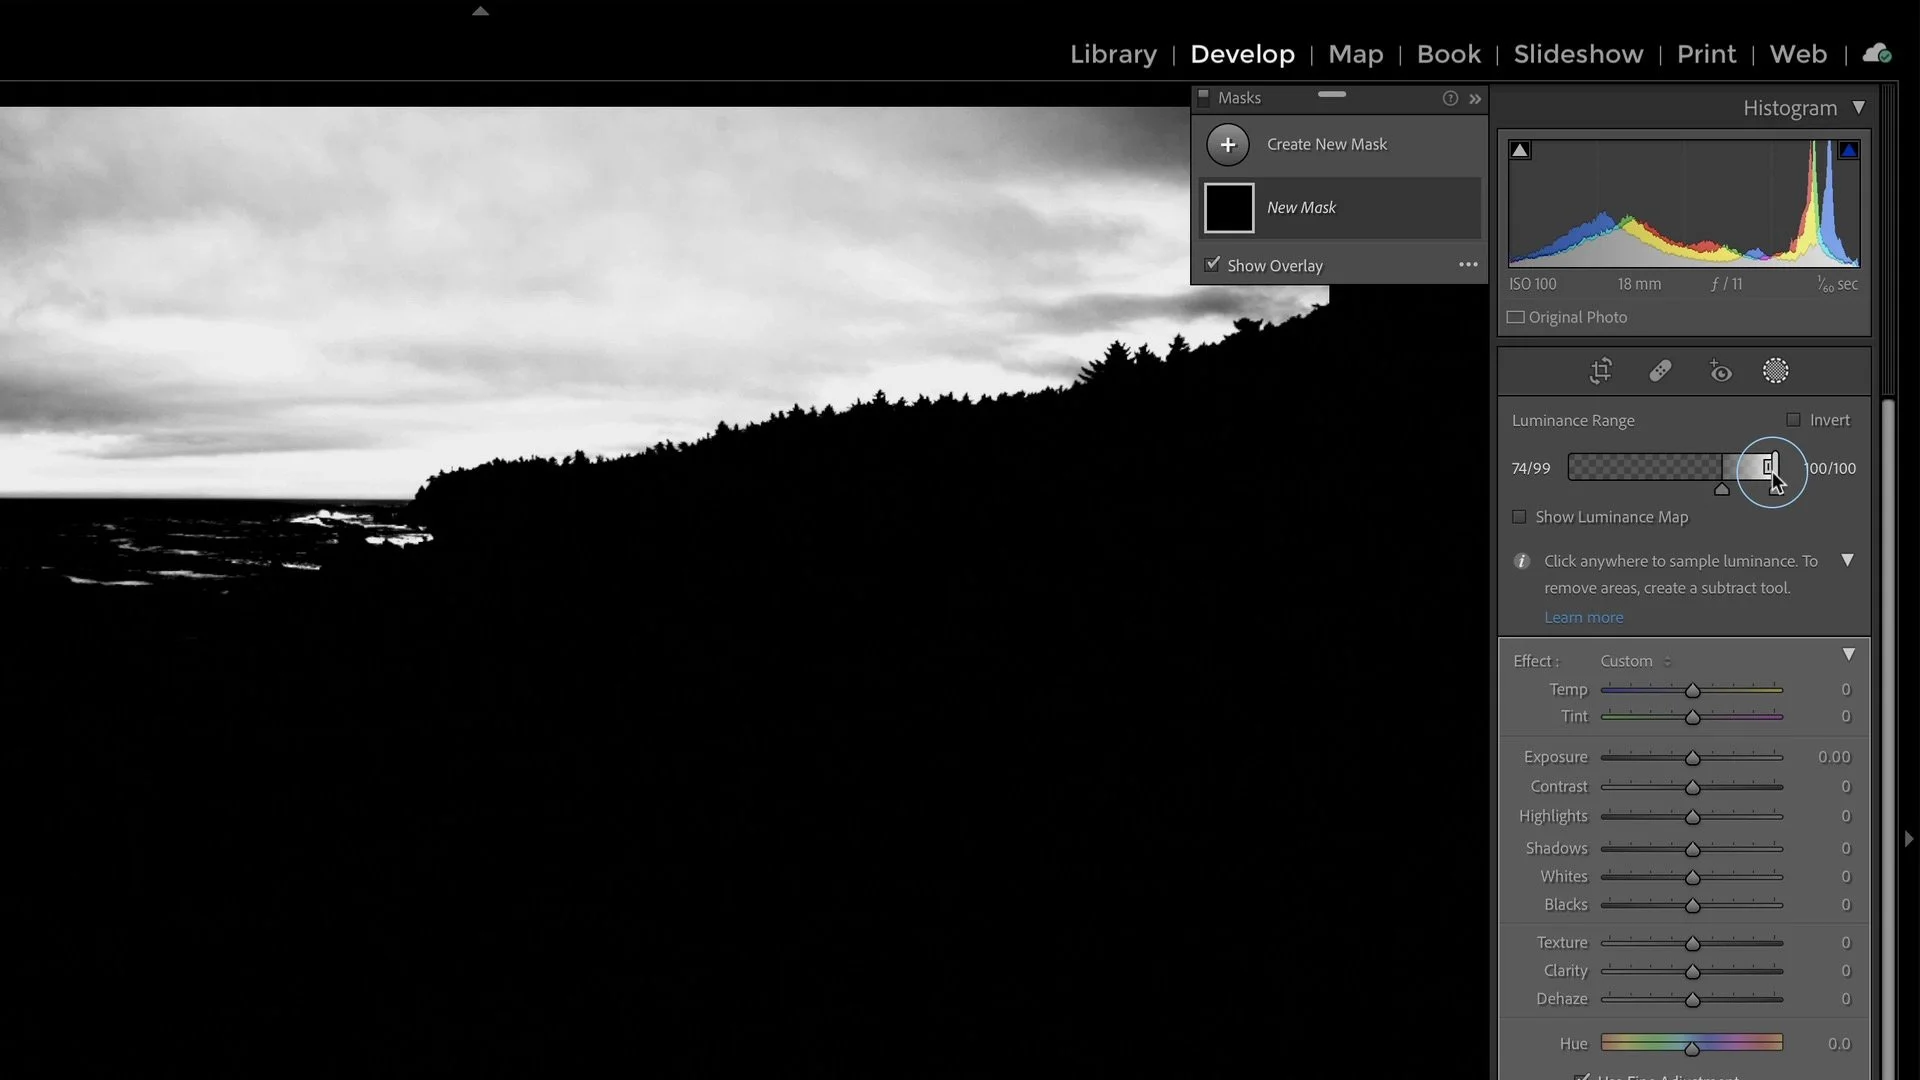
First, pull the left range control all the way to the right.

Next, pull the left feather control all the way to the left.
Step 3 - Invert The Mask To Affect The Shadows
What if you want to impact the shadows the most and the highlights the least? Simple! Invert the mask. Click the Invert checkbox in the Luminance Range controls. If your mask overlay is “White On Black” the preview switches to a photo-negative type of look. Remember, you are looking at a mask. Now, the shadows are affected the most and the highlights the least as you adjust the sliders.

The classic luminosity mask affects highlight tones more than shadows.

Invert the Luminance Range Mask to affect the shadows more and the highlight less.
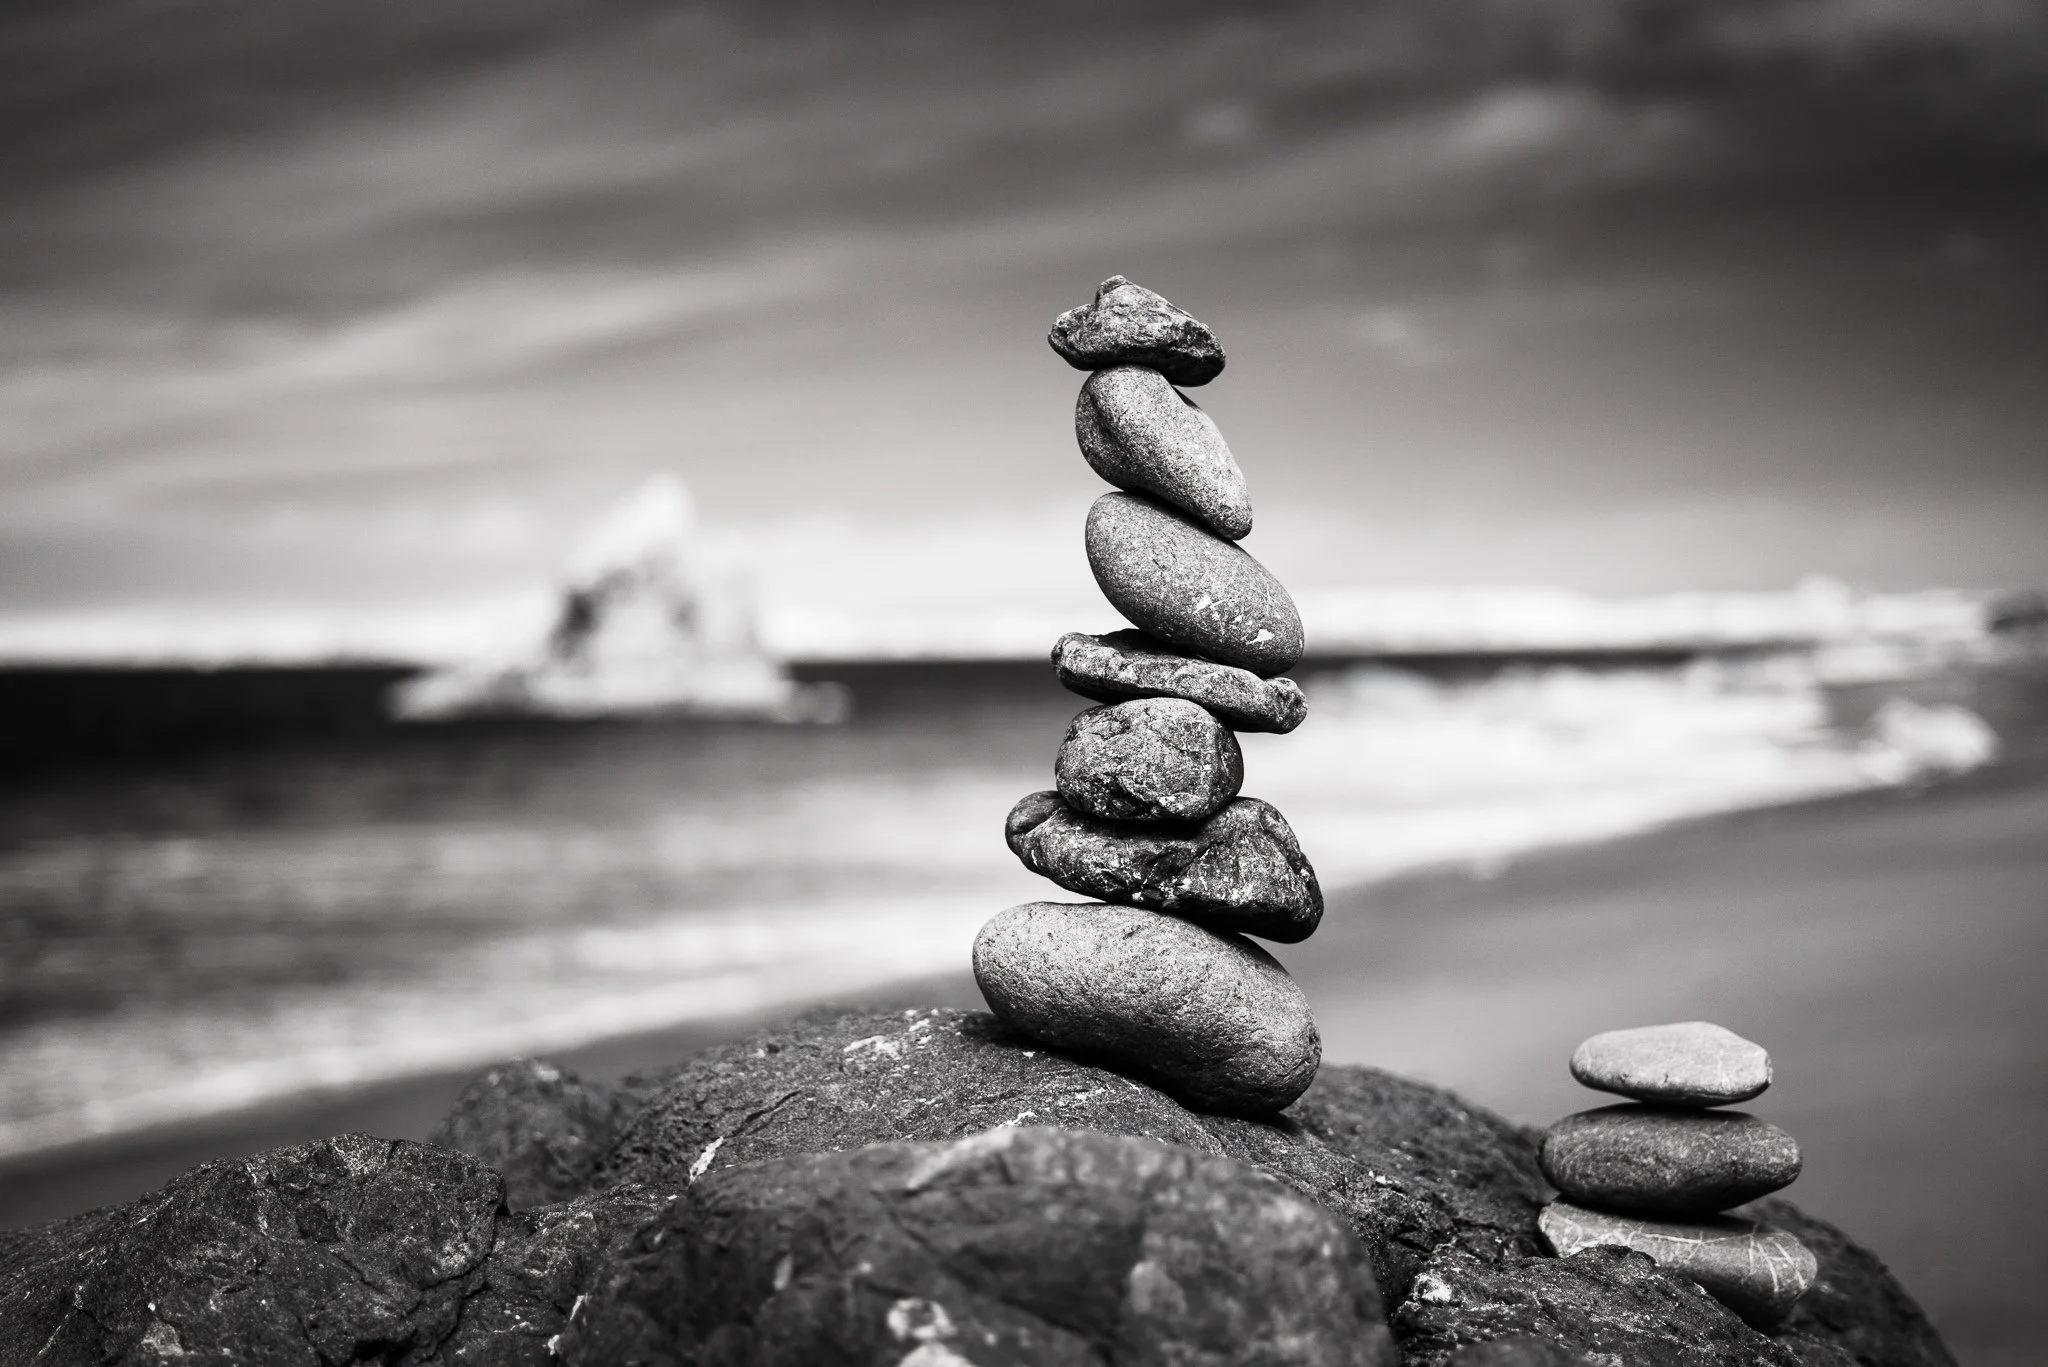
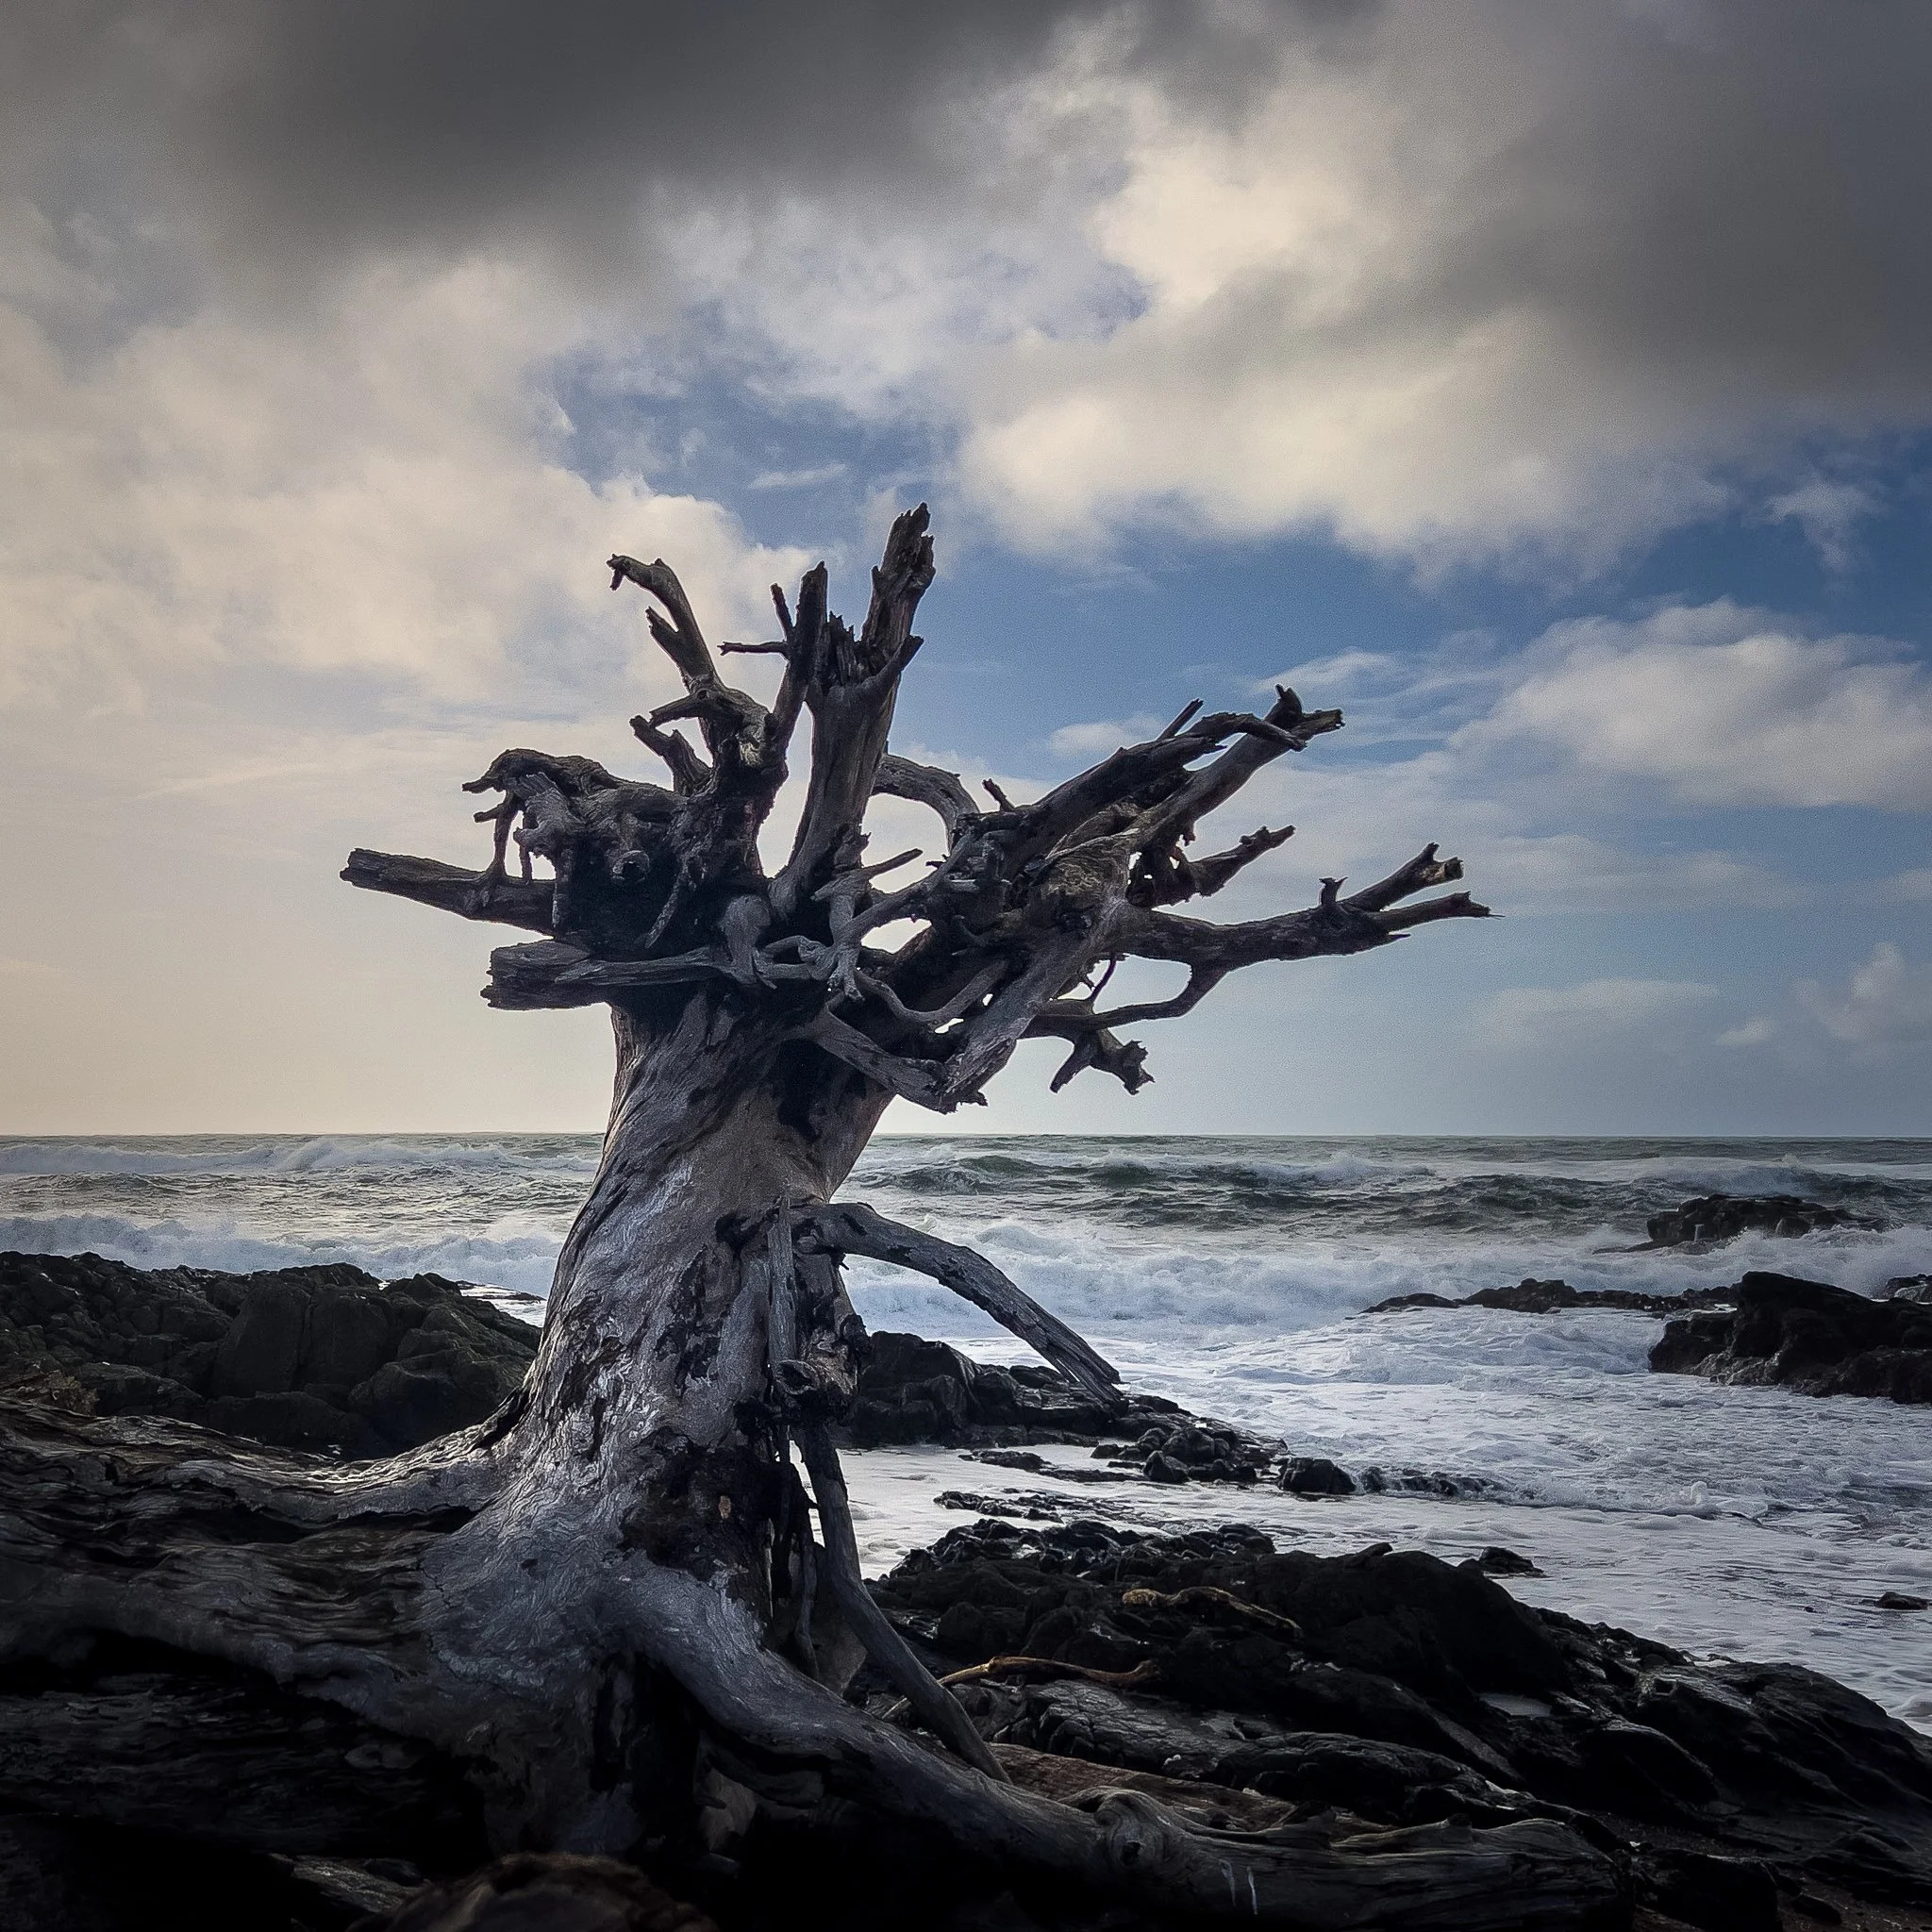
Classic luminosity masks continue to have a place in Lightroom workflow. While I tend to target certain ranges more directly with luminance range masks, there are certain looks where a traditional luminosity mask fits well. In the photo below, a boost of clarity and texture with an inverted luminosity mask was used to craft the final look. Although detail was increased throughout the photo, the darker areas (the rocks and trees) received more detail than brighter areas (the sky).
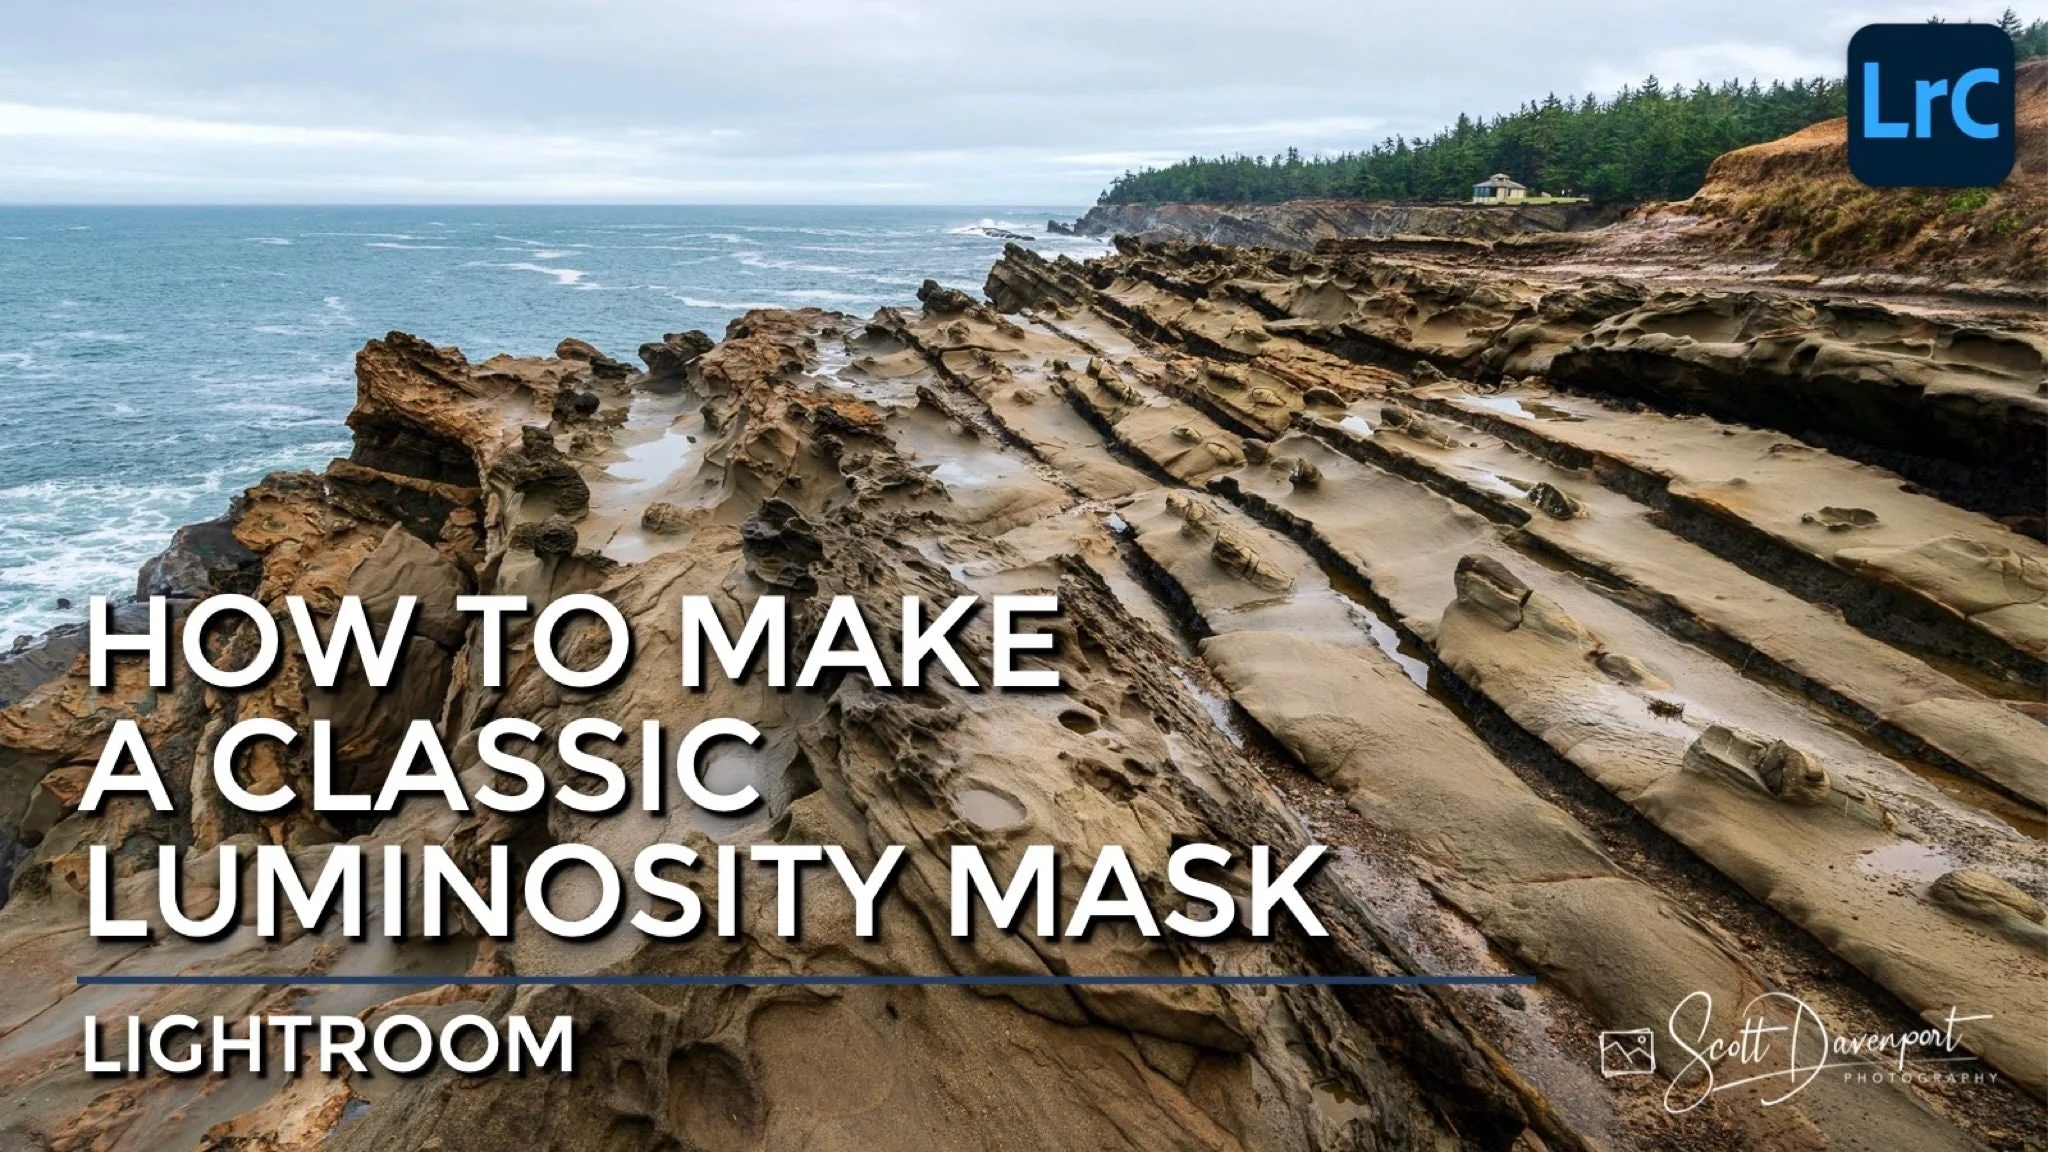
Rock Shelf At Shore Acres Park In Coos Bay Oregon
Contact Scott to commission a print or license this image.