5 Tips To Nail Focus In Your Landscape Photos
Focus is a topic that comes up often in my landscape workshops. How should I focus my camera? What do the different focus areas do and when should I use them? Where in the scene should I focus?
Here are 5 focusing tips to help you nail focus and get tack sharp landscape photos.
1. Use A Small Focus Area
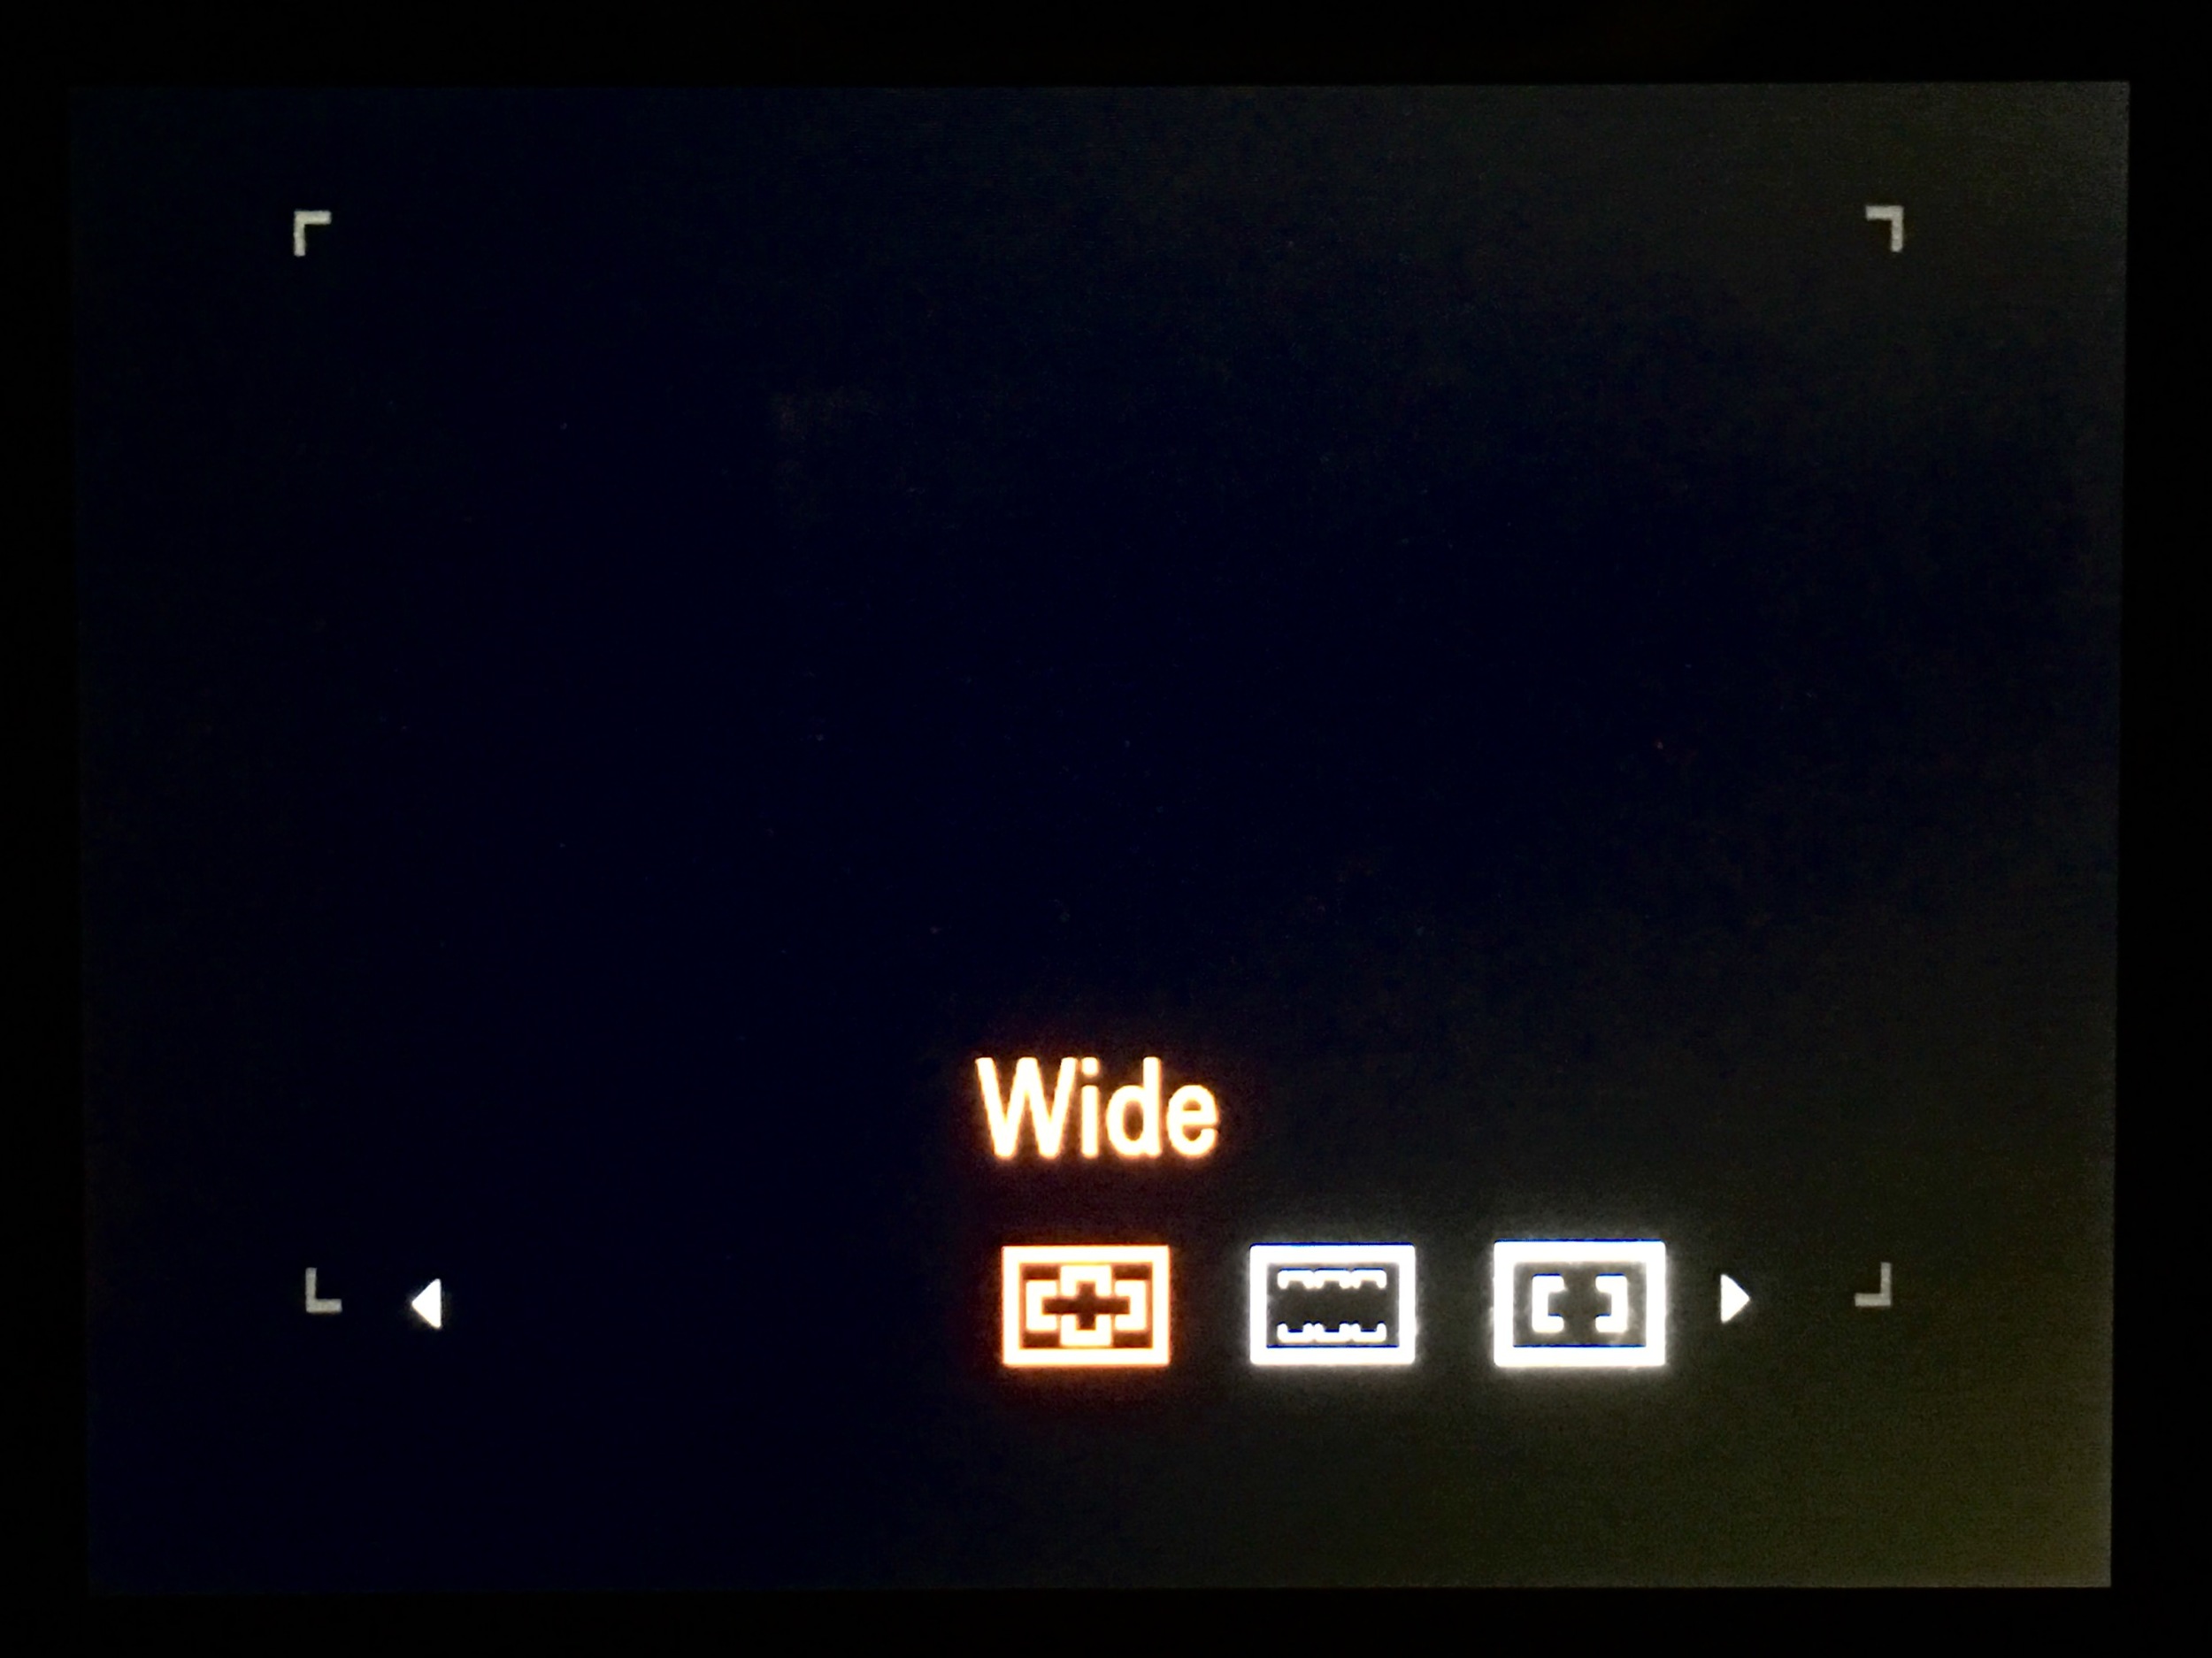
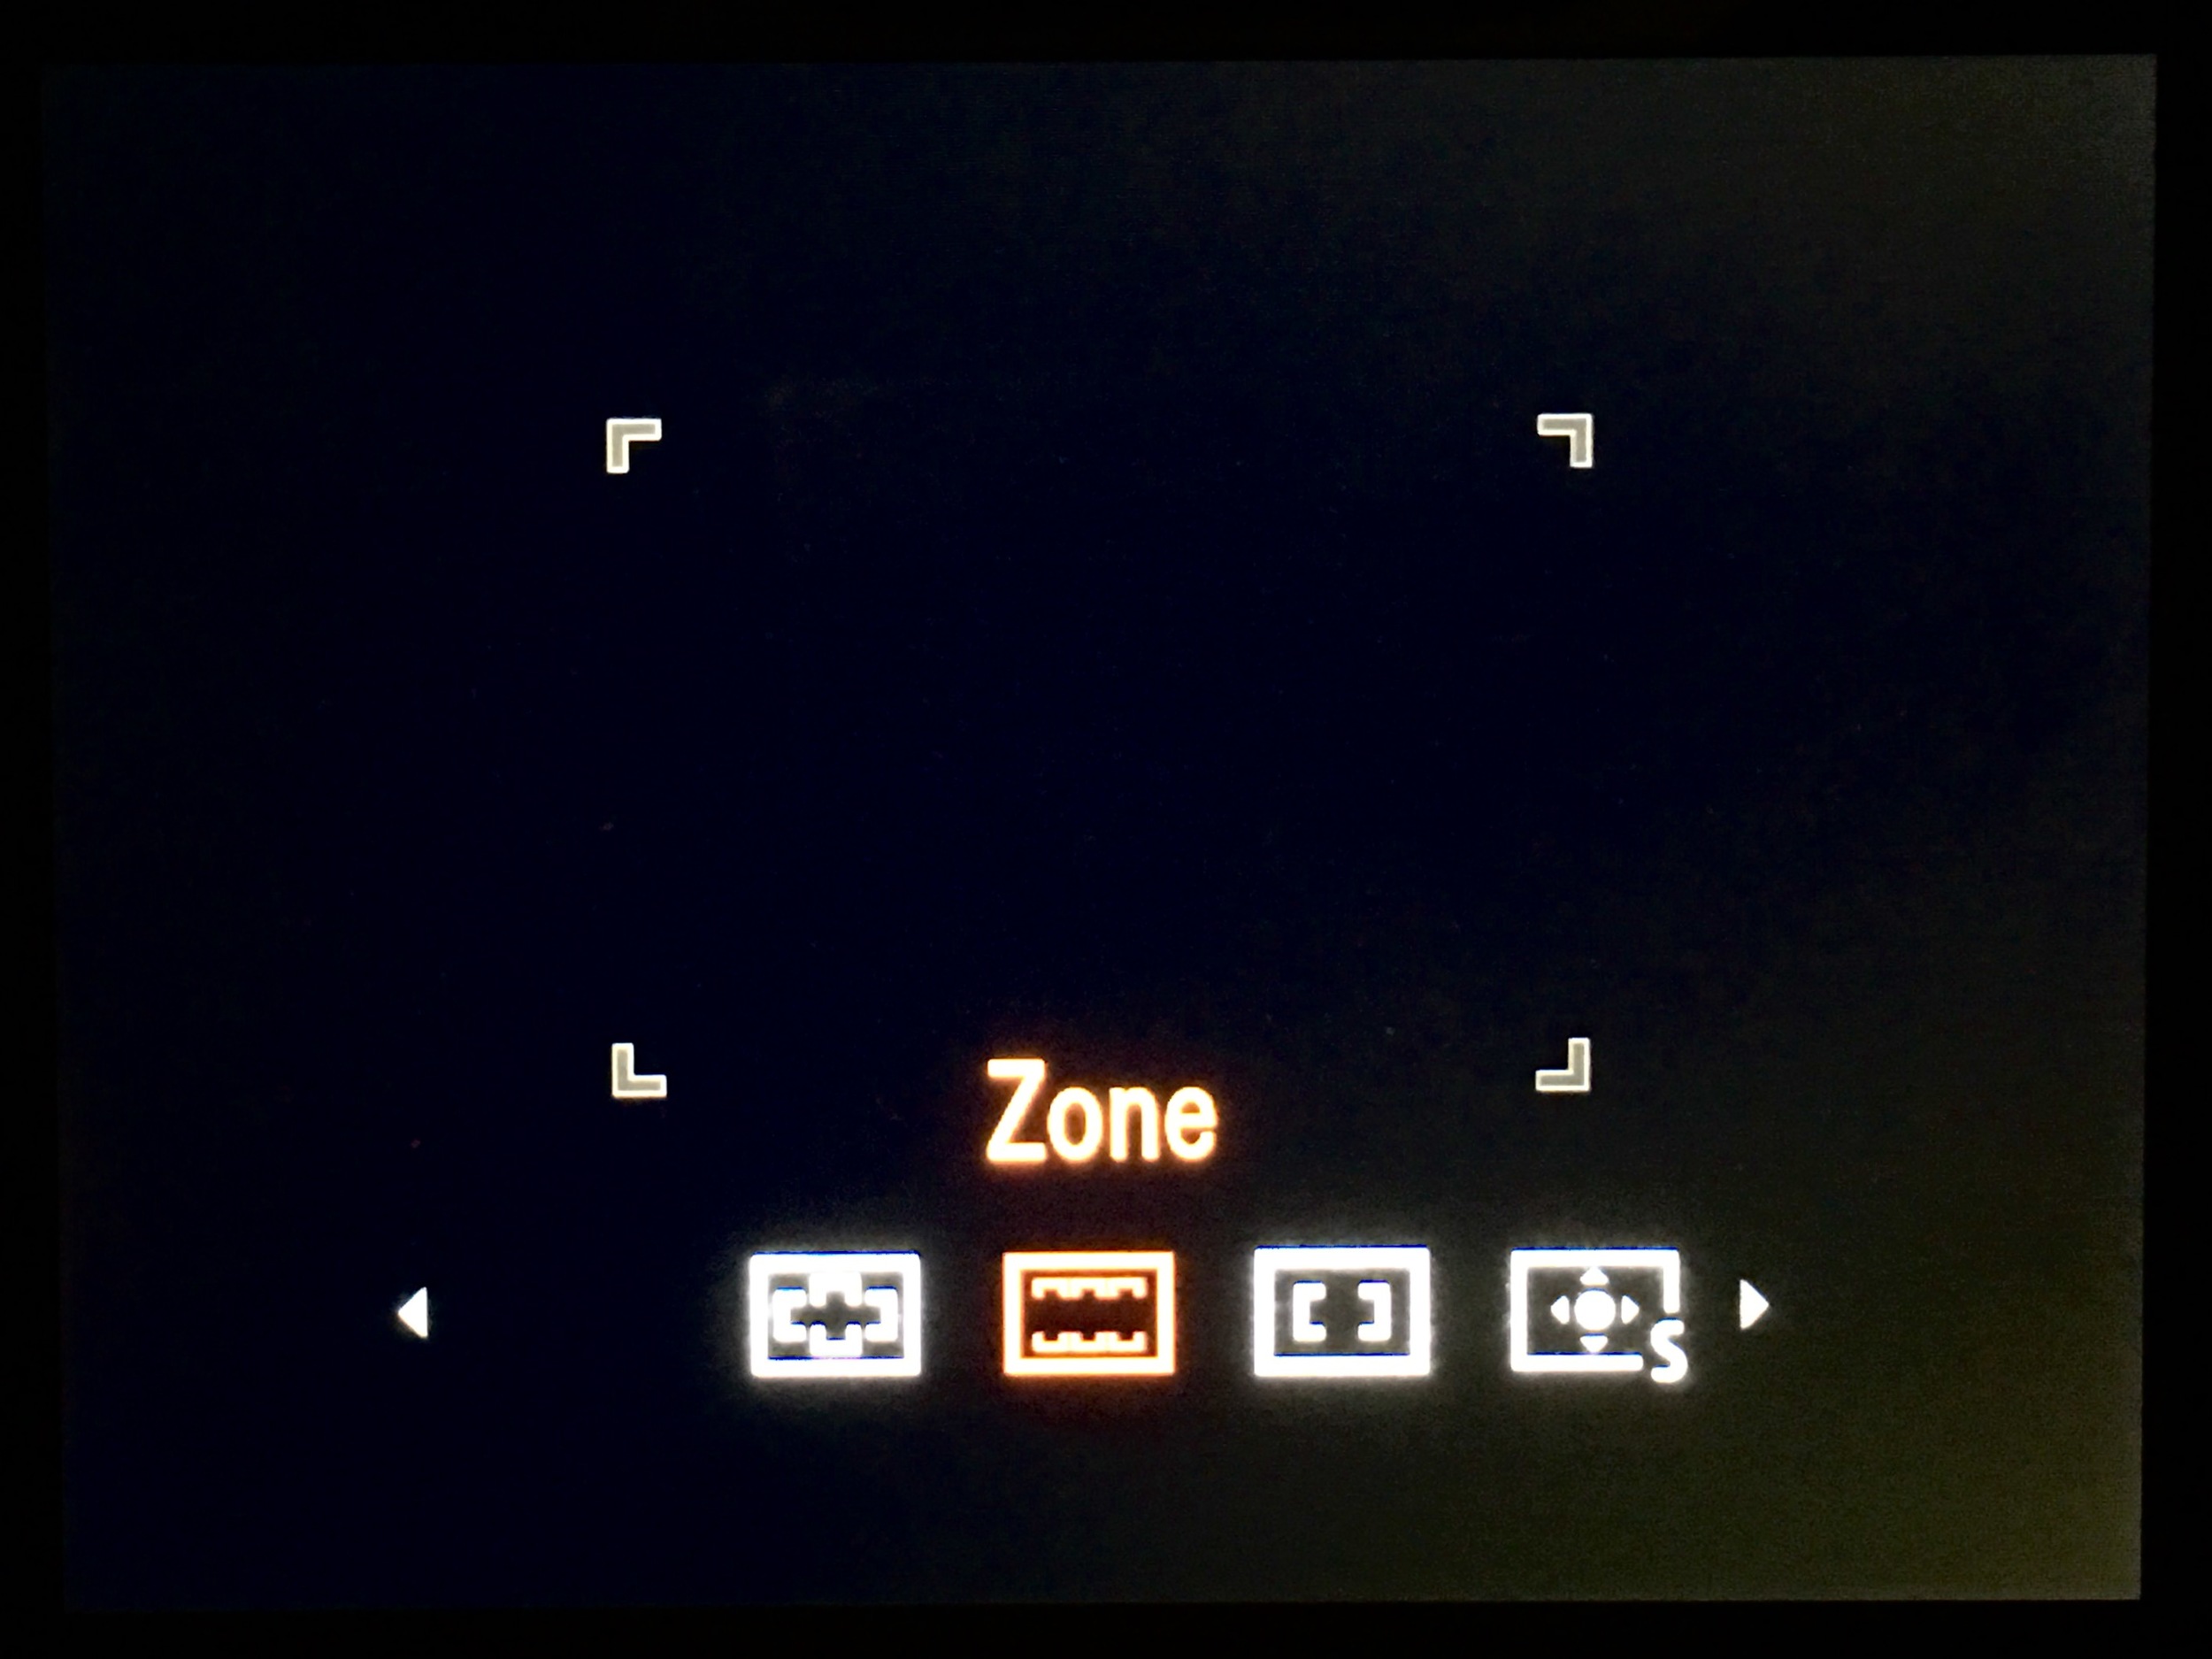
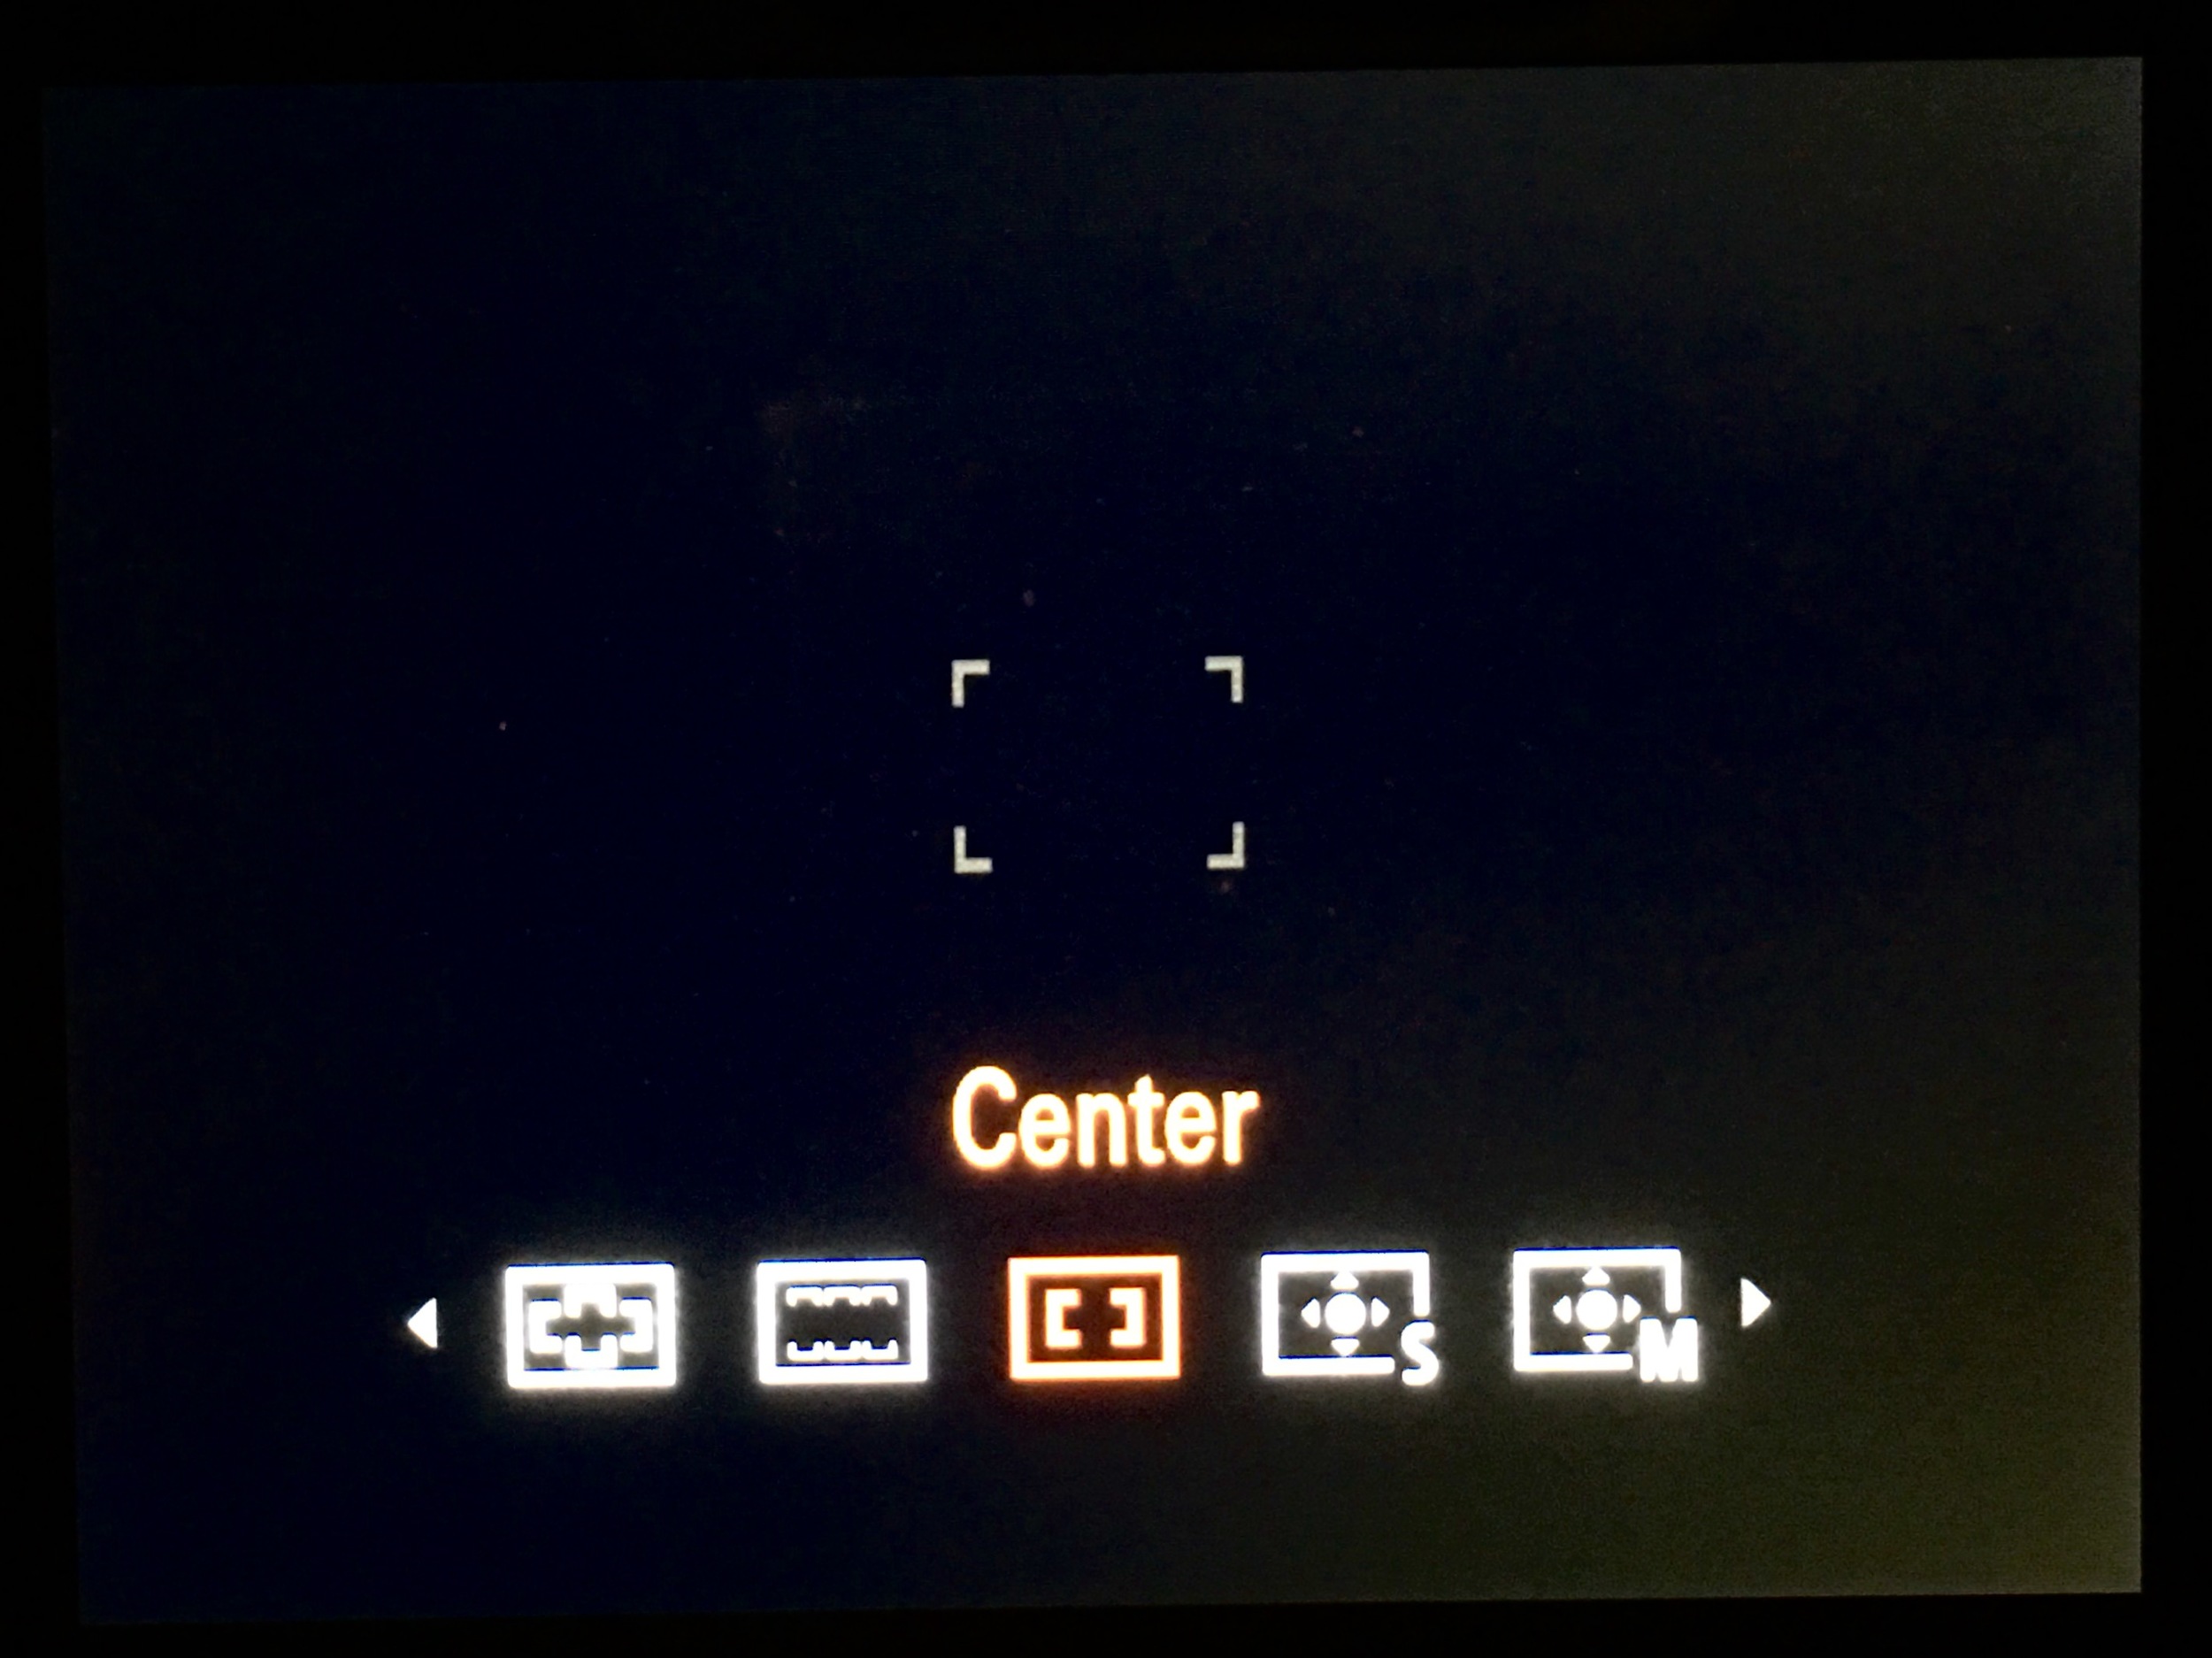
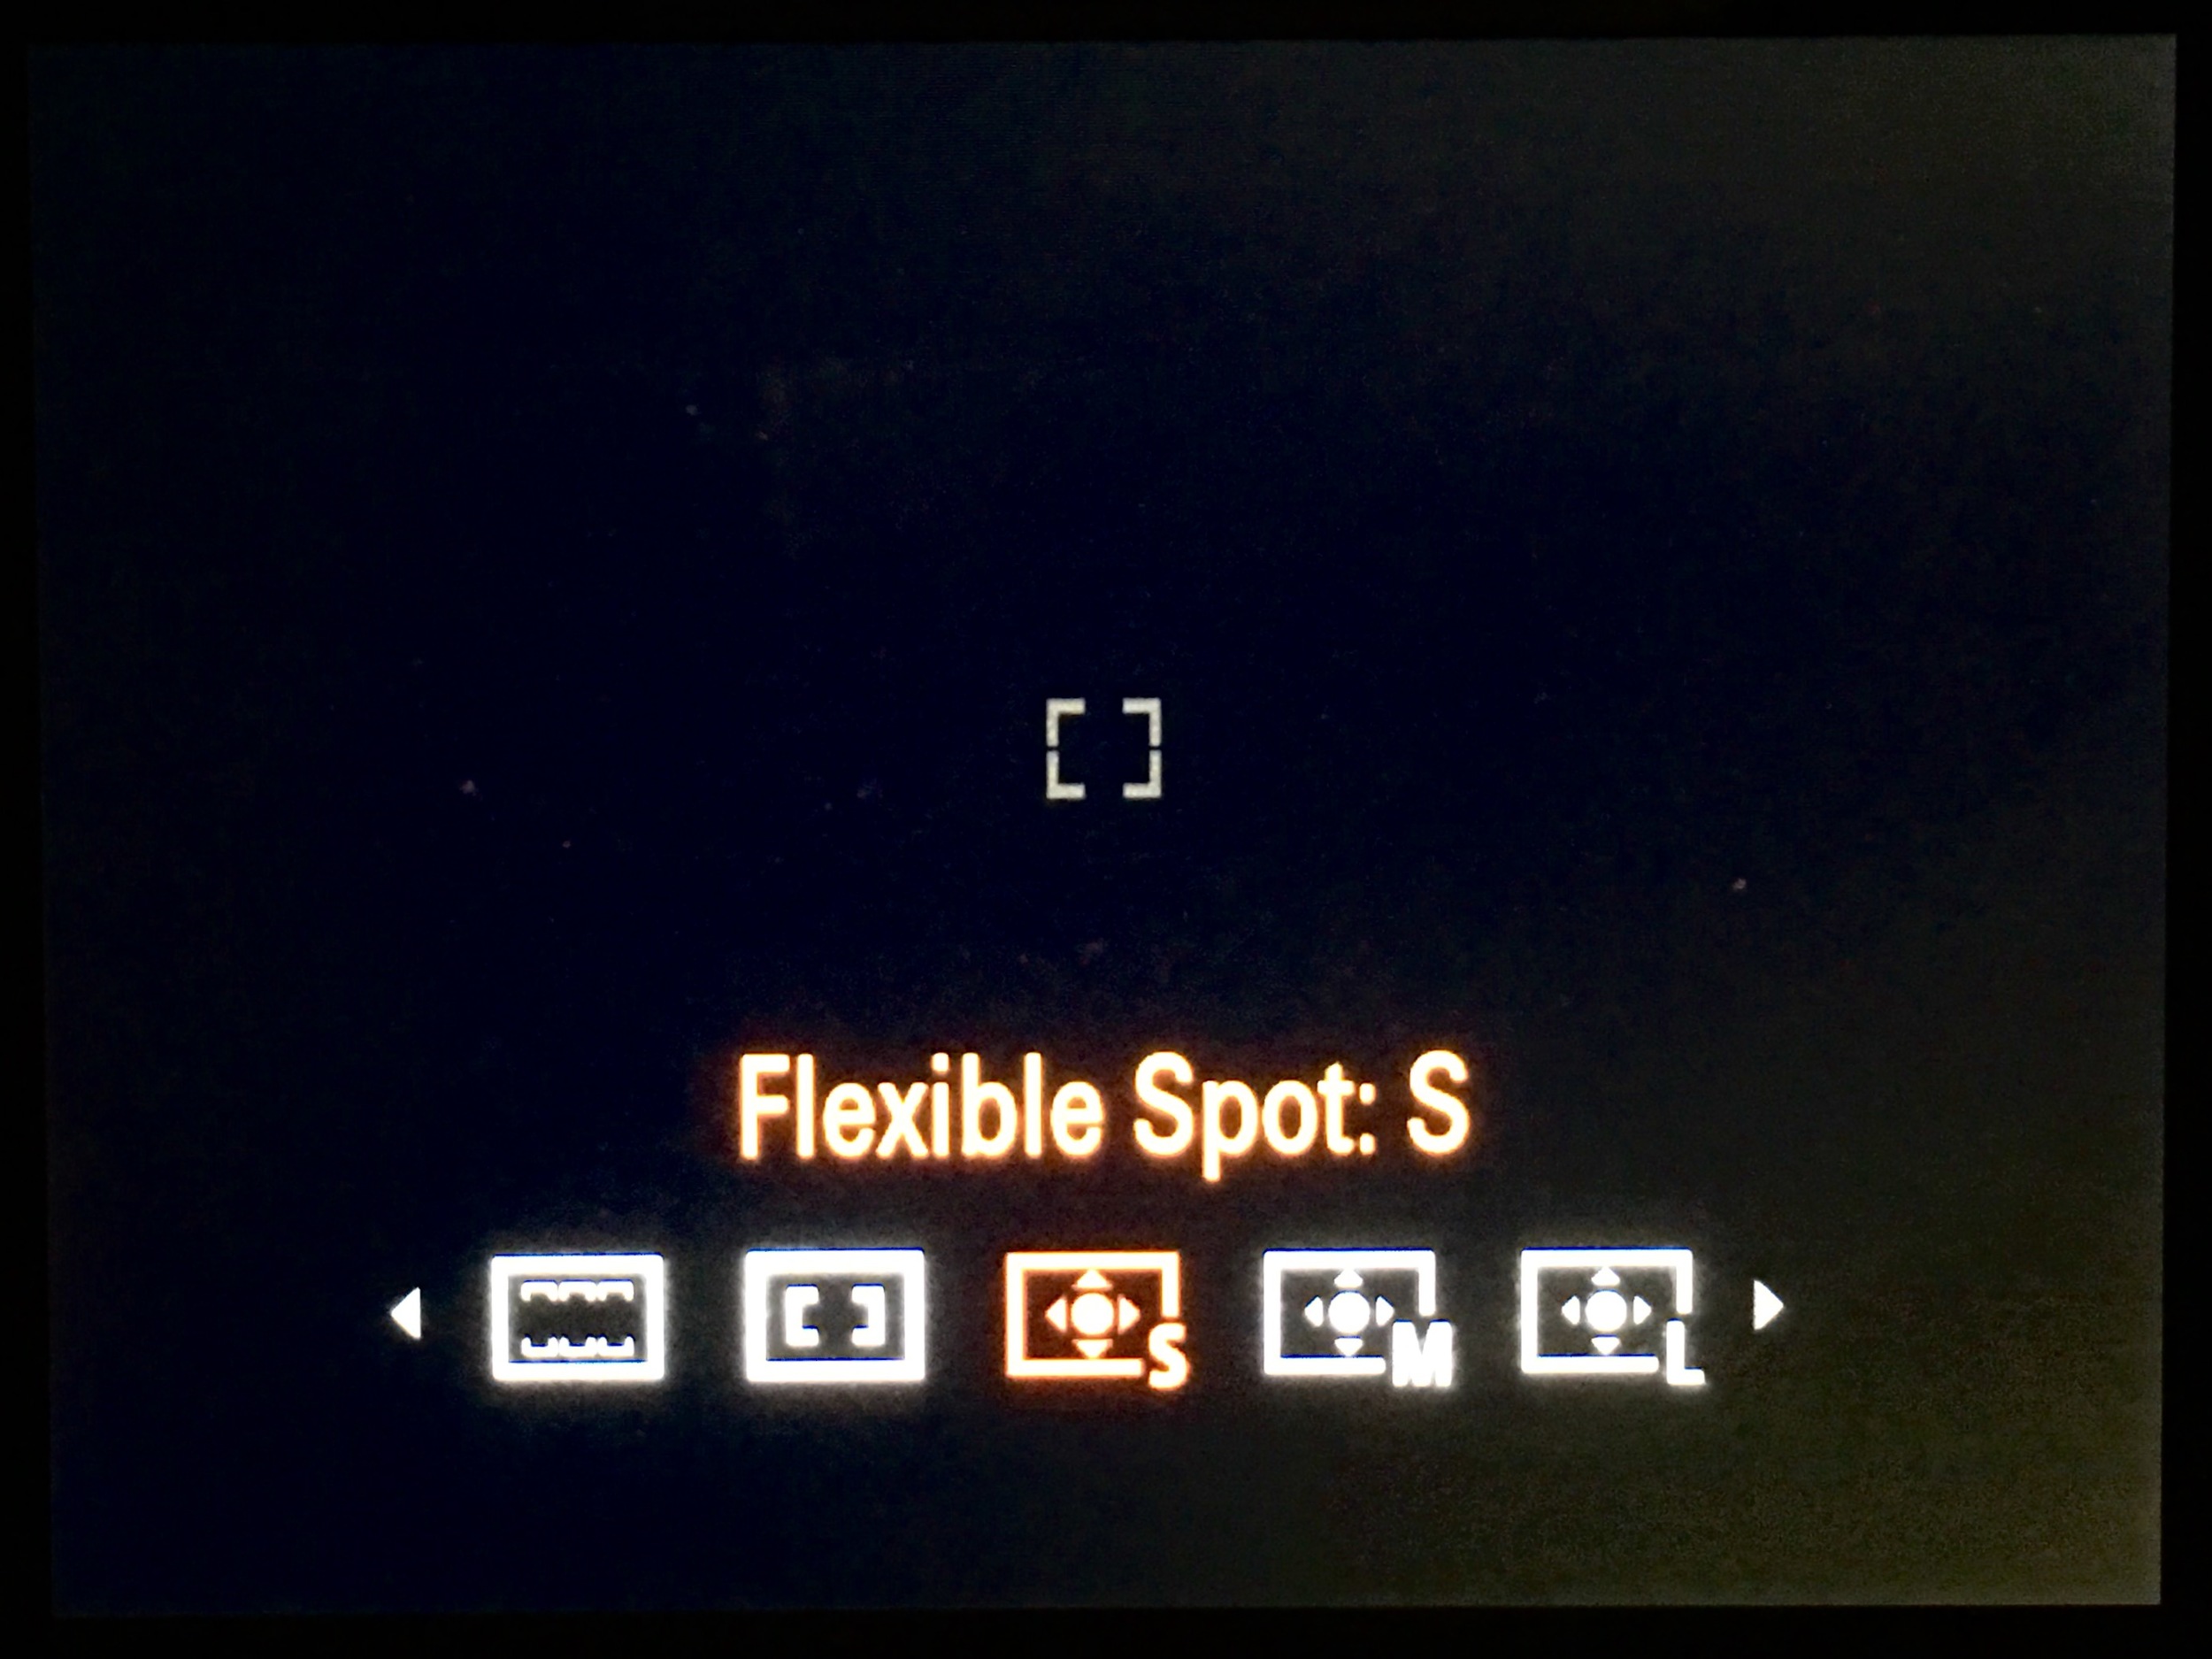
Modern cameras have tens or sometimes hundreds of focus points. Our cameras also give us various ways of using these focus points to help us capture sharp photos. Let’s start with a base line. Here’s the rundown of the focus areas on my Sony A7R:
Wide: Focus on a subject in all ranges of the image. A green frame shows what’s in focus on a half shutter press.
Zone: Focus on the left third, center, or right third (vertically) of the frame. You select the zone.
Center: Focus on a subject in the center of the frame
Flexible Spot: A smaller focus area that can be moved around the frame
Your camera will have similar choices. Some of the focus areas will be larger and some smaller. The larger the focus area, the more of the scene the camera considers to get an auto focus lock.
You can think of this another way - the larger the area, the more of the focusing decision you are leaving to the camera. The camera doesn’t know what subject in the frame you want to emphasize. For landscape photography, you want the most control over what subject in the scene is tack sharp. Set your camera to use the smallest area you can.
I shoot with a single focus point. On my Sony, I start with the Flexible Spot: S (Small) and only when I need to, bump up to the Flexible Spot: M (Medium) setting.
Bonus Tip: Change the position of the focus area in your viewfinder, too. I compose my scene and move the Flexible Spot to the primary element I want in focus. A feature of the Sony Alpha cameras I love is the flexible spot can be moved pretty much anywhere in the frame. Some cameras models, such as my Nikon D7000, have limits on where flexible focus spots or groups can be positioned.
2. Use Single Shot Focus Mode
Our cameras have many different focus modes. Each has its purpose. For landscape photography, our subjects are very stationary. You want a focus mode that excels for fixed subjects. Nikon and Sony refer to this as “AF-S” or “Single Shot AF”. Canon calls it “One shot AF”.
Focus on a fixed subject - a tree, rock, mountain, etc. - and in AF-S mode the camera won’t change focus to another area in the frame due to motion. You likely have motion in your scene - rushing water and moving clouds are common for landscapes. However, you typically don’t want your camera trying to focus on those elements in your frame. If you do, use Tip 1 and set your focus area there.
Note: If you’re shooting wildlife or other moving subject you want in focus, a continuous auto-focus mode (AF-C) is a better choice.
Bonus Tip: Half-press to auto-focus twice. The first press gets your AF system tuned to the subject you want in focus. The second press fine tunes the focus. This may be less of a need as auto-focus systems have gotten better and better, but it’s a habit I haven’t broken and it costs me little to no time in the field.
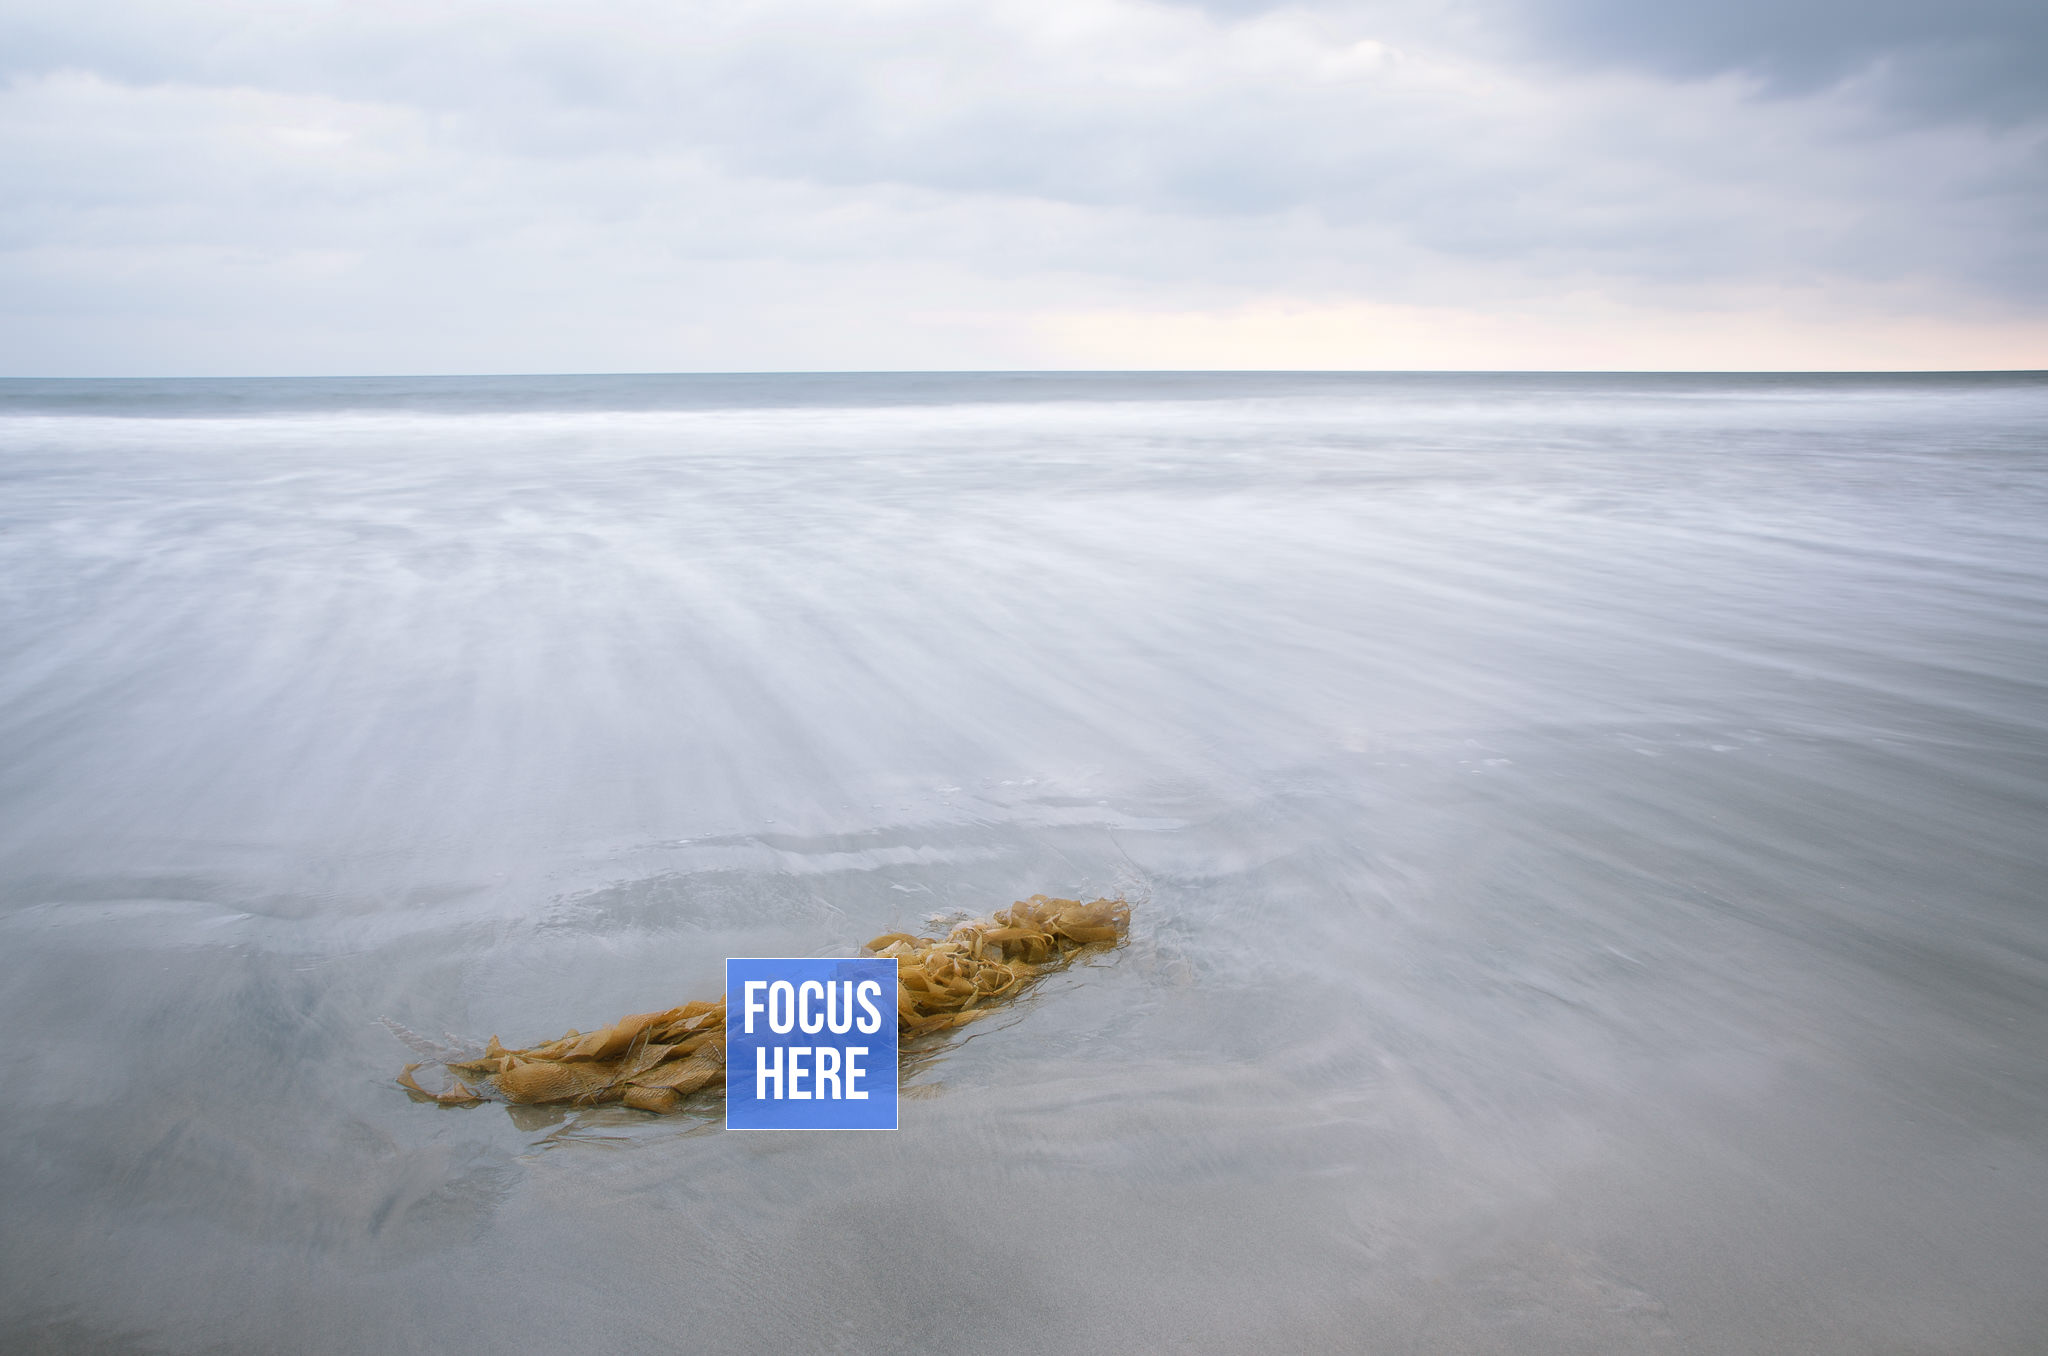
3. Focus 1/3 Into The Scene, Except When You Shouldn’t
When shooting landscapes, we are quite often shooting at wide angles. A good rule of thumb is to set your focus area about 1/3 of the way into the scene. That's often 1/3 of the way "up" your viewfinder:

This technique works very well when the scene as a whole is your subject.
However, you sometimes need to break this rule depending on where you place your subject. If you have a composition that accentuates a specific subject, you typically want that subject tack sharp. It may or may not be on the lower 1/3 line of your viewfinder.

Bonus Tip: Your camera likely has a setting to overlay a grid in your viewfinder or on the LCD. Turn this on. You'll always know where the lower third of the frame is.
But what about hyperfocal distance? I have two problems with hyperfocal distance, and neither of them are math. Smart phone apps have eliminated the need for photographers to be mathematicians. Issue #1: I don’t carry a meter stick. I can plug in my camera, aperture and focal length into a smart phone app and it will tell me “Focus 1.7m into the scene.” Great. Now what? Converting to feet doesn’t help either. I’m just not that good a judge of distance.
Issue #2: Hyperfocal distance calculations break down when subjects are very close to your lens. I am shooting wide on a lot of my landscape shoots. And, I’m getting a subject close to my camera to exaggerate its features. I need to have the nearby subject in focus, and more often than not the hyperfocal calculations don’t work well for that.
Oh… and the simple version of hyperfocal distance often ends up with “focus about 1/3 into your scene”. :-)
4. Back Button Focus (or Manual Focus)
Have you had this happen? You frame up a scene and half press the shutter to gain focus. Then, you’re waiting (landscape photography has a lot of waiting). You’re probably not keeping your finger half-pressed on the shutter while you’re waiting. Finally the light is right and you go to fire off a shot. And the camera starts hunting for focus again! Argh!
Another scenario… perhaps your camera has limits on where you can set your focus area. What if those limits mean you need to focus and recompose to get the composition you want? Nobody wants to hold their finger half-pressed on the shutter waiting for the light to be just right, or a wave to crash over a rock, or the sun to peek out from behind the clouds.
Enter back button focus. The purpose of back button focus is to separate your auto-focus system from the firing of the shutter. On the majority of DLSRs and mirrorless systems, you can customize your camera and program a button on the back of the camera to do the job of the half press of the shutter. A button on the back of the camera does the auto-focus. Back button focus.
Check your camera manual on how to set this up. Some models may require two settings, one to turn off auto-focus from the shutter button and a second to program another button to focus. It will take you a little practice before your muscle memory kicks in for the new focusing method, but once you’re there you’ll never look back - and never miss a shot because your camera is hunting for focus.
An alternative is switching your camera or lens into manual focus after acquiring focus lock with a half-press of the shutter. This is actually how I use my Sony A7R. I toggle the camera between automatic and manual focus modes using the AF/MF button on the rear of the camera. I frame up a scene, set my focus point, half press the shutter to auto-focus and then press AF/MF. The camera switches into manual focus mode. Any shutter presses or remote triggers thereafter fire the shutter and take a photo. The camera won’t try to regain a focus lock.
Whichever approach you use, separate the auto-focus function of your camera from the actual firing of the shutter.
5. Manual Focus/Manual Focus Assist
To really, really fine tune your focus, you can set focus manually. I like to let my auto-focus system do the heavy lifting, then switch to manual focus and do the fine tuning. There are several settings your camera may have to help you with manual focus:
Focus Zoom/Focus Assist: Focus zoom or assist magnifies the scene as you rotate the focus ring on your lens. On some camera models, you can do this is live view on the LCD. In mirrorless systems like the Sony, you can also use the EVF (handy when glare makes the LCD difficult to see clearly).
Focus Peaking: Focus peaking puts a color overlay on top of the scene, showing what areas are in focus. This is a feature of modern mirrorless cameras.
Some cameras will automatically jump into focus assist mode as soon as you touch the focus ring on the lens - even when the AF system is still enabled. It’s a useful feature and saves you a switch into manual focus mode. Explore this if your camera supports it.
Now it’s time to practice. Start putting these 5 tips to use. I use them all the time. Soon they will be part of your muscle memory and you’ll be getting crisp, sharp images on your landscape photo adventures.
What focusing tips do you have? Share them in the comments below.


